Unleash Your RV's Beauty: Learn How to Paint RV Walls Like a Pro

We’re going to share with you tips and steps on how to paint RV walls!
Painting the interior walls of an RV camper, trailer, or motorhome requires prepping, priming, and learning how to get the best possible adhesion. RV wall panels are similar in texture to wallpaper, so using the right products is the key to a great job.
Let's get started:
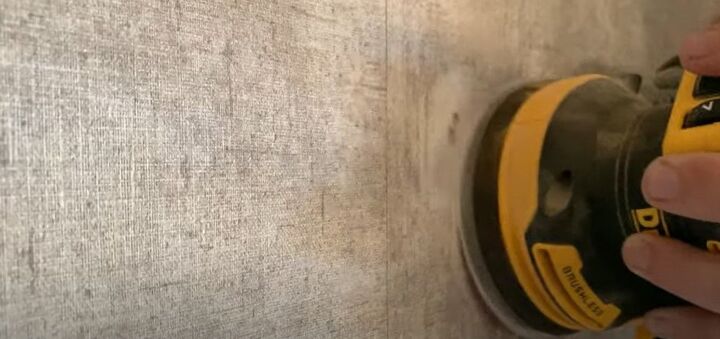
1. Sanding
We’re using this Dewalt 5-inch random orbital sander but any sander will work to knock down bumps and smooth out the surface.

2. Apply wood filler
Once we finished our initial sanding, specifically focusing on the nail holes, we took wood filler and filled in the holes. We used Elmer’s ProBond Wood Filler, but any wood filler will do the job. Once the wood filler is in place, you will go back and sand it out so it’s nice and smooth.
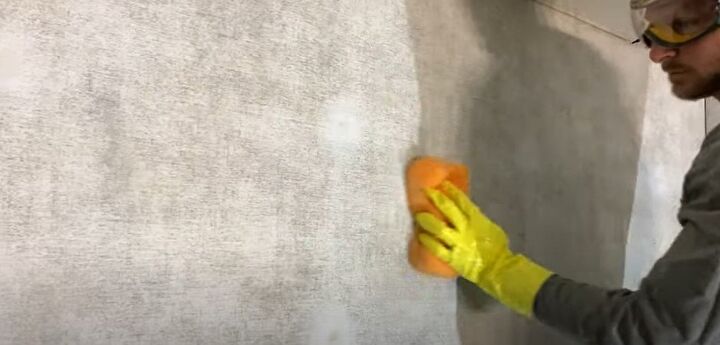
3. Wash with TSP
RV wall panels are made with a vinyl wallcovering that’s very similar to wallpaper. That makes it difficult to get paint to stick to it. That’s why we recommend TSP (trisodium phosphate).
We do not recommend trying to remove the vinyl covering because it does work really well when you sandpaper and clean with TSP. This is a very harsh chemical so you want to avoid getting it on your skin so wear long sleeves and pants, plus safety glasses and protective gloves.
You’ll need a 2-gallon bucket and large sponges. Follow the directions on the TSP product. Ours called for a half cup of TSP dissolved in 2 gallons of hot water. Take your large sponge, dip it in the bucket of water and TSP, and wash down the walls. Later, we will rinse with a bucket of just plain water and a fresh sponge.

4. Caulking
Once all the walls are completely dry, apply silicone caulk. We used a fast-drying acrylic DAP brand. In some areas of an RV, it is easier to use caulk instead of a trim piece. Note the caulk bead that’s on the inside corner here.
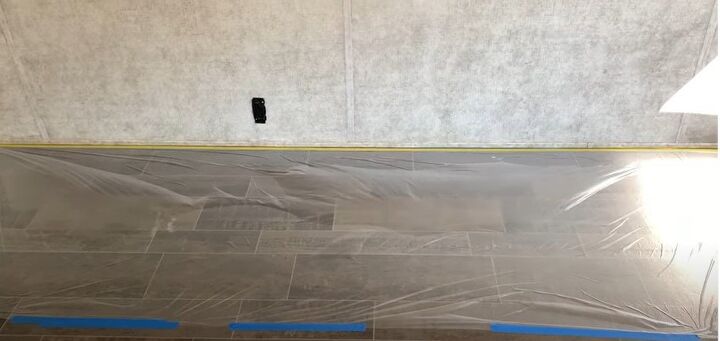
5. Tape
Before priming, it’s essential to make sure everything is taped off really well. We used pre-taped masking film, which is a really cool product that makes the process go so much faster. We taped off all the floors and windows.
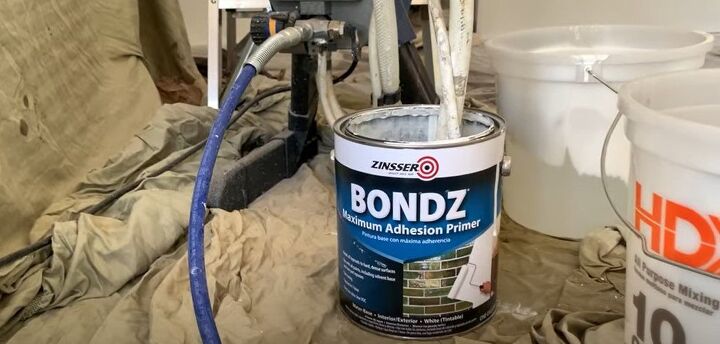
6. Apply primer and paint
After everything is taped off, it’s time for primer. The primer is a critical step when painting RV walls. We used a bonding primer for its gripping power.
There are a couple of different brands. We’ve used KILZ primer before, which worked great. This time we are using Zinsser Bondz Maximum Adhesion Primer.
The reason you want to use a bonding primer when painting RV walls is that it’s specifically designed to stick to things that don’t usually take primer very well, like walls with wallpaper on them, wood furniture, cabinets, and anything with a glossy surface, etc.
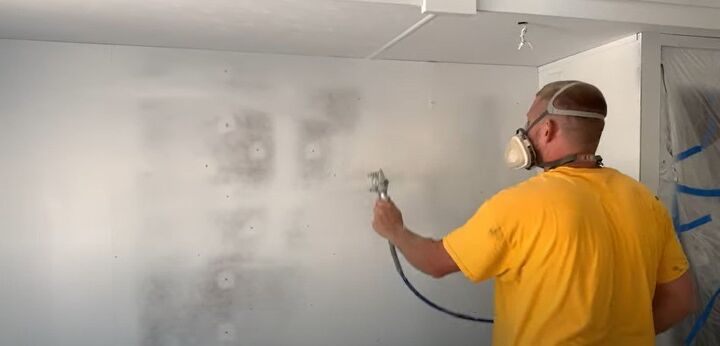
We’re using a paint spray that works really well in big open areas but you can also apply primer with a paintbrush or roller. The paint sprayer system we are using is the Graco Magnum.
The main goal of the paint sprayer is to get the paint applied as evenly as possible. You have to try hard to remain very steady with the spray gun. I usually do two light coats of primer and two coats of paint, as well. Heavy coats end up dripping in spots.
Another tip: You need to be moving the spray gun before you pull the spray trigger. If you pull the trigger and then start moving the gun, it’s already too late and you’ll end up with paint that pools up and drips.
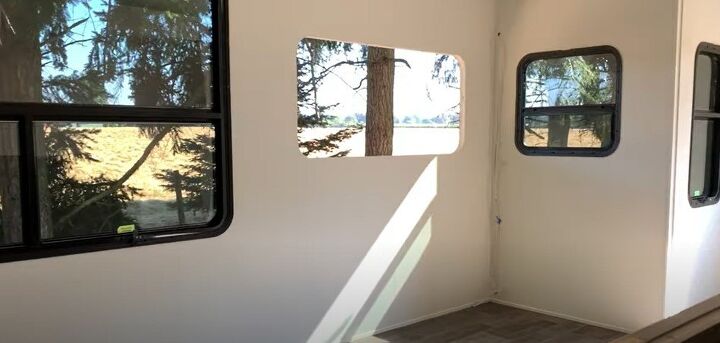
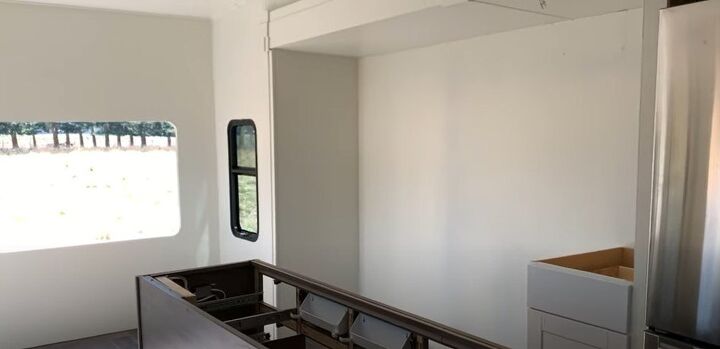
How to paint RV walls
The results are flawless. We hope these RV interior paint ideas help you if you are thinking of doing the same in your RV. Let us know if you’ve had to deal with an RV paint overhaul and how you approached the project. Leave us comments below.


Comments
Join the conversation
Great tips, thanks!