3 DIY Spring Decor Crafts You Can Make With Dollar Tree Items

Hey everyone. I’m going to show you some DIY spring décor using Dollar Tree products. I love making home décor, and with Easter coming up, I decided to try my hand at some holiday decorations as well. Using Dollar Tree products is a great way to make your own, very affordable home décor.
1. Decorative sign
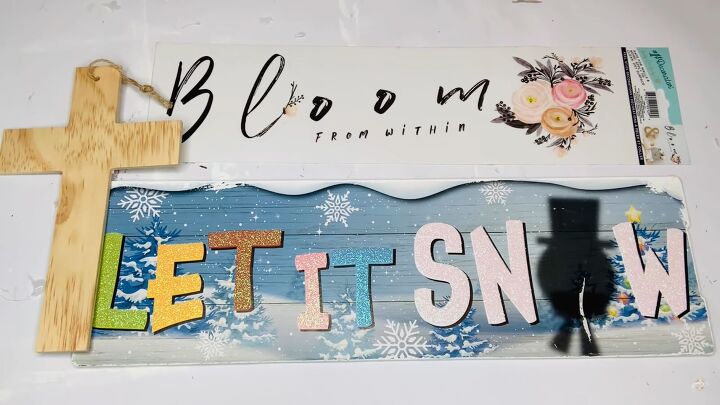
For our first DIY, I've got a wooden cross, a Christmas sign, and a bloom decal. I painted my cross and my sign in white. I used a fine-tip pen to write some scripture. You can always print something up if you don't like your handwriting.
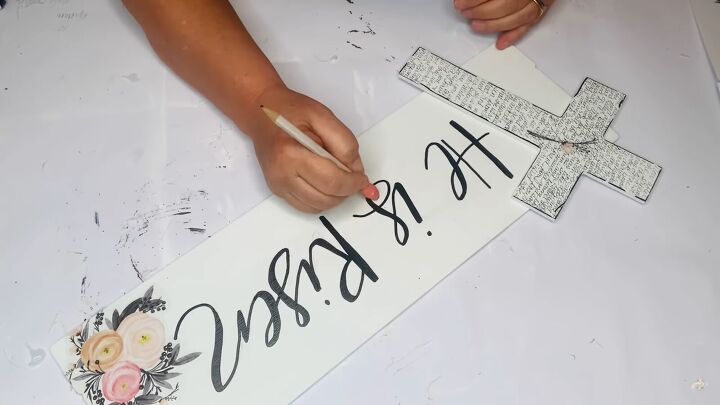
I took my sharpie paint pen and went along the sides to give it some distress. Then I took my decal and cut out the small flower and placed that in the middle of my cross. I used the larger cluster of flowers in the bottom corner.
I wrote out in pencil, ‘he is risen.’ I went over it with my pen and did the downstroke method to give it that old photograph look. I took my decal and attached it to the bottom right corner. I used my sanding sponge to smooth it down.
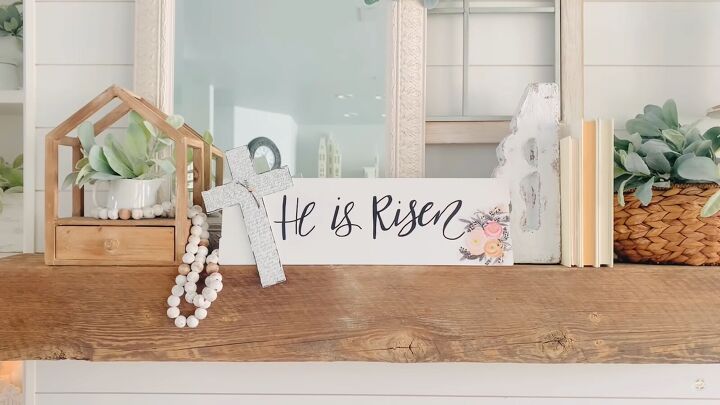
I glued my cross onto the side and I tilted it just a little bit. Then I used an eraser and erased the pencil lines. Just wait till it's completely dry. You could hang this on the wall. I didn't do that because I wanted it for my mantle.
2. Decorative door hanger
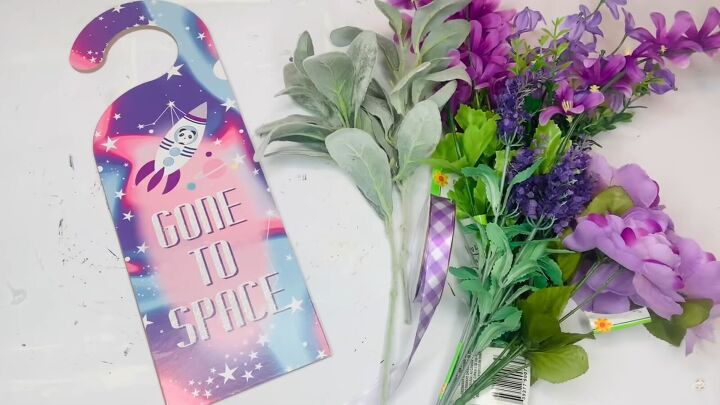
For this project, I'm using a wooden door hanger and some purple flowers. I pulled off the decoration that was on the door hanger, so I’d have a blank slate. I used a heat gun to help me get the stickers off.

Then I took my sanding sponge and got the surface nice and smooth so I could paint it white. I printed out some letters. This is a great transfer method. Just rub a number two pencil on the back of all of the letters.
Then turn it right side up and go over the letters with a pencil or something sharp. It's better if it's a pencil or pen so you can see which letters you've already covered. Then go back in with a black paint pen to fill in the letters.
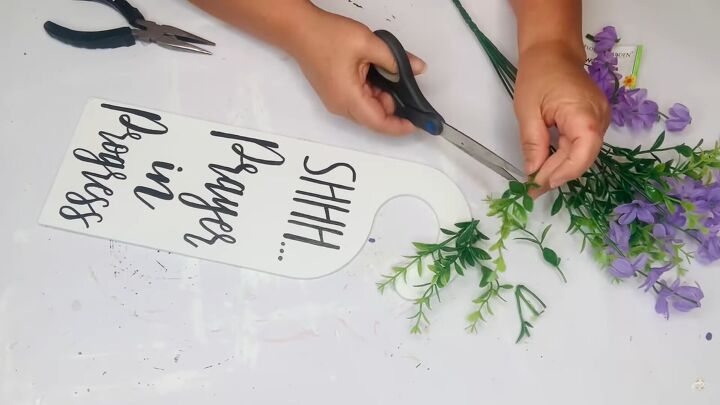
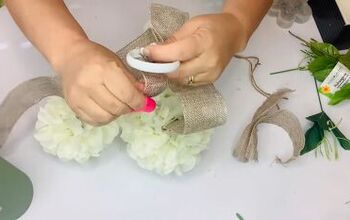
I took some purple wildflowers and cut off some of the pretty greenery. I used that greenery and put three on one side and three on the other and then attached that in the middle.
Then I hot glued that down to the top of my door hanger and added a few of the purple flowers. Then I put one big purple flower right in the middle.
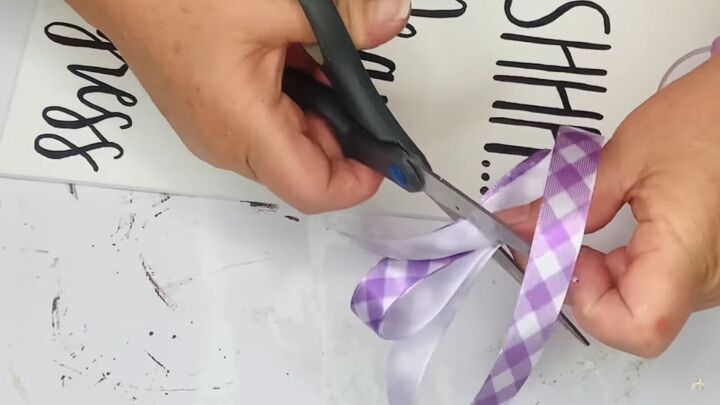
I took a purple ribbon and rolled it over a few times. Then I made one big loop. I took my scissors, found the middle, and cut tiny slits on each side so that my stem can go in between.
You don't have to be a really good bowmaker. You just twist them around and they'll just move wherever you want. This makes a super pretty perky bow.
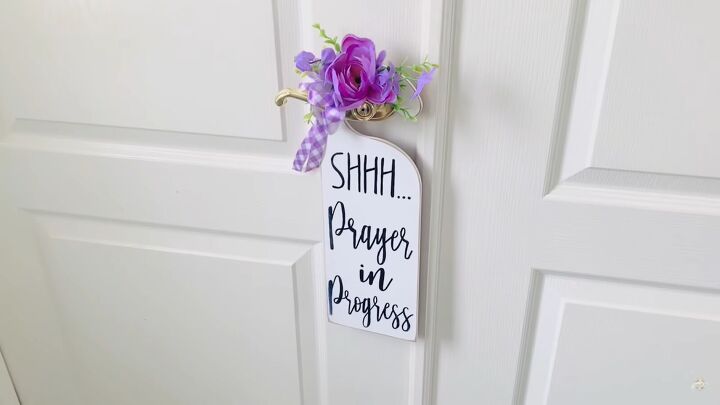
I hot glued the bow and tucked it just underneath the side of my flowers. I use my sanding sponge and distress the edges. I think this is so sweet and it only cost me a couple of bucks.
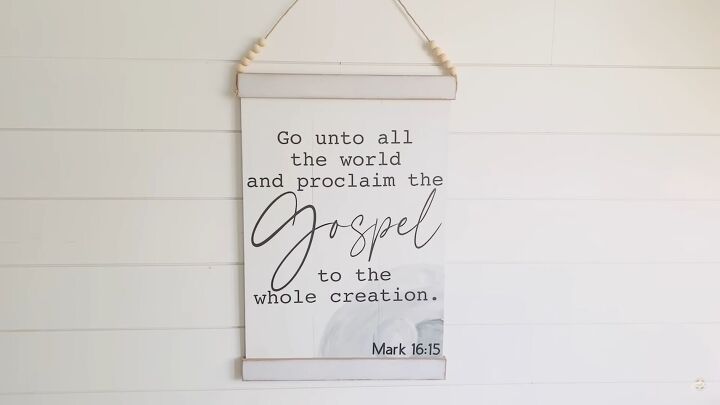
3. Decorative hanging sign
For the next project, I used some painter's tape to combine an old tryptic painting I had made that I wanted to repurpose. I sanded off the surface and I painted the whole thing white. Then I went back in with some super light grays by adding a little bit of black in with my white.
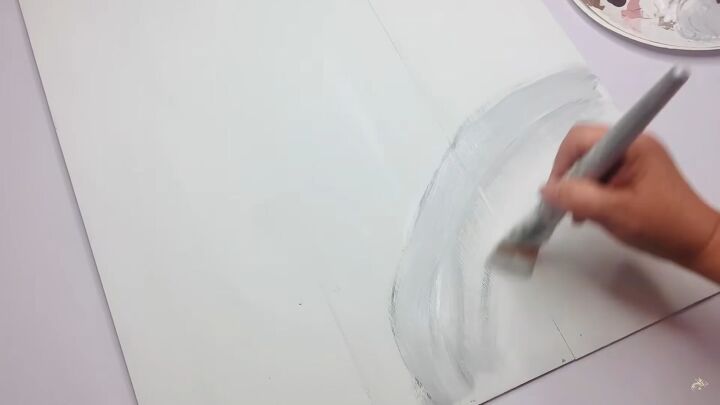
I wanted to paint a tomb so I wanted it to be nice and have pretty blended gray colors and look like a rock. I think it looks like a tomb that has an opening with a stone that was rolled away.
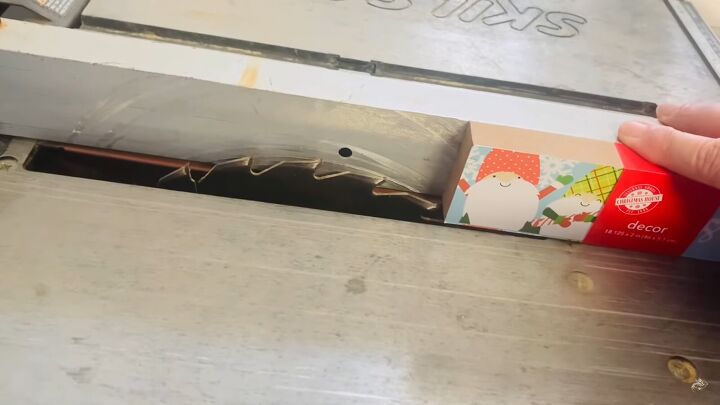
I had these two wooden Christmas signs that I wanted to use for this project. I used a table saw to create a slit on each side to slide the sign into. If you don't have a table saw, you could take a couple of long pieces of framing and piece them together with glue.
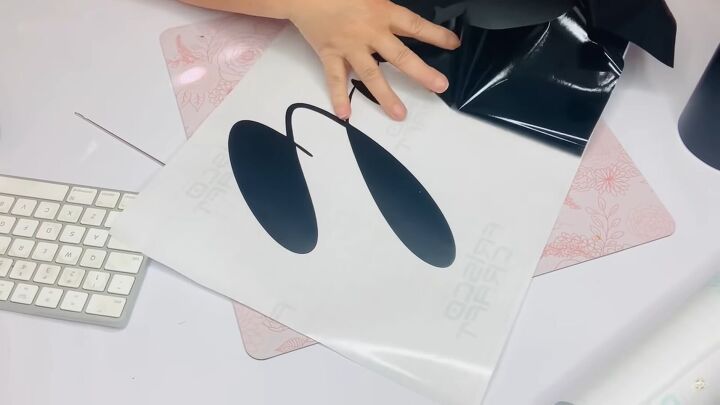
I used my Frisco Craft Adhesive vinyl in matte black and I used their transfer tape as well to cut out the scripture I used. I just cut this all out on my cutting machine and put my transfer tape on top and then flattened all the bubbles. Then placed that onto my sign.
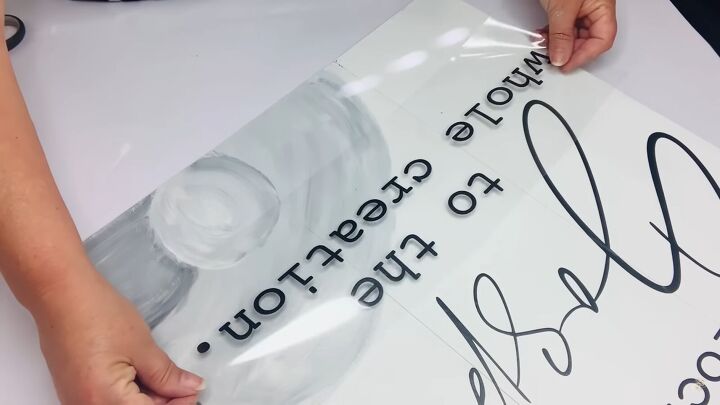
I had to place the largest word first. I left the backing sheets on the top and bottom parts of my scripture so that I could get the right placement for the large word in the middle. Once that one was down, I could place the top and bottom words and make sure they were all centered.
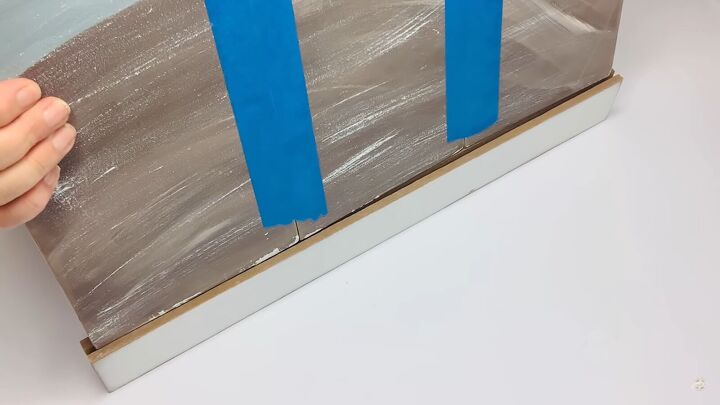
As soon as all of my letters were on, I slid my sign right into that little opening and hammered and tapped it in from the top to secure it. I had an open piece of twine and I decided to add some beads as well. I love how this one turned out.
DIY spring decor from Dollar Tree
I hope you enjoyed all of these projects. I love how easy and affordable it is to make DIYs using Dollar Tree products. Leave me a comment and let me know what you think.


Comments
Join the conversation