6 DIY Dollar Tree Spring Crafts For Your Home Decor

We're doing some DIY Dollar Tree spring crafts for your spring home decor. I have six beautiful spring crafts, all made from Dollar Tree items. You can have a gorgeous new look for your home this spring without spending much time or effort.
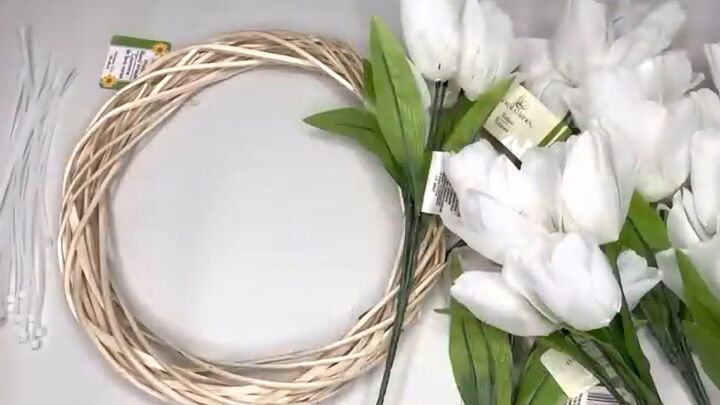
1. Spring wreath
I used a bamboo wreath, eight tulip stems, and some nylon zip ties. I also made a bow with Dollar Tree ribbon.
I pulled off the leaves from the tulip stems and then cut the stems down so that they were still together but shorter. I took those and started attaching them to my bamboo wreath. I curved those wired stems so that they go around the curve of the wreath and then put those zip ties around the stems.
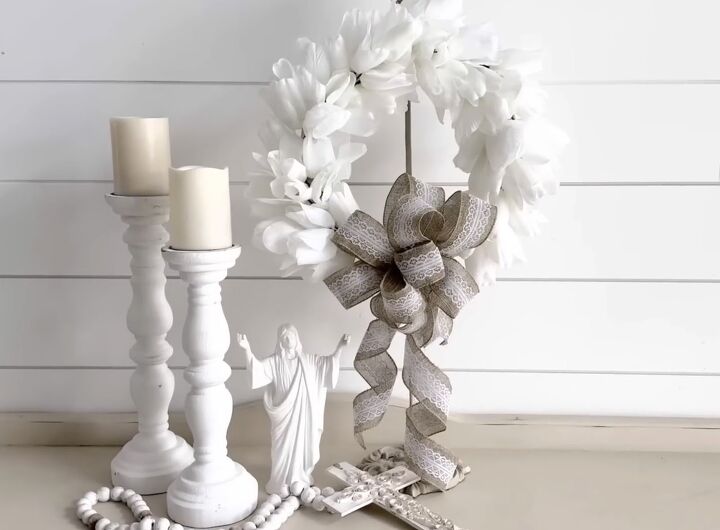
I put a bow on the bottom using burlap with lace. I made four loops on each side and then gave it two big long tails.
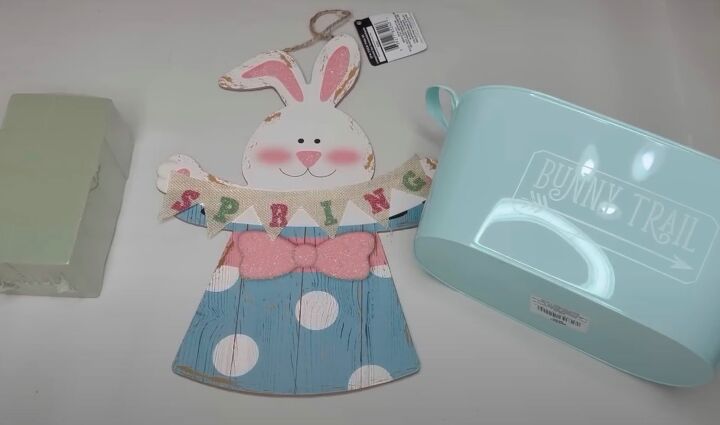
2. Spring bunny planter
Using a pretty teal Dollar Tree plastic tub, I added a piece of floral foam and hot glued that inside. I took an adorable little bunny holding a banner that said Spring and pushed him into that floral foam.
I used some excelsior from a gift box and tucked that all around on top of the foam and in front of the bunny. Then I took pink hydrangeas from Dollar Tree, cut off the bottoms, and tucked them in.
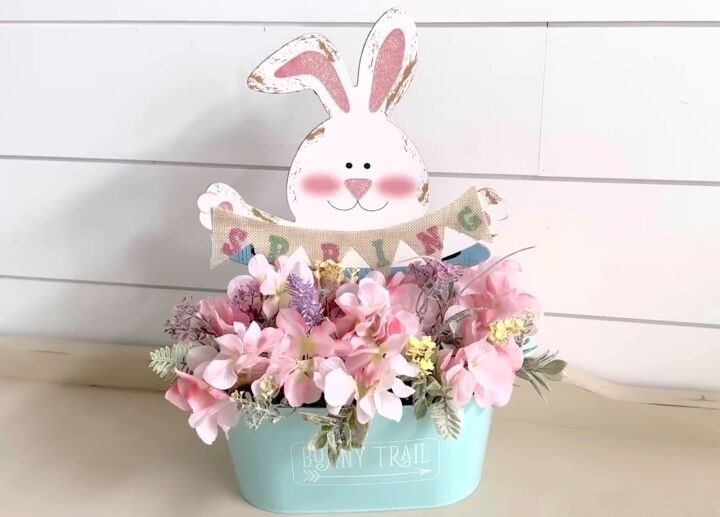
I added some frosty greenery from Dollar Tree and cut those apart, and tucked those in to make a pretty spring bouquet.
3. Spring bucket planter
These buckets are adorable, so I also picked up a pink one and some little bunny fannies from Dollar Tree. They come in a package of five, and I used all five.
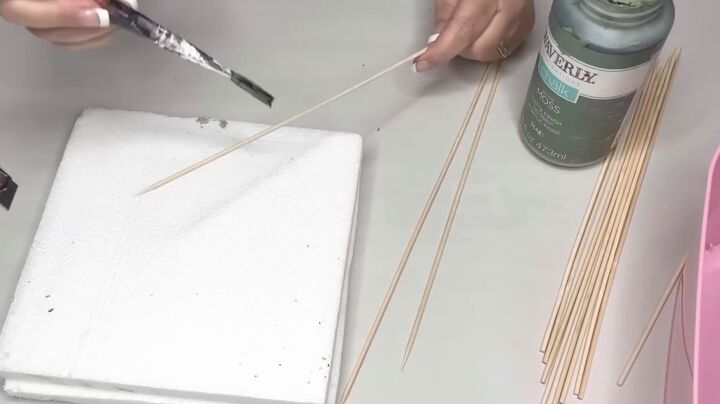
First, I painted some skewers with my moss green chalk paint. Then I used the little bunny fannies, cut a hole in the back, and popped my skewer up inside.
Then, using some scrap styrofoam, as well as some onion grass from Dollar Tree, I separated a total of four individual pieces of the onion grass. I started sticking them into my styrofoam until I got it all nice and full.
Then I took the little blue flowers and poked those in there and started poking the little fannies at different heights. I broke my skewer according to what height I wanted it at. I added green moss to cover up the styrofoam at the bottom.

To incorporate some pink into the arrangement, I used a couple of daisies, popped them in there, and it was done.

4. Springy bunnies
For this project, I used three of the garden kneeling pads. I took a piece of Dollar Tree's poster board, cut that down to the size of the kneeling pad, and traced out a bunny silhouette to use as a template to trace onto each of my kneeling pads. Using my craft knife, I cut along my trace lines.
I put the feet or the little paws of my bunnies at the very bottom where it's flat on my kneeling pad to help stand up when done. After cutting out all three, I took some 5/8" linen ribbon to go over the edges and cover those rough areas.
Once I got those covered and gave it that nice edge, I embellished their necks with more linen ribbon. I made sweet little bows, took some Dollar Tree hydrangeas in white and frosty greenery, cut those pieces apart, and hot glued them onto their necks. I then hot glued that bow right over the bottoms of the little greenery pieces.
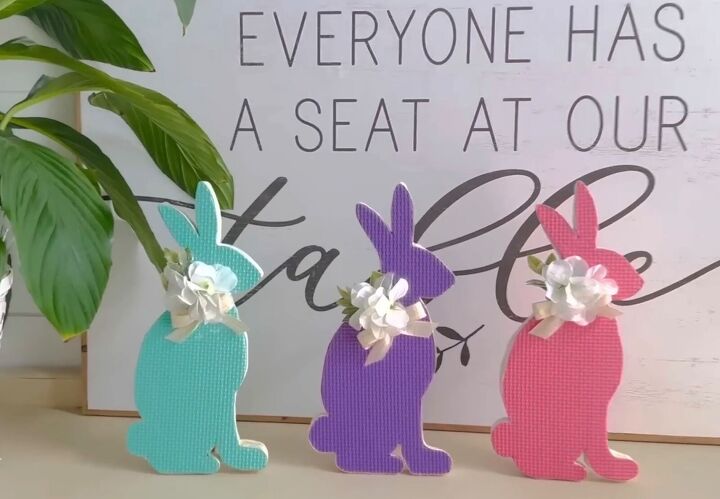
To stand these bunnies up, I used three Jenga blocks, glued those together, and then glued them onto the back at the bottom.
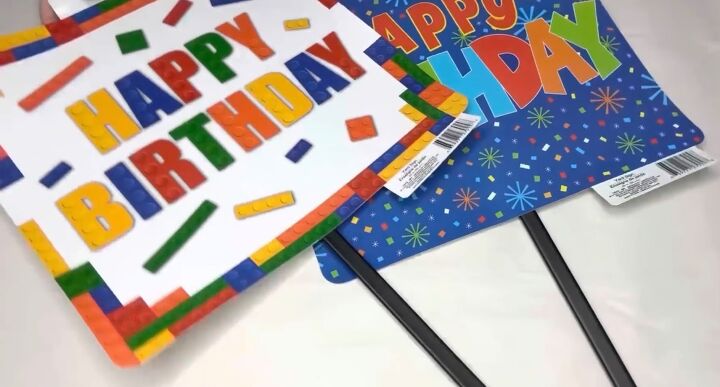
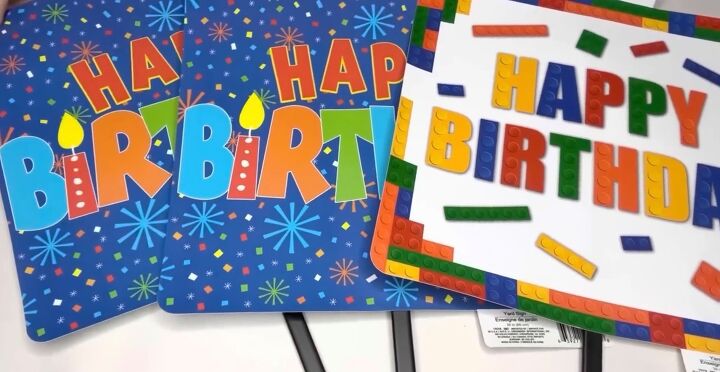
5. Bunny ears for the garden
I used two Happy Birthday signs from Dollar Tree. I cut out little bunny ears by cutting out the first one and used that as a template for the second one so that our ears were the same size.
Once I got those cut out, I painted them with white chalk paint. Once that dried, I made the inside of his ears with some pink chalk paint. I added a little white to the center to give it some highlights.
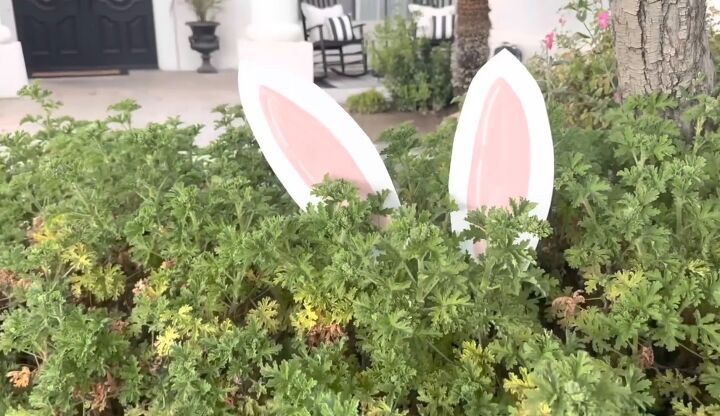
I covered them with some Mod Podge so that they stay waterproof.
6. Garden crosses
I did the next project using the same Happy Birthday banners. I removed the backing where the little stake slides in, using my Cricut spatula to carefully lift that off the back of my sign.
Using a piece of scrap board, I made a cross template. I made one sideways so that it's larger than the other two crosses I made.
On the two smaller ones, I left the backs where the stakes go. Those are going to stay in there because they're smaller and they're in the right place.
I used my white chalk paint, painted the crosses completely white, and then used Waverly antique wax on top of them. I did my strokes in the same direction on both the beam going vertically and then on the beam going horizontally.
After I got it done on the two smaller ones, I took a damp Wet-Nap and made those same striations to make it look like wood and let that white show through. I made those two lighter, and then on the larger one, I made it a lot darker because that's in the front, and that will be the Jesus cross.
I took a brown paper bag and ripped out a piece that fits at the top of my cross, got that to the right size, and wrote the letters INRI with my black paint pen. Before I attached that, I took my white paint pen and wrote risen at the top of my cross.
I used my Mod Podge and covered the crosses so they held up outdoors.
Once everything was all done, I turned my big cross over and repositioned and glued my stakeholder onto the back of my cross. I placed my stakes into the ones that were already in place.
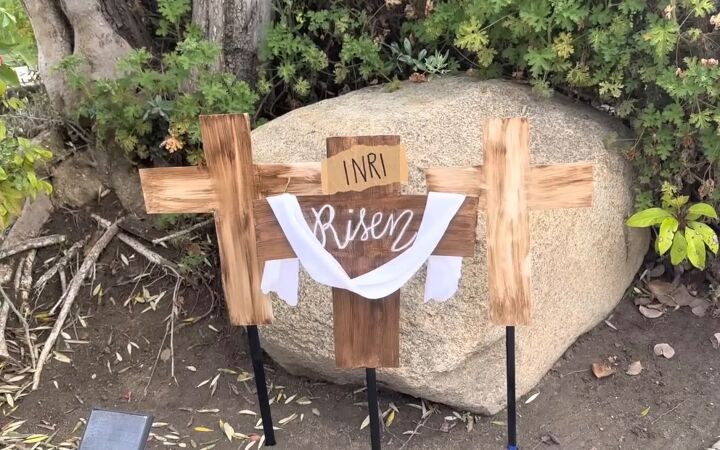
I used scrap fabric that is light and flows nicely, cut a strip of that, and then wrapped it around my cross, taping it in the back to stay in place.
DIY Dollar Tree spring crafts
I hope you enjoyed these DIY Dollar Tree spring crafts. Do you decorate for spring? Share your decorating ideas in the comments below.


Comments
Join the conversation
Adorable and so creative! Kudos
Great ideas! Especially liked the kneeling pad bunnies!