DIY Dollar Tree Stencil Hack: How to Make Your Own Cricut Stencils

I love to do Dollar Tree DIY with signs. I've come up with a way to make a Dollar Tree stencil for my Cricut using their file folders. My Dollar Tree stencil creates a beautiful design for a fraction of the cost of premade Cricut stencils.
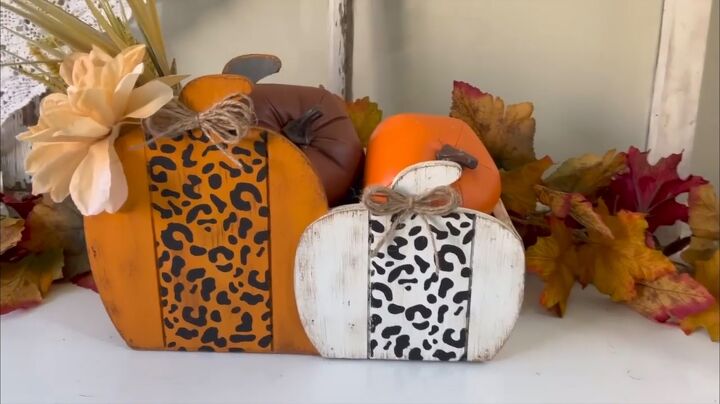
DIY cutting board sign
1. Stain a cutting board
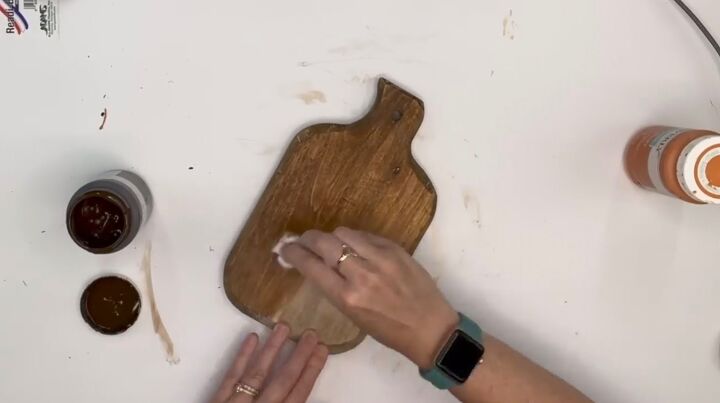
Let's go ahead and get into these DIYs. I bought a cutting board with a pineapple design. I love the cutting board but wanted to change the design, so I sanded it off. I took a baby wipe and antique wax to give the board a nice stain.
Once the stain set, I took the painter's tape and taped off the top. Then I took a wood cut-out pumpkin from Dollar Tree to see how wide I needed the middle to be. I would be attaching the cutout later.
2. Stenciling with the cut-out folder
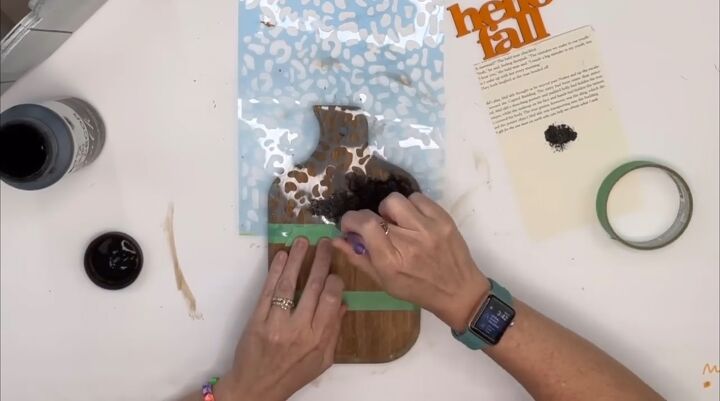
I painted a design on the pumpkin. After that, I took my cheetah stencil and used a stencil brush from Dollar Tree. This is where the folder divider comes into play. I made a stencil with the Dollar Tree folder and painted using a stippling motion.
Let it dry, then removed the painter's tape. I added a few embellishments like twine and wood beads using wood glue.
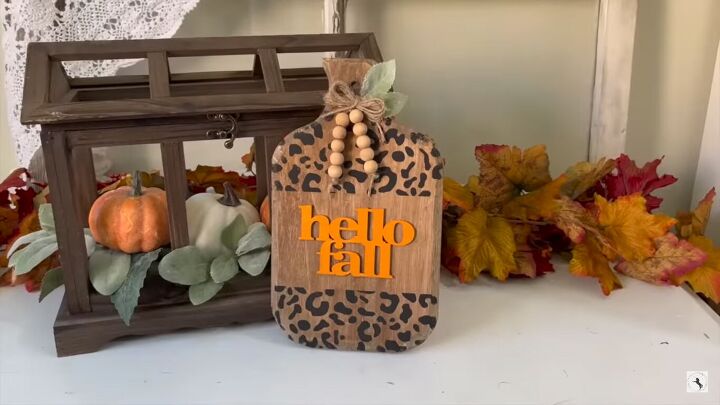
Here's the final cutting board sign!
How to make the Dollar Tree stencil
Now I want to teach you how to make the stencil I used. Just to recap, Cricut is a smart cutting machine that allows you to create personalized projects with hundreds of materials.
It works with Design Space software, which comes free with your machine. You can create your projects and browse from hundreds of images and fonts. Once you've completed your design, it sends it directly to your machine.
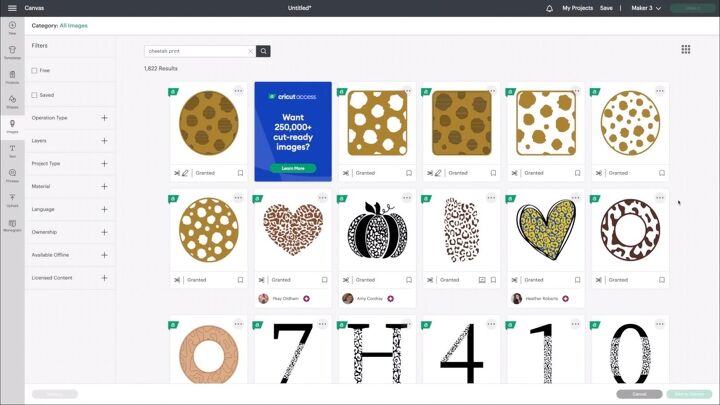
1. Choose your design
Go into Design Space. You're going to click on images. I picked the cheetah print for my design.
Add your design to the canvas in the Design Space software and then go up top. You're going to press the unlock button and then size it to fit the folder divider. The size of the folder divider is the size you make your stencil.
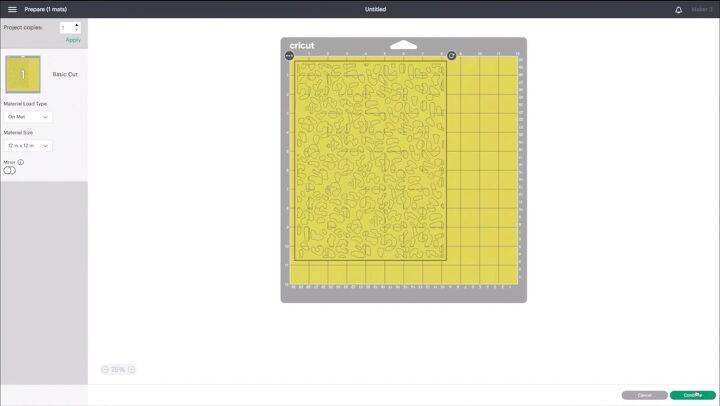
2. Get ready to cut
Click Make it. For materials, you're going to hit stencil film. Then I put my Dollar Tree folder divider onto a regular Cricut mat and feed it through. You don't have to change any blades in your Cricut. Then it is going to cut it for you.
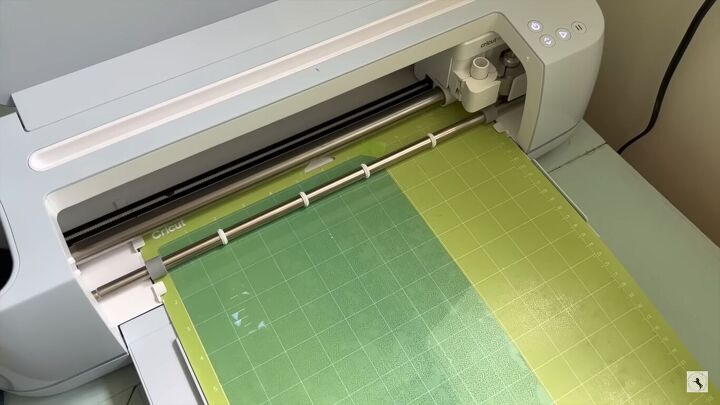
After you're done, you'll have the little cheetah print pieces on there. All you have to do is get your Cricut scraper, and it scrapes right off. Just have a trash can right under you.
After this is done cutting, you will be able to repurpose so many things with this one stencil.
DIY planter
My next project was an old planter that I'm not using. I primed it with a gray outside, then painted a pumpkin design on it.
I know not everybody will have this exact planter, but it's to give you ideas of how you can use this stencil to repurpose things. I used the stencil once again, laying the stencil over the design again. I don't want to over-saturate my stencil because that's when you'll have leaks, which will seep underneath that stencil folder divider.
With your Cricut, you can make any kind of stencil or design you like. You can cut to these folder dividers to make any style stencil for so many upcycling projects. You can use stencils with bleach in fabric to create bleached-out designs.
Dollar Tree stencil hack
Use Dollar Tree file folders with your Cricut to make lots of stencils for your projects without spending a lot of money. A Dollar Tree stencil is just as durable as commercially made stencils, but by making your own, you have the ability to be much more creative.
Have you created stencils? How have you used them in projects?


Comments
Join the conversation
I think my daughter will love this she’s the one with the cricut ♥️