Take a Tour of Our DIY Skoolie Build For Our Young Family of 4

Welcome to a tour of our DIY skoolie build! I am Jen, my husband’s name is Jake, and we have two sons.
Living on a bus may be hard at times but in the end, it is all worth it. The money saved on all the unnecessary things we used to buy allows us to spoil the kids and so much more.
It definitely took us a few weeks to really get the hang of everything, but now that it all works, it is just really nice to have somewhere to call home that we made and we do not owe anybody for. So we are happy to share our experience and show us around our beloved skoolie, named Skulley!
The story of our DIY skoolie build started when we were struggling to live paycheck to paycheck. Jake was working full-time while I was with the kids, and it seemed like we never spent enough time as a family.

We were looking into different forms of tiny living, but it all required buying land first. We had heard about skoolies but living like that seemed unreal: we were stuck in our regular life, with work, rent, and bills.
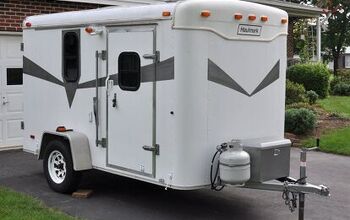
Buying the school bus
I found this bus almost by accident, it was only $2,000, and that was too good to pass up.
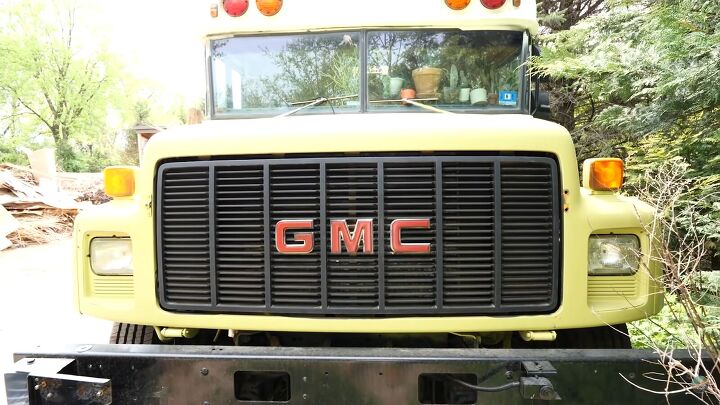
Our bus is a 2000 GMC Blue Bird with a 6-cylinder Caterpillar motor. We have it parked at the farm where Jake works. We painted it within a day.
Power & water
There are six solar panels that power the entire bus, as well as shore power in case something goes wrong with the solar.
In the back there is the water hookup: we either fill our tank or it can just be hooked up to water directly. There is a 100-gallon water tank in the storage space at the back of the bus.

Entryway
We built a wall in the front out of vintage soda crates. We put the crates in different directions so at the top we can put hooks and hang things, and at the bottom, we keep the kids' shoes.
Cats' corners
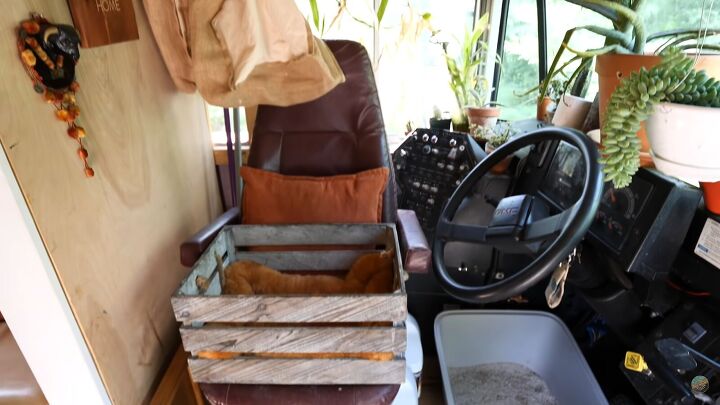
The driver’s seat is turned into the cats’ corner: they have a bed, their litter box, food, and water.
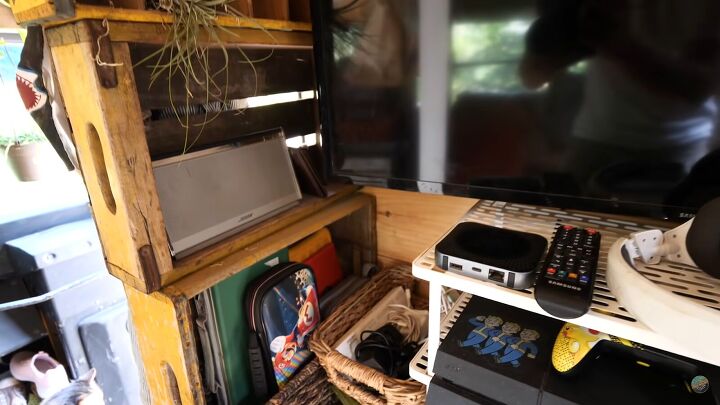
Electronics & toys
Next, we have our electronics: boys’ tablets and games, DVDs, and a PlayStation. Our Internet is wireless, just needs to be charged, which is great.
The cabinet underneath has been in all of our past houses, but it is so slim that it fit the bus perfectly. We just repainted it, and we keep the boys’ toys inside, although they usually prefer to play with sticks.
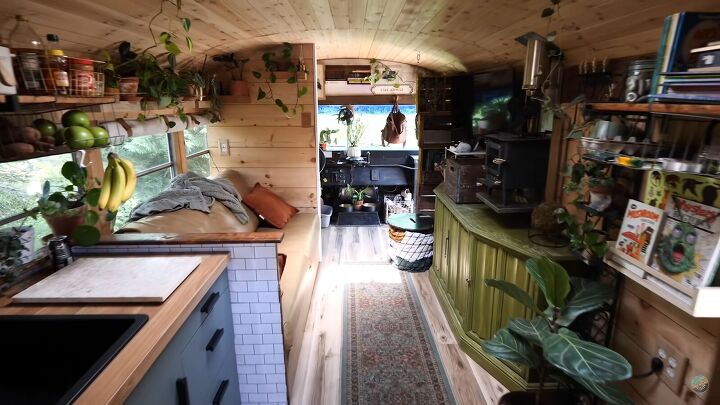
Living area
We got the couch at Home Reserve, I knew I wanted it right away, so we built everything else with the dimensions in mind. There is extra storage space underneath the couch cushions. We have a wood stove that we can cook on, and plants everywhere.
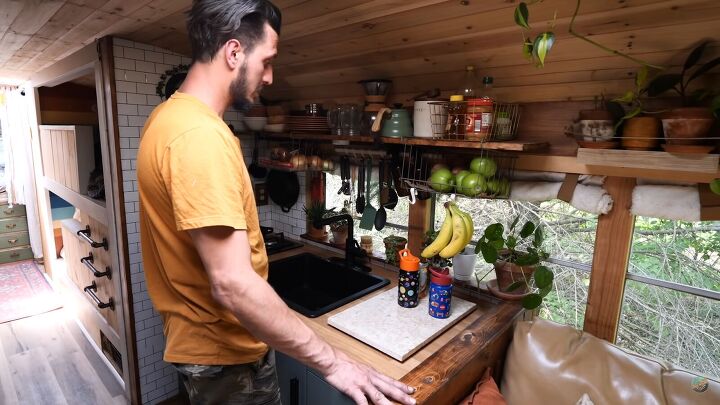
Kitchen
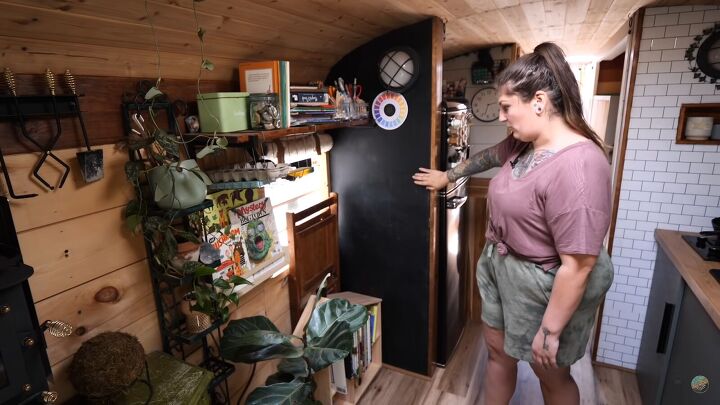
The kitchen cabinets and the sink we got in IKEA, and Jake built the shelves. Our space is limited, so we own very few dishes: we wash them right away so we really do not need much. The lights are actually meant for the outside, but they work great in here.
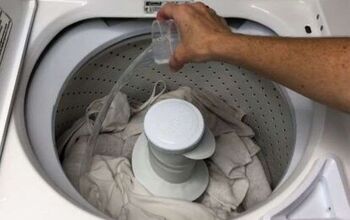
Next to the fridge is the water heater with a touchscreen. It kicks in automatically when you use the water or the pump. We also have a washer and dryer in one: it takes two or three hours to do a full load but we can just throw things in and get them when it is done.
Homeschool corner
Next, we have our homeschool corner. There are shelves with books, and everything is organized to keep us sane. We painted the wall with magnetic paint, and it acts as a chalkboard.
The floor is life-proof vinyl planks. I was really scared that it would not hold up because of all the dirt we bring in, but it is doing great.
We have two skylights, and one of them opens up. They used to leak in the beginning but we fixed it.
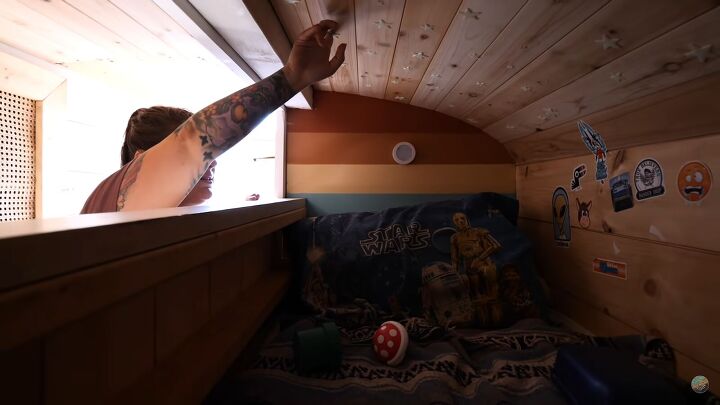
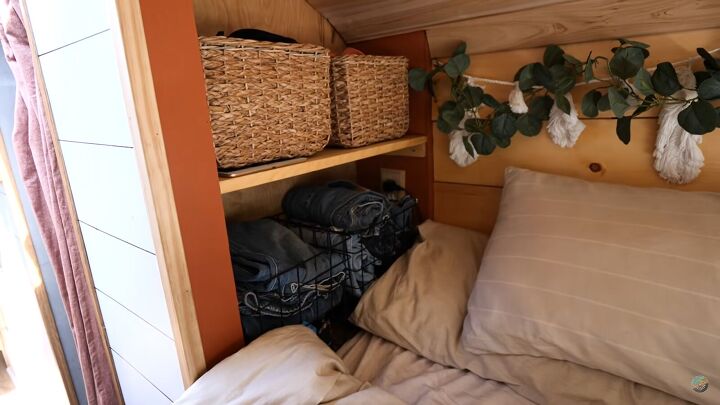
Kids' bunk beds
The boys sleep in bunk beds, and we have some glow-in-the-dark stars on the ceiling. There is also some space for baskets with pajamas: we use tape to hold baskets together, and they slide out.
Bedroom
Our queen-size bed is in the back, with drawers from a vintage dresser underneath. There is a woven curtain separating our bed from the rest of the bus. For the window, I took blackout curtains from Walmart and glued fleece on them.
Above the window here is where our mini split is set to go: it will be a backup heat source in the winter and serve as a fan and air conditioner in the summertime.
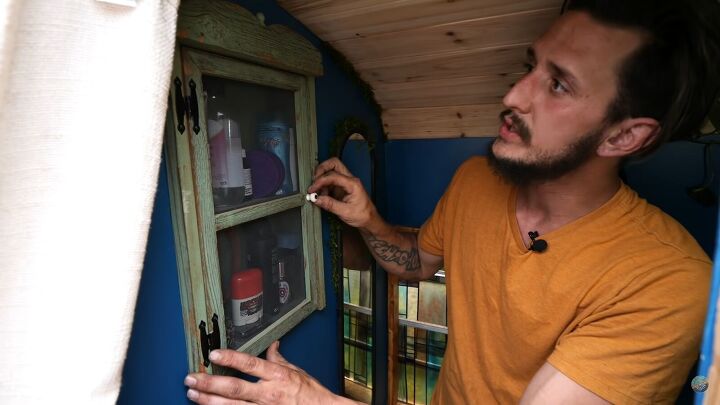
Bathroom
For the bathroom, we put a little cabinet that we found in a thrift store into the wall. We also wrapped the entire room with bamboo ledges.
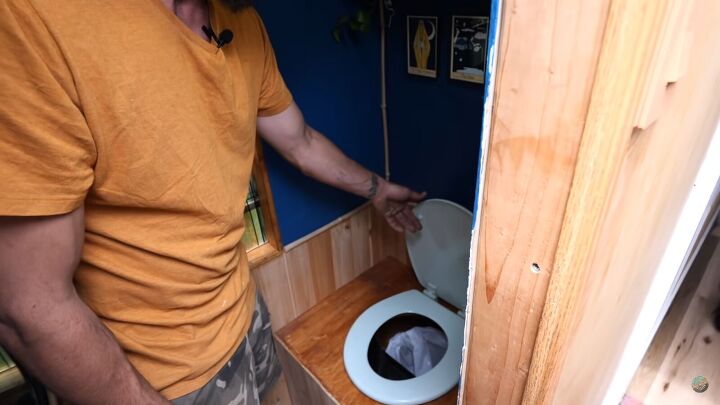
Composting toilet
This is a composting toilet, which we made ourselves. For the mirror, we put in the original rearview mirror of the bus.
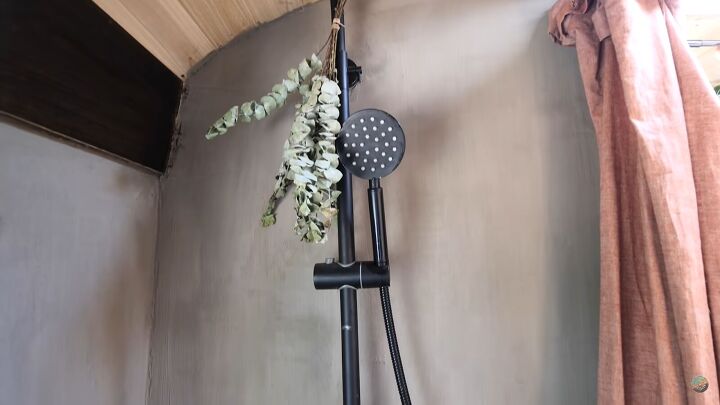
Shower
The shower is pretty spacious: there is a bench to sit and the boys can get in here together. There is also an emergency window in here. We covered the concrete floor with wood tiles that we painted, and sealed the walls with two coats of concrete sealer to avoid mold.
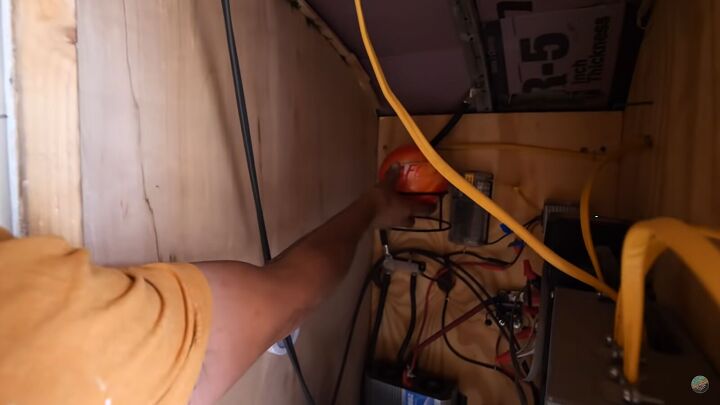
Electrical closet
In the electrical closet, we have four Lithium-ion batteries that power the entire bus. It was pretty simple to put together once I researched it enough. For safety reasons, we have this fireball that will explode and extinguish any fire here in case of emergency.

Tour of a DIY skoolie build
We hope you enjoyed our skoolie tour. Our advice for anyone planning to build a skoolie is to be patient, every project takes a while. Just take your time, have fun, and do not stress yourself out about the small things. Everything can be fixed.
Let us know what elements you would like to bring into your own skoolie, or maybe just try at home!


Comments
Join the conversation
What is your hvac and how is it powered?