How to Install Under-Bus Storage Boxes On a School Bus Conversion

I’ll show you how we added two under-bus storage boxes on our Wild Caravan skoolie. These boxes were made by Viking. We found ours on Facebook Marketplace; we highly recommend you try to find a used product for your DIY under-bus storage project for the best value.
I added a 60-inch long by 24 by 24 storage box. We paid $700 for the two boxes with the brackets. The reason I love these boxes is that there is no drive shaft running through the center so we have a ton of space.
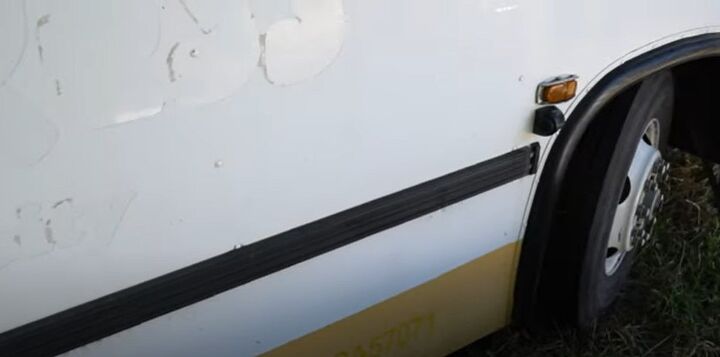
Removing the rubber rail
Before I install the boxes, I have to remove the rubber bumper guard rail. The center of the rail is exactly where we need our box to go.
Drilling the pilot hole
Before cutting the hole, I have to go under the bus and drill a pilot hole to guide the box into the correct position. The pilot hole marks the outer edge where the box is going to go.
Measuring the hole to cut
I’m using a t-square to mark and make sure the hole is going to be perfectly squared.
Use a jigsaw
Wear eye protection, a long-sleeved shirt, and long pants when doing this. I’m going to use a jigsaw with a thick metal cutting blade to do this. You can do this with an angle grinder, as well. For my needs, I feel I have more control using a jigsaw.
Cutting the hole
This next part is every schoolie converter’s worst nightmare. If this goes wrong, you are totally screwed. I’m talking about cutting a huge hole on the side of the bus. Be patient when cutting this hole. It’ll take time. It’ll shoot hot metal in your face. I took lots of breaks when cutting this hole. The hole took me about an hour to cut.
Line up the box
I have the box lined up. It takes a while to wriggle the box in and put it in the correct position.
Jack it up
Use a spare tire jack from your car to lift the box up to place it in the hole. Once it’s in the right place, then you use the jack to lift it up into its place.
Mounting the box
The manufacturer of the box recommended their mounting bracket. But it didn’t fit our bus. The bracket was too thick and big and would significantly lower the ground clearance of this bus. Putting these tall boxes in is risky enough.
Instead, we simply hung the boxes from the frame rail with unistrut. The boxes will not fall off the bus. The box is 16 gauge steel, so it’s not all that strong. If you put a thousand pounds in here and you expected it to stay stiff and steady, I’m not sure it would work.
But we definitely don’t need a thousand pounds of tools in our boxes. We just need some tools, fluids, and camping gear in the boxes.
Unistrut and bolting
We could put more unistrut on the bottom and underneath the box for more support. But we won’t do that yet. We will figure out if it’s necessary. A lot of people doing schoolie conversions work with metal so they get a welder.
You could take some angle iron and build a box and supports and weld it to the frame. But we’re not doing that. We’ll continue to bolt the box to the frame.
After the unistruts and bolts are in place
Now I’ll take the lift away from the box and let it drop. I’ll lay inside the box and the friction will keep the bolt heads from moving while I tighten them. A few things to note: we used inch and a half long ⅜ thick galvanized bolts, nuts, and washers. If we see the boxes flexing over time, we’ll find a way to support them from beneath, but I don’t think that will be necessary.
Installing under-bus storage boxes
The thing about converting a bus into a home is that you get to do it the way you want. This is just one solution to adding under the bus box storage.
Our storage boxes are beautiful. Let us know in the comments below if this type of storage box installation will work for you. Let us also know if you have another way to install skoolie under box storage.


Comments
Join the conversation