5 Easy Dollar Tree DIYs You Can Make Using Faux Succulents

We're doing 5 Dollar Tree DIY crafts today. These are easily affordable, gorgeous crafts that will look lovely in your home or given as gifts. Everything you need is available at your local Dollar Tree.
1. Wood drawer plant boxes
For this project, we're starting with five wood drawer boxes and using my Waverley Wax in antique.
I will stain them all by brushing the wax on all sides, then wiping it off to give them a pretty brown base.
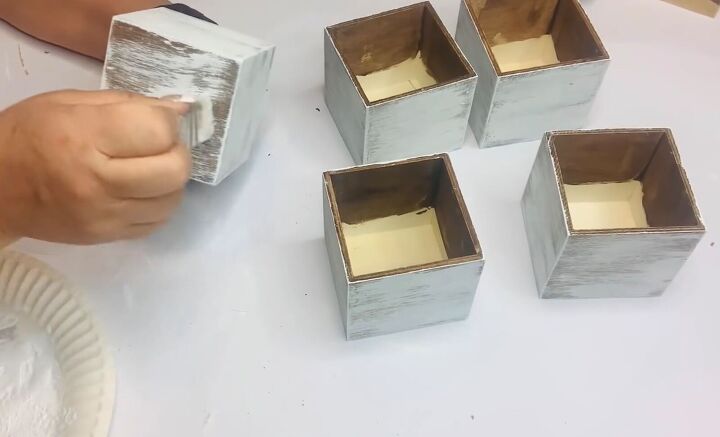
Using a semi-dry brush technique, I added a soft powdery look with my chalk paint in white.
I will add Dollar Tree floral foam to all of my boxes. I'll cut those down to size and then slip them in there. I used the end pieces to fill my last box.
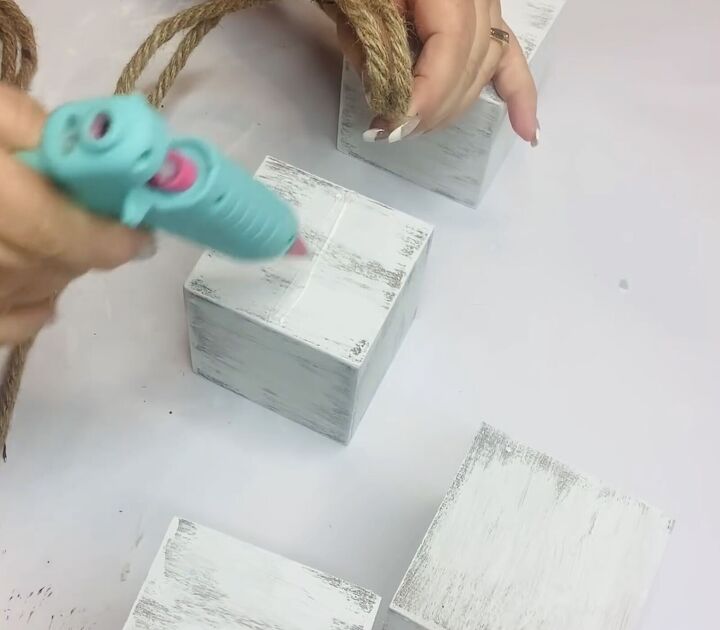
I'm using two packages of the Dollar Tree nautical rope, folding each one in half and measuring down eight inches, then hot gluing that right onto the side of my first box.
There'll be two strands on each box on both sides. Once I got it nicely secured, I measured three inches from the bottom of my top box to the top of my next box. There's a three-inch gap in between each box, and the opening will be at the top,
Once I got all five boxes attached to the rope, I flipped it over and repeated the same process on the other side with the other rope package.
I used a binder ring to attach my two loops at the top. That's what we'll use to hang this piece.
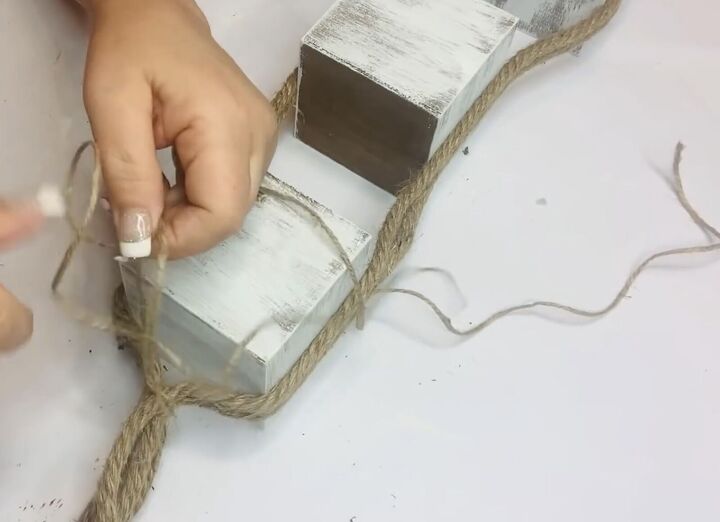
With the leftover rope at the bottom, I pulled the four strands together, wrapped some jute twine around them just below the bottom box, and then unraveled the ends to give it a fun, frayed tail.
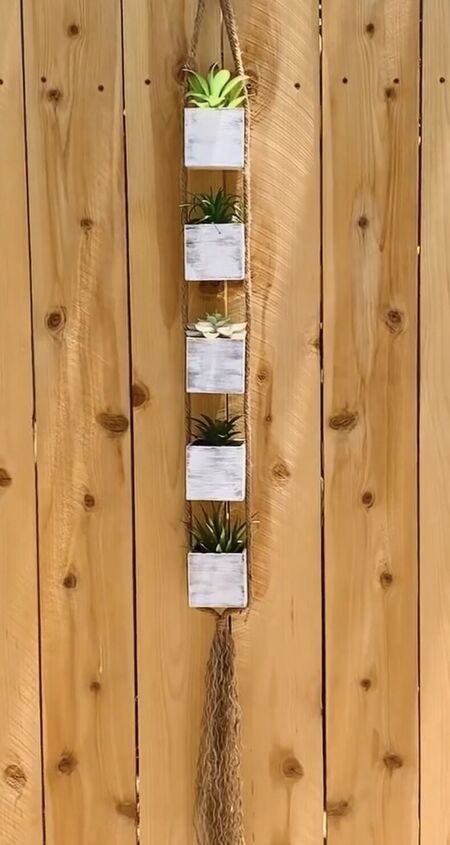
I added some rocks inside and then stuck a pretty little Dollar Tree succulent in each one.
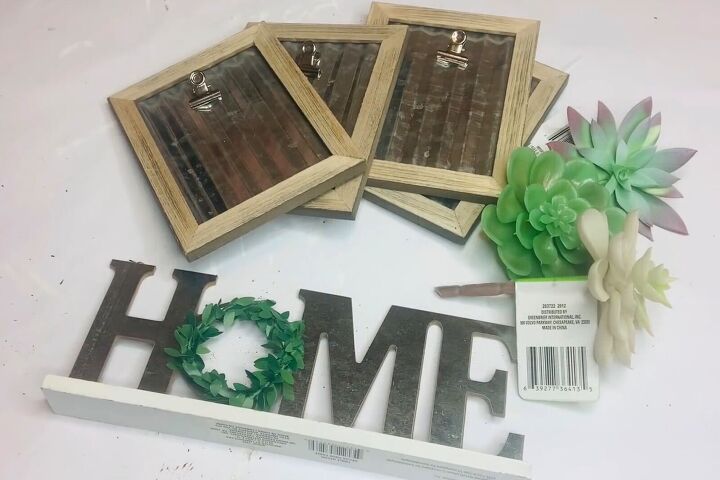
2. Home sign
We're using four-dollar tree metal clip frames, the super cute home sign, and one succulent.
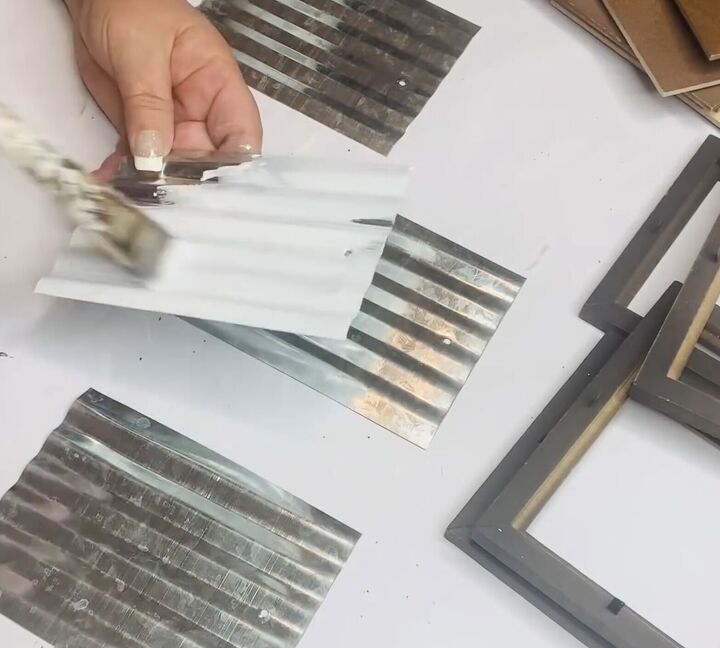
I unscrewed the clips from the frames and took them apart to paint the metal with my Waverley chalk paint in white.
I went back a little later and filled those holes with some spackle. I took the stand off of my Home sign.
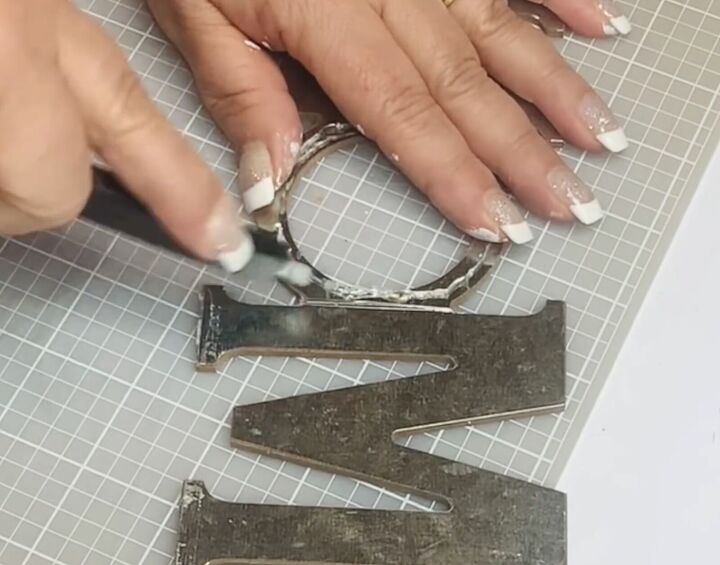
I used a sharp craft knife to separate my letters, and I only needed the H, the M, and the E.
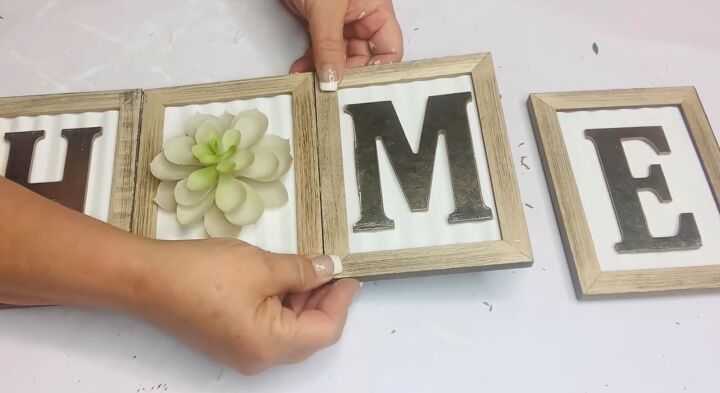
Once I separated the letters, I put my frames back together, attached my letters to the frame, and then attached this pretty, soft green off-white succulent to use as the O.
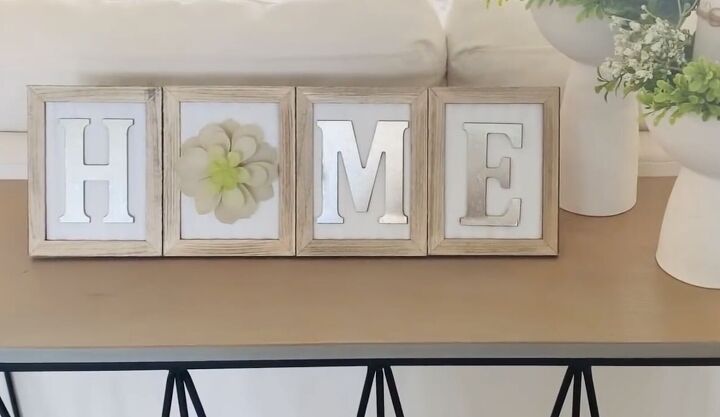
I attached my frames with all-purpose cement from Dollar Tree and hot glue to finish.
3. Scripture sign
For this DIY, I'm using a Dollar Tree sign and one of these adorable little half-pot succulents, and a decal I made.
I just took some scrap cardboard and glued it on top so I'd have a smooth surface for my sign, then I painted it with my white chalk paint.
I took some of those small puffy dots and added those to the top of my pot.
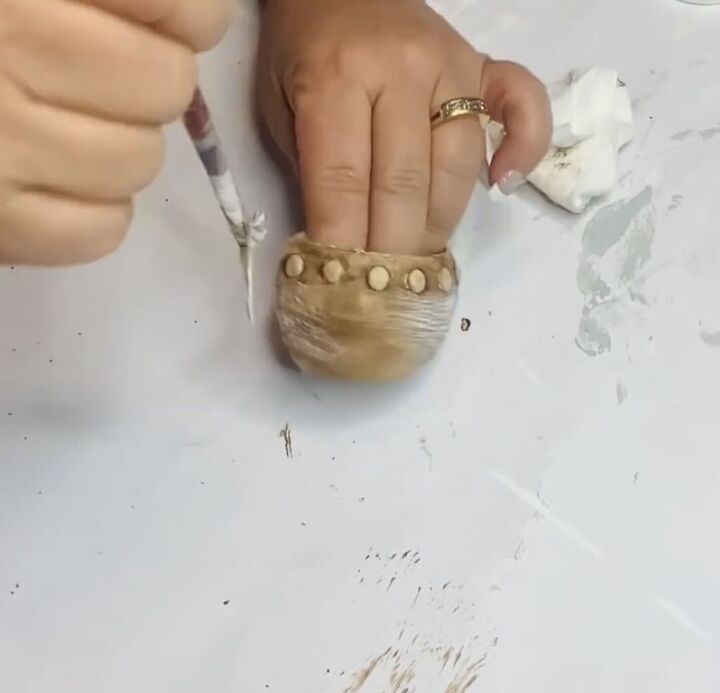
I pulled out the insides and I painted it white, and then once it was dry, I added some Waverly wax and antique with a dried-out wet wipe, and I just rubbed it all over and then used a fan brush to lighten it up a little bit and get it to look similar to the pretty frame.
I'll pop the foam and succulent back inside.
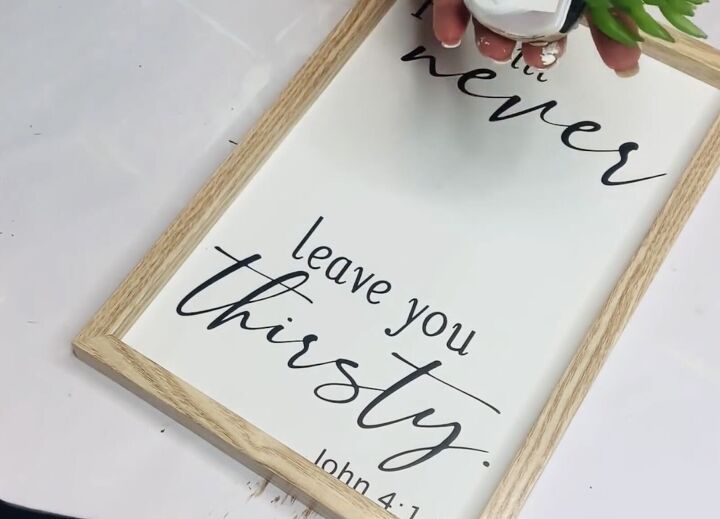
I put my scripture as far apart as possible.
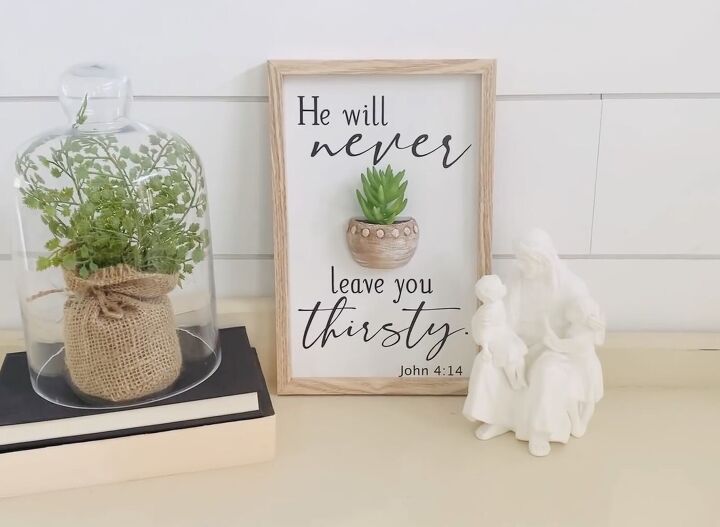
My little potted succulent fit perfectly in the middle.
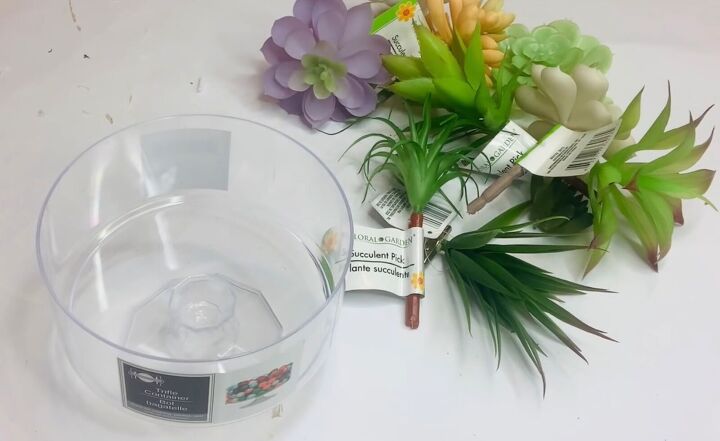
4. Candy dish planter
I'm using a Dollar Tree plastic candy dish and will paint it completely white.
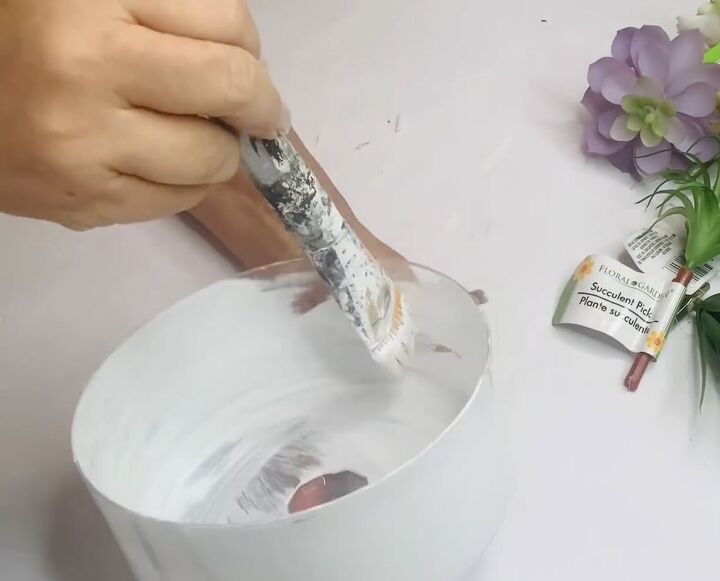
I started on the inside so that it would be nice and solid from the outside.
Be sure to sand anything that's plastic that you're painting so that the paint has something to stick onto.
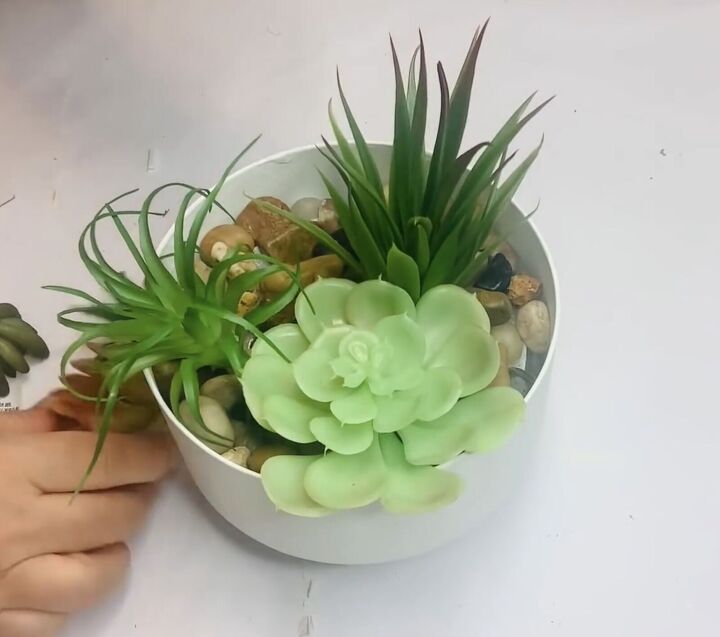
Then I added some styrofoam discs from the Dollar Tree, plastic and all, added some pretty rocks to cover that up, and then stuck an assortment of succulents around.
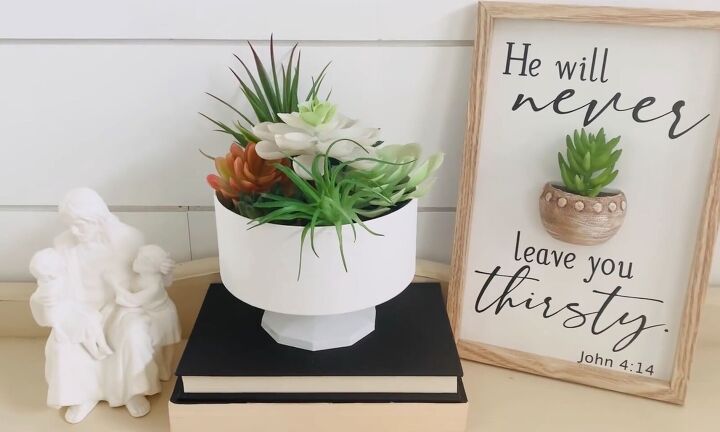
I topped it off with another one of these beautiful white ones right in the middle, and that's it.
5. Dollar Tree bamboo planter
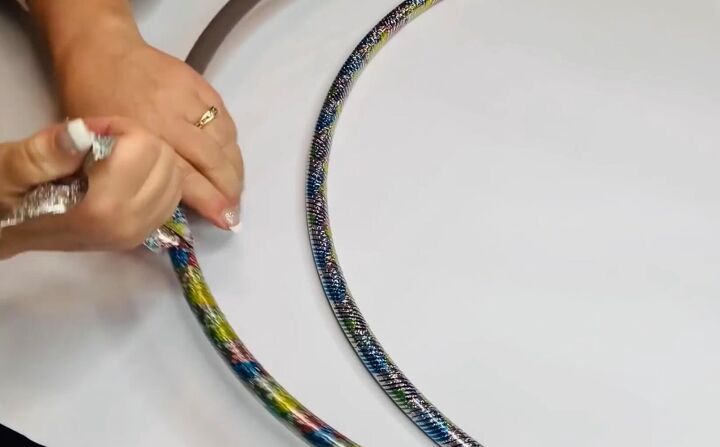
I used two of the smallest hula hoops I could find from Dollar Tree and removed the metallic tape.
Then I emptied the beads inside. When I put it back together, I will use some masking tape.
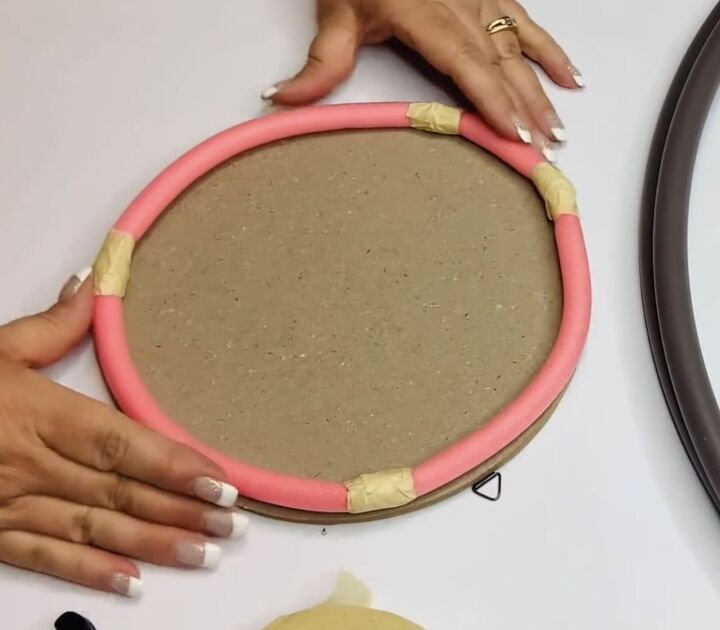
I made little bumps with it by mushing it together and wrinkling it up, and then sticking it down. I did that five times around the hoop to resemble those joints or nodes in natural bamboo, and I didn't want them to be evenly spaced.
For the inside holder, I used this round family plaque, and using my Cricut spatula, I removed the paper from the front.
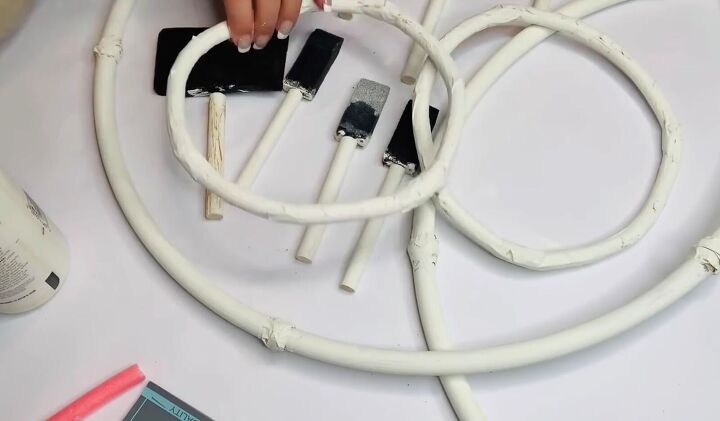
To make the rims, I'm using some of the long, skinny foam rollers, and I attached them with some more masking tape and made those little joints again.
Since there's a wire inside, I was able to shape it into a circle, add one more roller, and then cut that down to the same size as the plaque, which will become the base of our planter. I made two of those small rings.
I took some more masking tape, went around the inside of my ring, cut tiny little slits so it would wrap around the curve, and then went around the outside and wrapped it inward.
Now it's time to paint all of these pieces.
I used Waverly chalk paint in the color plaster, which is more off-white. Then I went back in with some truffle chalk paint to give it all the pretty streaks, lines, and shading that bamboo has. I put some more plaster on top of that to soften it up.
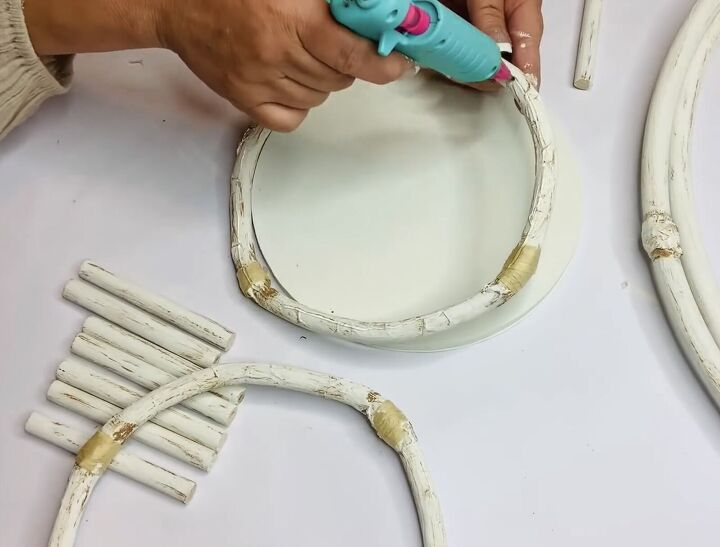
Next, I glued one of my rings to the top of my plaque.
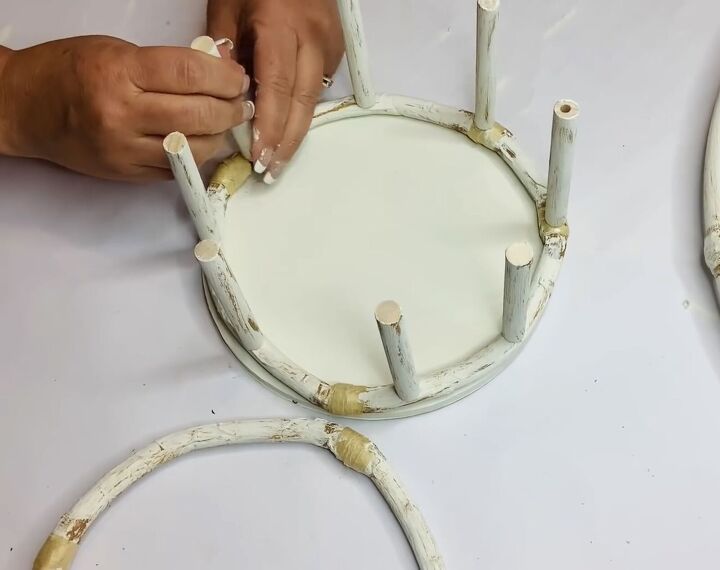
I took my used sponge brush handles, glued eight to the foam ring, and then glued the top ring to the tops. You have to work fast, so your hot glue doesn't cool down.
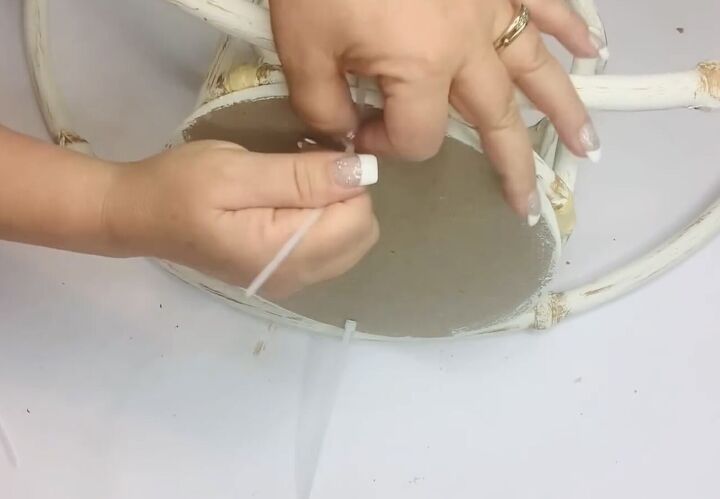
I drilled a couple of holes into my base, fed a nylon zip tie through those holes and around the hula hoop, and then pulled it super tight to keep it in place.
I used another zip tie to attach the tops of my hula hoops, and I wrapped some raffia around it to make it look like that wicker wrapping you see in some bamboo pieces.
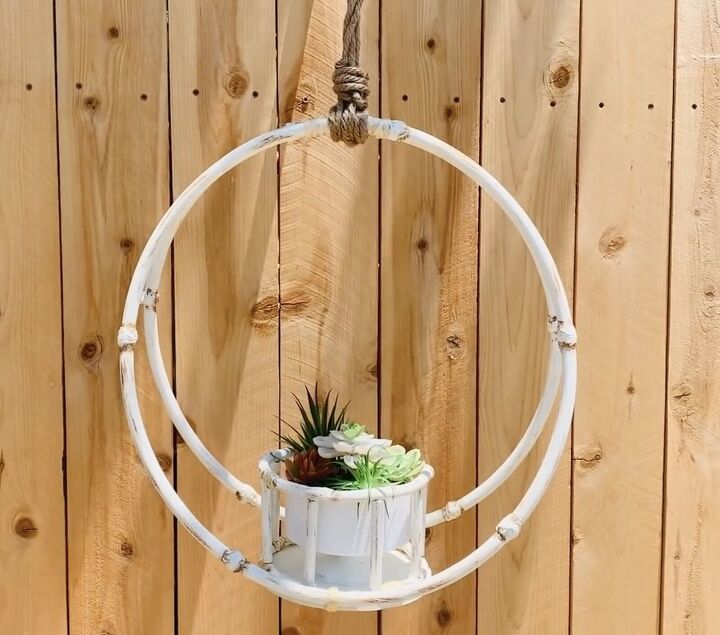
I attached some nautical rope at the top.
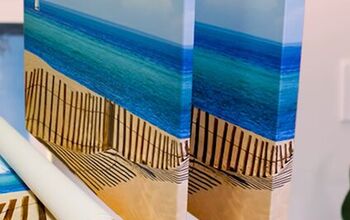
Dollar Tree DIYs with succulents
Dollar Tree DIYs are a fun, inexpensive way to enjoy crafting. What succulent project has been your favorite? Let us know in the comments below.


Comments
Join the conversation
Love the thirsty project. Very attractive and meaningful.
Enjoyed the video. I just purchased some faux succulents to use in a couple planters I have that I can't keep any plants alive in... you have very good ideas.
I'm wondering how you made the stencil -- please share 🙂