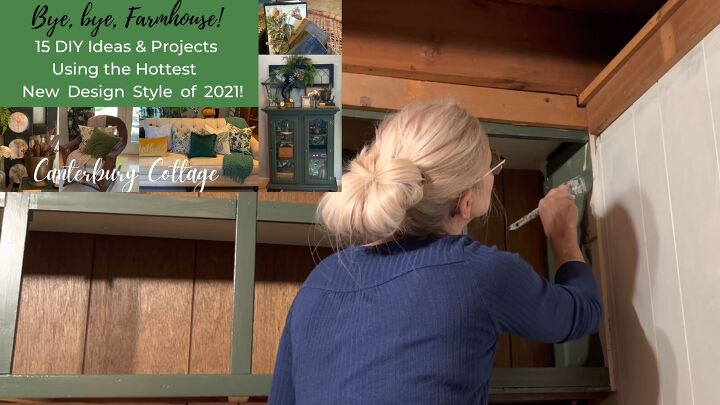
Follow Along With My Incredible Small Kitchen Makeover For Only $100

If you're looking for inspiration from small kitchen makeovers, I have some ideas to share. I recently did a small kitchen makeover on a budget.
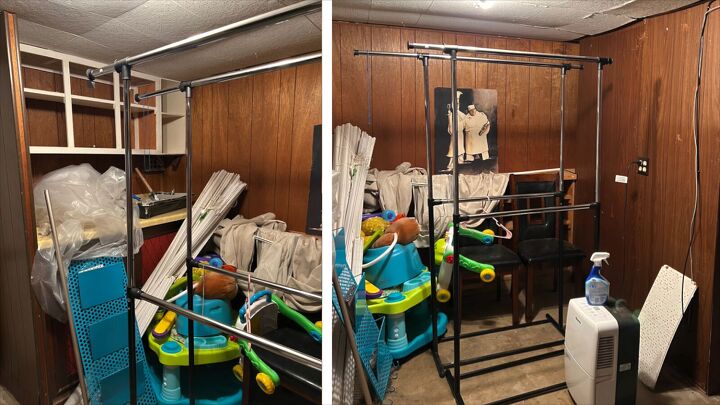
It wasn’t your typical kitchen makeover, as it is actually a kitchenette in the basement for my son. I managed to get creative and find some clever ways to bring fresh, new life into a previously dreary kitchen.
1. Stripping out the old
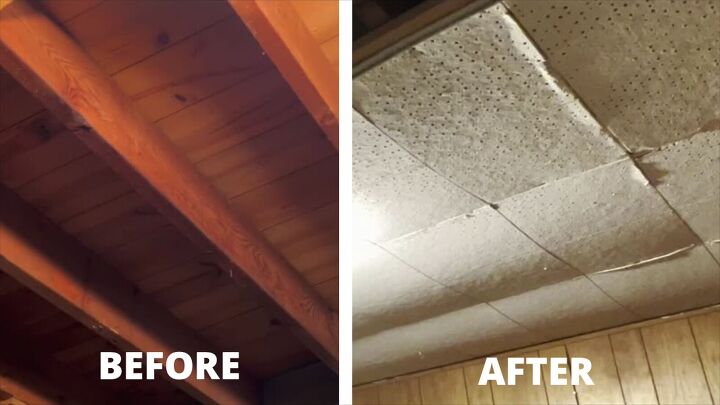
The first thing I noticed about the space I was working on was that the acoustical ceiling tiles were sagging and damaged.

I removed a couple of those tiles and saw that the wood above them was quite nice, so I decided to take all the tiles down.
I took out all the nails from the wood and the room had already been drastically improved for zero cost and very little effort.
2. Get rid of extra wires
I noticed a lot of wires running along the edges of the floors and ceilings. I found out that some of them weren’t even functioning or serving any purpose so I had the telephone and cable company remove those wires.
Once those wires were dealt with by the pros, I repaired the holes in the wall with some spackle and paint.
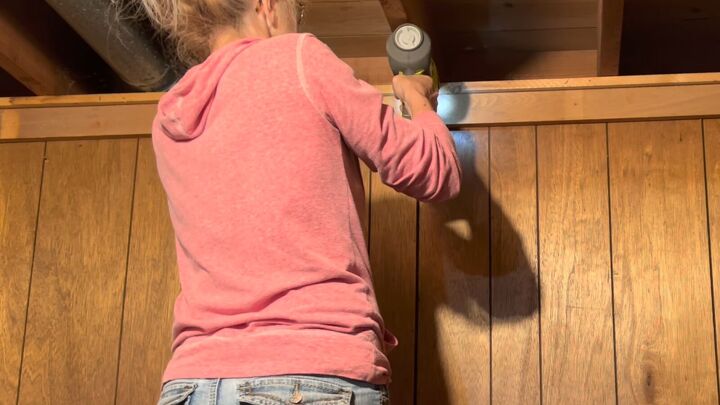
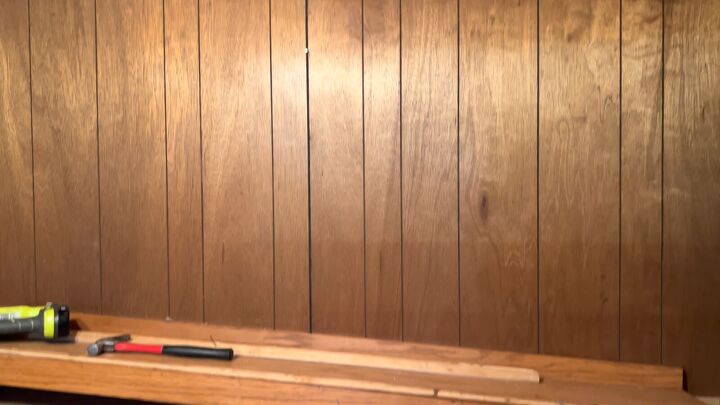
3. Crown molding
Crown molding can add an elegant, finished look. I had a pile of 1x4s that I had just removed from the ceiling. I repurposed those and measured and cut them on my miter saw. I installed them using my nail gun.
4. Paint
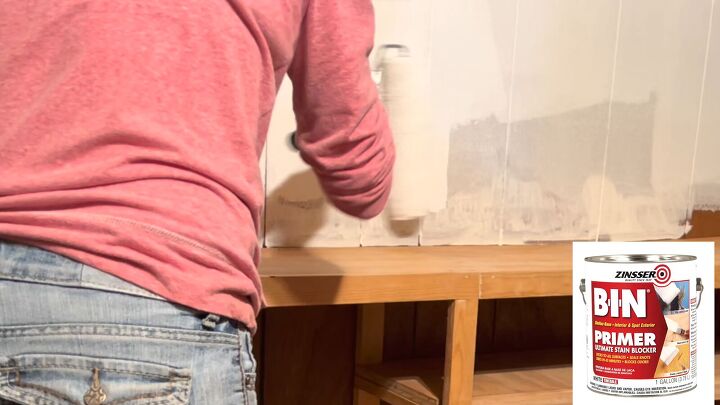
Never underestimate the power of a fresh coat of paint. The walls in my son’s kitchen were a dark wood paneling that was way too heavy for the space.
I decided to paint it white. First, I primed the walls so the dark wood wouldn’t show through, and then I applied the paint.
5. Deal with damage
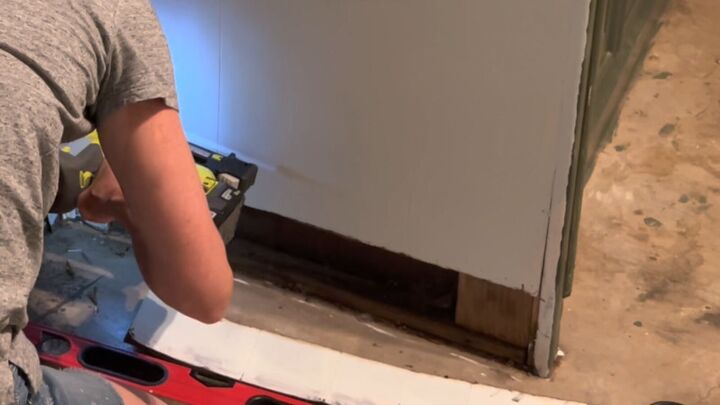
Part of the wall in the room was never finished. It was covered with sheet rock and the bottom section was suffering from serious water damage. It also had some exposed seams.
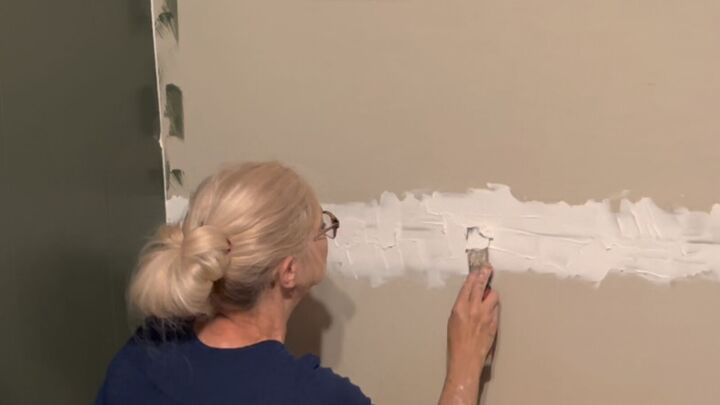
First I wanted to cover the seam. I went over them with some drywall joint tape. Then I applied 3 thin coats of spackle, sanding in between each coat.
Before painting the sheetrock I applied some mold-killing primer. I marked a line just above where the water damage was irreparable. I used my oscillating tool to cut off that bottom part. I covered the hole with some trimmed wood.
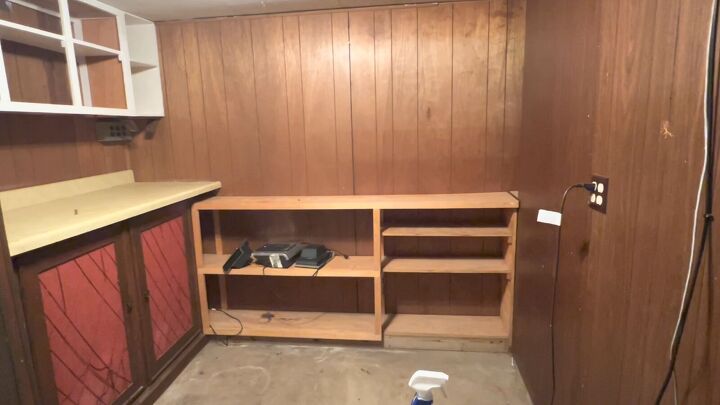
4. Add trim
There were some nice shelves built into the walls but they looked a little bare. I decided to buy some wood and create a trim.
Adding trim along the edges of a thin shelf, makes it look thicker and more expensive. Then I painted the shelves and the trim.
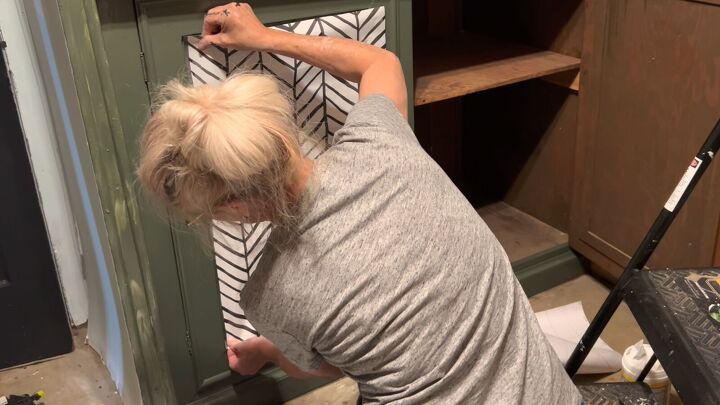
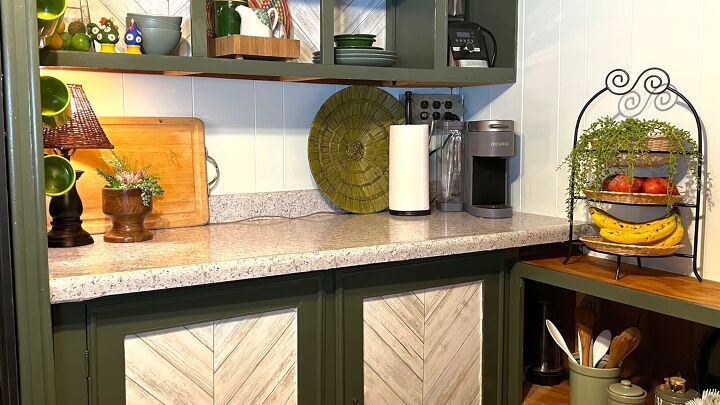
5. Refinish cabinet doors
The design on the old cabinet doors was falling apart so that was excuse enough for a redesign. I painted the doors and put an eye-catching seal-and-stick wallpaper on the inner frame of the doors.
Then I took out the old handles and replaced them with some nice new ones.
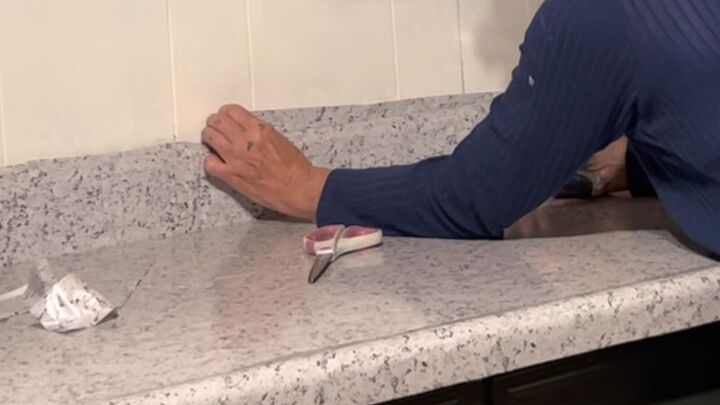
6. Countertops
The countertops were an ugly yellow laminate countertop. I covered it with contact paper, using a blade.

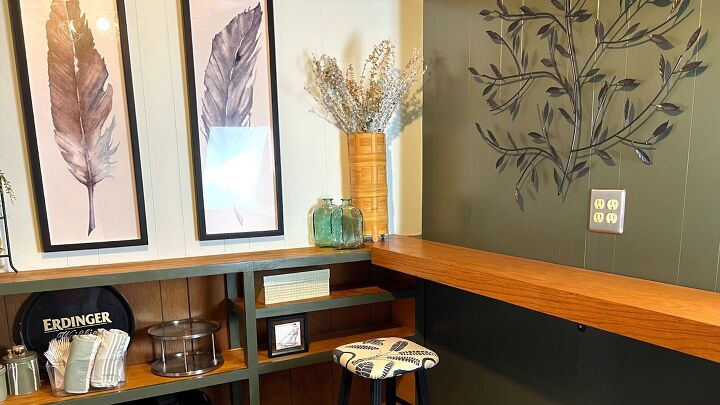
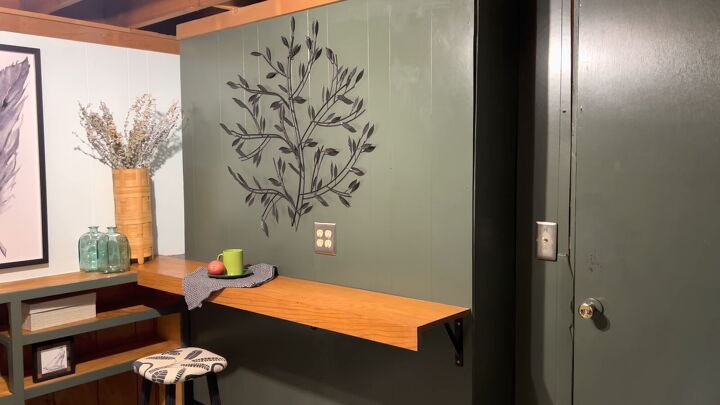
7. Breakfast bar
I debated putting a small table in the kitchen but then I realized it would crowd the small space. I decided to install an oak hanging shelf as a breakfast bar instead.
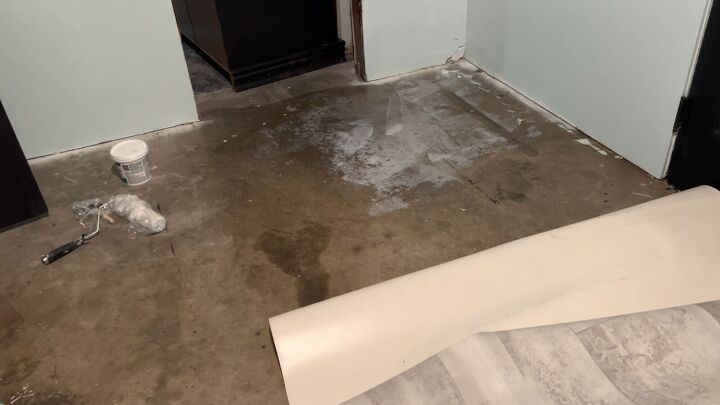
8. Install vinyl flooring
Concrete floors were not going to cut it for this space. I happened to have several leftover pieces of sheet vinyl from the upstairs kitchen. I used some vinyl adhesive and pieced together the vinyl scraps on the floor.
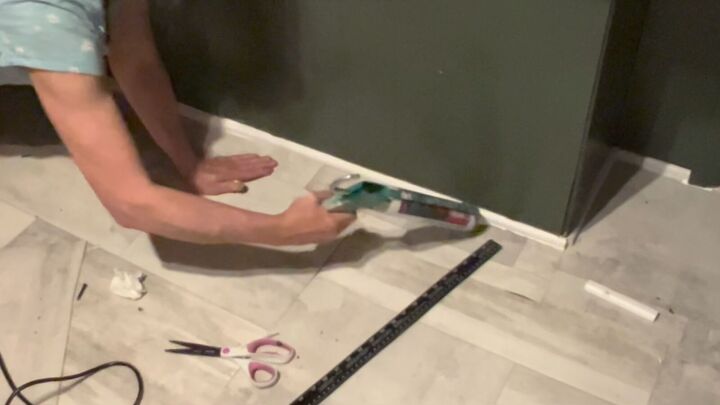
9. Install baseboard or quarter-round molding
I decided to use quarter-round molding to save money on the baseboards, and they did the job perfectly. I nailed it in place and filled in the top and bottom edges with caulk. This made both the floors and the walls look so much better.
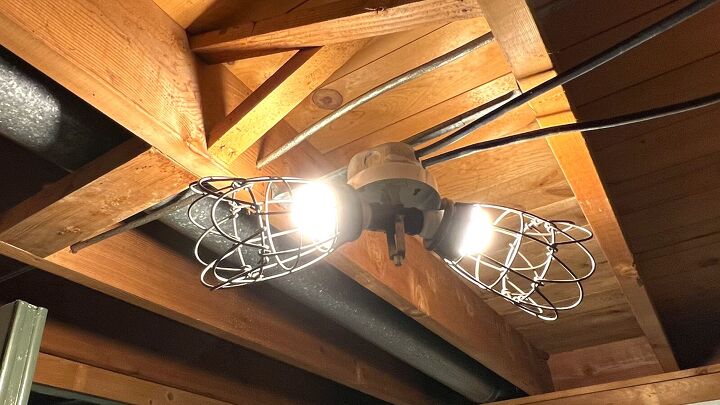
10. Update light fixture
The room I was working with was in a basement with no natural light, so I needed something that wouldn’t shade any light.
I covered the bulbs with some industrial shades to expose as much light as possible while adding a more finished look than an exposed bulb.
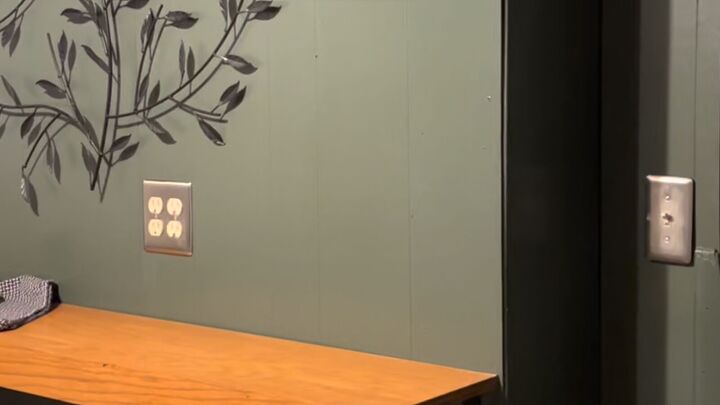
11. Replace switch plates
I updated the switch plates for some more new ones. I got metal switch plates. I think it adds a bit of a more modern touch to the small, previously outdated, space.
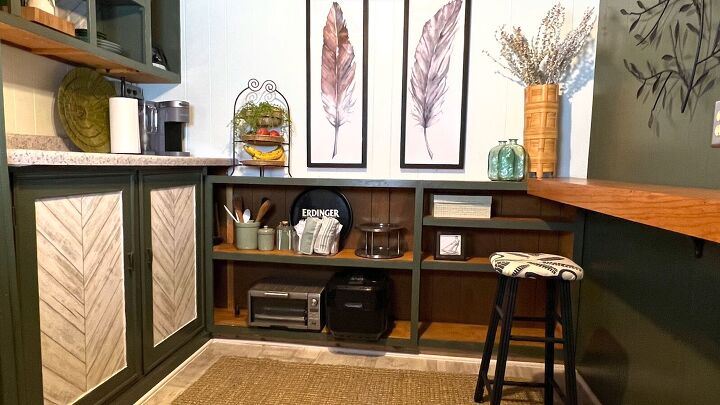
Small kitchen makeover
I went slightly over budget, but when you look at this small kitchen makeover before and after pictures, I think you’ll agree with me that this project was well worth it. Best of all it was done on a budget of under $140.
It truly is possible to do a small kitchen makeover on a budget. Leave me a comment and let me know which of these ideas you think you’ll use in your kitchen makeover.


Comments
Join the conversation