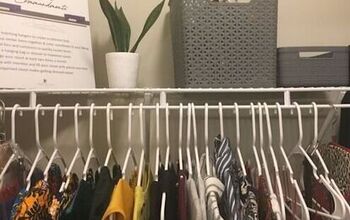
Easy Shelving & DIY Kitchen Storage Ideas Using Target Containers

People are always looking for DIY kitchen storage ideas, and the one I'm going to show you how to make is one of the best. It consists of a long box filled with clear storage containers from Target to make finding what you need in the kitchen easy. This is especially great for small spaces as it takes up very little room but provides tons of storage.
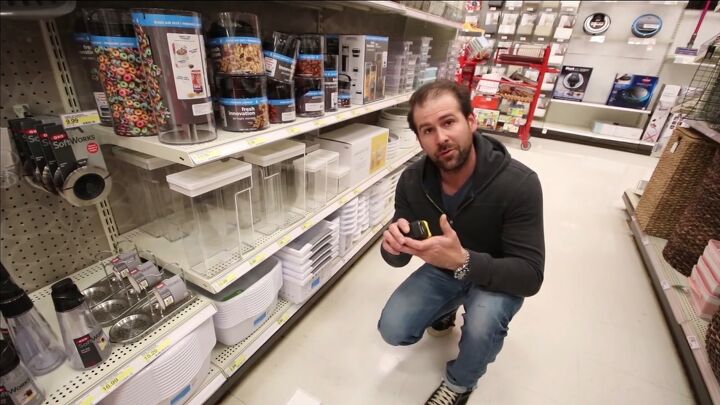
1. Buy containers
You'll first need to buy your storage containers that will fit on the shelf. I went to Target to find mine, but you could purchase from any store.
The important thing to remember about this project is that the storage container we're going to make looks very custom, and it is. You'll have to make the outer box, but the whole thing depends upon the containers you decide to use.
Go to a local store, comb through the different containers, and play around with different configurations. It's good to bring a tape measure with you for this process because you'll want to measure and lay everything out to make sure it's going to fit your area.
I'm going to try to keep the box that I'm going to make between 40 and 48 inches wide, and I'm going to try to keep it at the height of about eight to nine inches. That may vary depending on what size containers I can find.
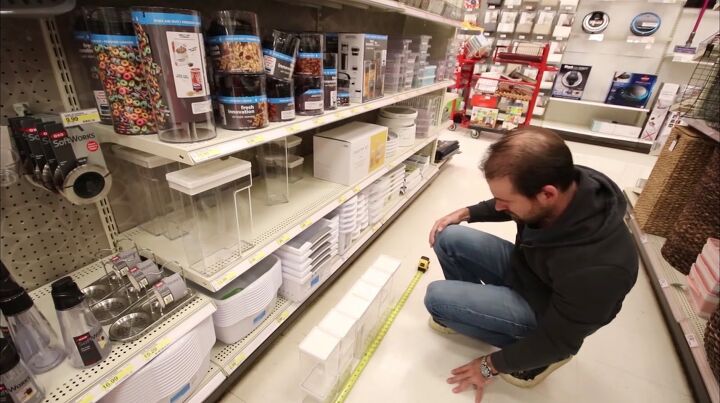
2. Measure containers to fit
I brought my tape measure with me, but if you didn't have your tape measure and you wanted to use the squares on the floor, you could easily do that as well. Each floor square will represent about a foot, so you could just lay them out that way. I brought a tape measure, so I'll lay that out and start putting together some boxes.
Based on the containers that are here at the store, I'm going to change the size of the outer box. I've decided to change it to 2 feet wide and 12 inches tall. I was initially going to go 4 feet wide by 3½ feet high, but I'll change that to work with the available containers.
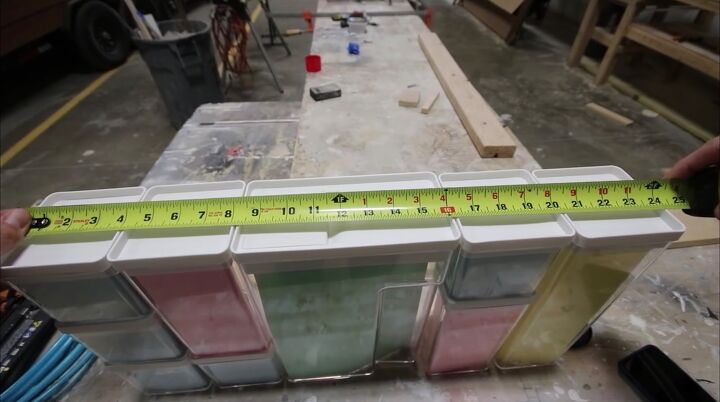
3. Measure for the box
Once I returned to the shop with my containers, I had to play around with different sizes and see what would work as far as what would fit together; then, I started to create the box.
To create the box, take some measurements. Take your tape measure and add a little to the height of the sides. In our case, we made it 24⅜ inches wide to give it some room on the sides. Then for our height, we want to ensure that we can get fingers inside. I would measure the space with the width of our fingers added into the measurement. We're going to make the height twelve and a half inches tall. You can get your fingers in there and pull the containers out.
For our depth, I like to make this pretty exact. In our case, we're going to go 4⅛ inches deep based on the depth of the containers we bought.
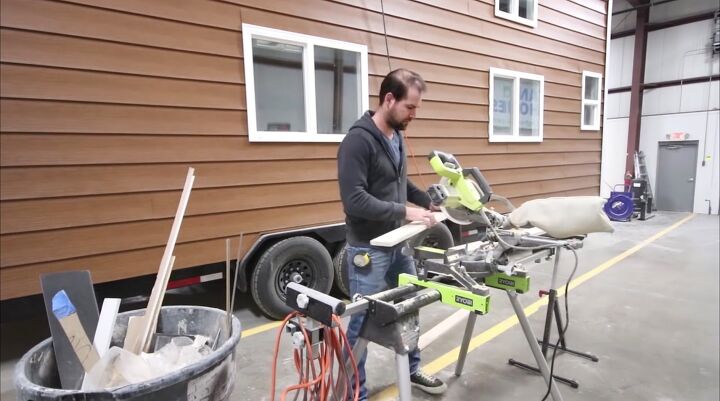
4. Cut the wood
Next, I cut all the wood based on my measurements. Be sure to add the top and bottom wood thickness to your side measurements so your sides can nail together perfectly. If you don't include the thickness of your top and bottom wood in your side measurements, the whole unit will be too short for your containers.
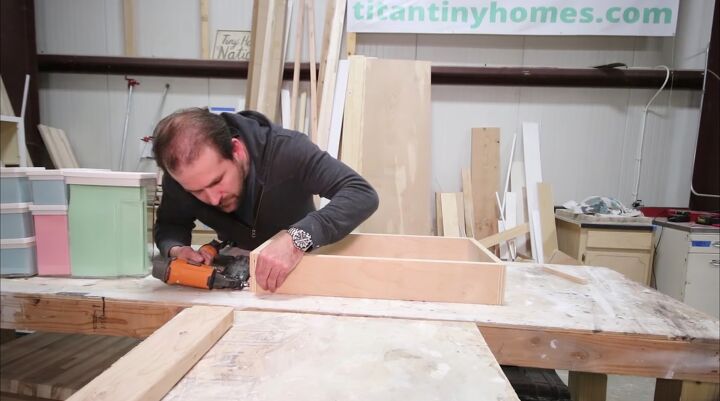
5. Nail the sides to the bottom and top
After I cut my sides and used wood glue on the inside of each, I nailed them together to the bottom and top pieces of wood to form a box. I like to put about two to three nails on the sides. Make sure that your edges are nice and flush.

6. Attach a back
The next step is to put a back on the unit. Now we're ready to put some plywood on this. I cut the plywood to equal the length and height of the unit, including the thickness of the wood that makes up the top, bottom, and sides.
I used half-inch plywood, but if you have some heavier stuff in the containers, you probably want to go with something slightly stronger. Go ahead and nail the back onto the bottom, top, and sides. This is what's going to hold it to the wall.

7. Paint
Prime the wood, then paint the color of your choice.
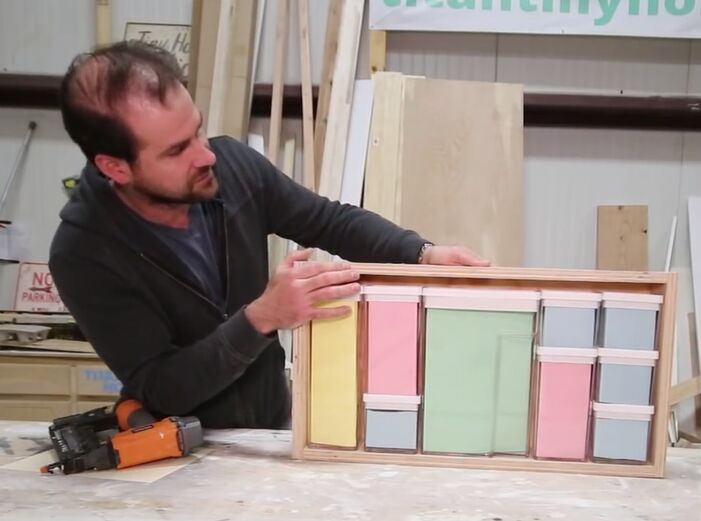
DIY kitchen storage ideas
Hang it from a wall near your oven or stove, counter, or wherever you do most of your food prep. You've now finished a beautiful DIY kitchen storage piece that can store spices, dry goods, or whatever you need to make it easy to access what you need when cooking.
Let me know what you think in the comments below.


Comments
Join the conversation
Oh wow 👌 Nice,, Now I need to hire a Carpenter ,,, that for sure cost more than those beautiful containers,,,,
If I were to make that wood box, I would make it tall and wide enough to be able to get my fingers between the wood and containers and between the containers. Honestly though, with the high cost of wood these days, I'm not seeing any real benefit of this storage idea.