Upcycled Home Decor: 8 Easy Thrift Flip Ideas

It has been snowing, so instead of going to more thrift shops, I am working with what I already have.
Here are eight thrift flip ideas, based on what the Goodwill home décor I have accumulated in my storage. Let’s make some upcycled home décor!
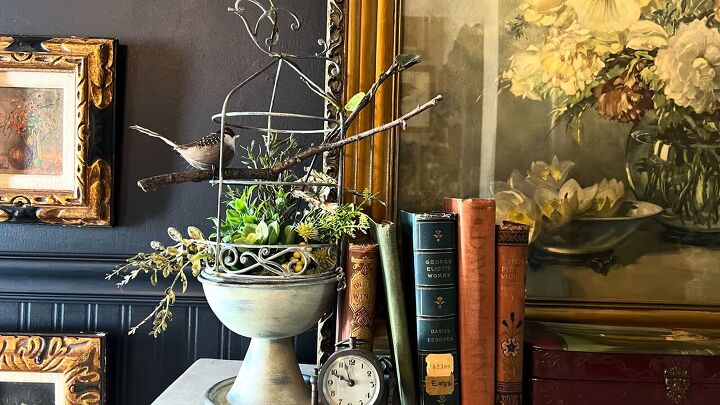
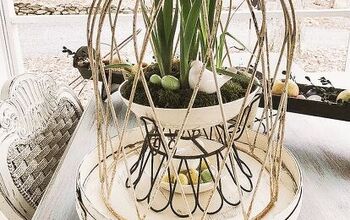
1. Metal cloche
The light green color of this cloche was fine, but I brushed on some white wax to brighten it up.
To create a cute terrarium, I hot glued a small square of Styrofoam in the center of the stand, and added a variety of greenery stems.
Once I was happy with the arrangement, I glued some moss to cover the sides of the Styrofoam and the bottom of the tray.
After putting the cloche back in place, I added a stick across the middle, and used the wire sticking out from the underside of a fake bird to hold the bird to the stick and also to hold the stick to the cloche.
Finally, I added a faux vine and wrapped it around the stick and then up and around the top of the cloche.
2. Wicker tray
I love the size and shape of this wicker tray, but the 1990s fabric had to go. I could have left the bare wood, but I wanted to dress it up with a design.
First, I painted the inside of the tray with one coat of white chalk paint. Then I applied the patterned ply of a William Morris paper napkin with Mod Podge, adding small strips from a second napkin to the empty spaces on the sides.
I then removed the excess napkin along the inner edge of the tray with a utility knife.
To seal the napkin, I applied a thick coat of Mod Podge Hard Coat. I then decided to add more green by gluing a ribbon to the handles with fabric glue. Turned out fabulous!
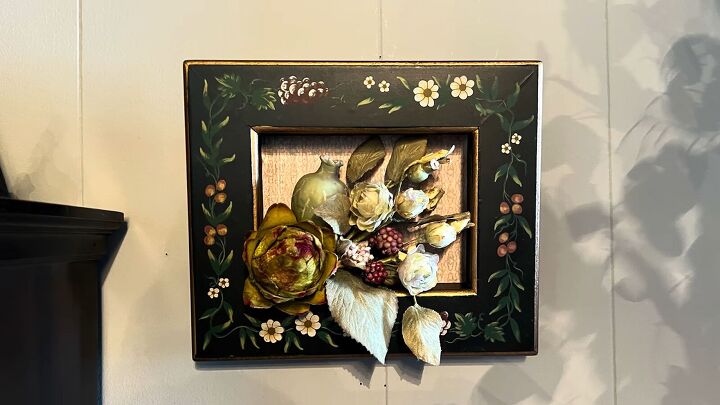
3. Rooster frame
I bought this rooster art for the pretty painted frame, so I unscrewed it to separate it from the shadow box and popped off the rooster. I covered the chicken wire paper inside the box with a piece of scrapbook paper and a glue stick.
I then hot glued a small piece of Styrofoam in the corner of the box and added some fake flowers and fruit to coordinate with the design on the frame.
I wanted the leaves and flowers to stick out over the frame, so I did not reattach the piece of glass.
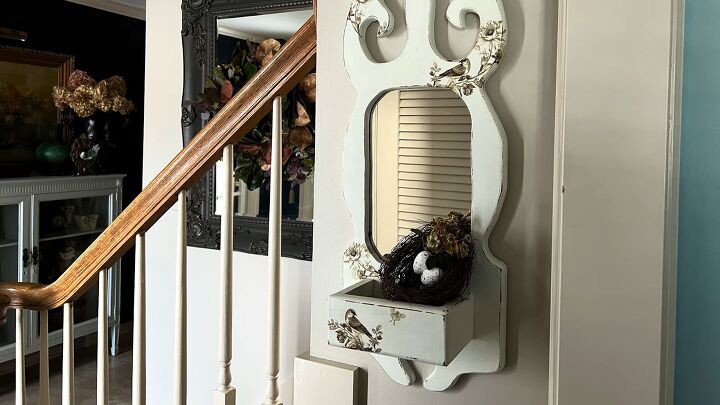
4. Wall mirror
I usually like stained wood, but this one was not for me, so I painted it with off white chalk paint, and then lightly sanded it, which is necessary for a smooth finish if you are using chalk paint.
I decided to embellish the mirror with some bird and floral designs cut from napkins. I cut around the designs with small scissors and applied them with Mod Podge, and then sealed the chalk paint by brushing on a coat of clear wax and wiping away the excess with a paper towel.
I thought it would only be appropriate to add a bird's nest to the little drawer.

5. Peacock lamp
Let’s turn this lamp into a small table!
First, I removed the lamp parts and pulled out the cord. For extra stability and height, I glued a couple wood rounds to the bottom with wood glue and filled in the gaps with caulk.
I also added a few brad nails to the larger round to attach it to the smaller one.
To create a tabletop, I first cut down and inserted a wood dowel into the body of the lamp, on top of which sat the wood round.
Then I glued a second, larger wood round on top of that. I drilled a center hole and drove a wood screw through the hole all the way into the dowel rod.
I filled in the holes on the tabletop with wood putty, and when everything was dry, I brushed a primer on the wood rounds both on the base and on the top of the lamp.
Finally, I painted it all dark brown, reattached the tail to the lamp base with Bondic, and brushed it with antiquing wax, which adds dimensions and provides a protective coat.
To unite the appearance of the wood rounds with the lamp, I applied some gold Rub and Buff around the edges with my finger.
I also brushed some of the gold wax on the peacock to make it stand out from the brown branch stand.
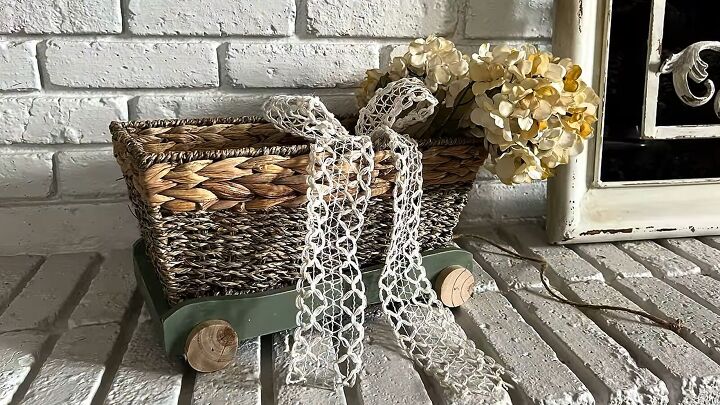
6. Block wagon
Initially, I painted the plastic wheels with a mixture of baking soda and black chalk paint and painted the wagon with moss green chalk paint, but the wheels still looked juvenile, so I hammered them off.
A few small pieces of wood broke off too, which I ended up filling with wood putty.
For new wheels, I used the small wood rounds, attaching each with a single brad nail. I replaced the red pull string with a strand of jute, and finally, installed a wicker basket, adding some thrifted fake flowers.

7. Wood tote
I decided not to put a plant in, but to give this wood basket a new unexpected life.
I spray painted it green and removed the handle, drilled new holes, slid a dowel rod that I had painted a matching color through, and then slid on a ball of twine.
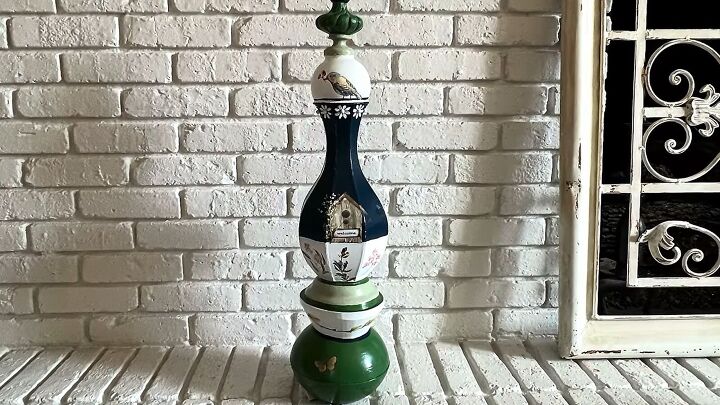
8. Topiary
I got inspired by the spring topiaries from the Grandin Road catalog, and decided to make my own out of a pile of wood and metal items. I started by creating a ball shape for the base from two bamboo salad bowls using wood glue.
To the top, I glued a wood bowl from a candle. I then used a combination of E6000 and hot glue to attach a vase to the bottom of a small metal bowl.
Once everything had dried, I began painting everything with chalk paint in various shades of blue, green, and white. I then took a plastic Christmas ornament, drilled a hole and inserted a painted finial into it, using E6000 and hot glue.
I inserted the ornament into the vase, painted it with white chalk paint, and attached the metal bowl to the wood bowl with Gorilla Glue.
Once everything was dry, I applied a bead of caulk to the joints and applied rub-on transfers.
Upcycled home decor
Which of today's thrift flips was your favorite? Do you thrift and flip your finds a lot? Share the projects you are proudest of in the comments.


Comments
Join the conversation