How to Design a Camper Van Using SketchUp, Plus Flooring & Insulation

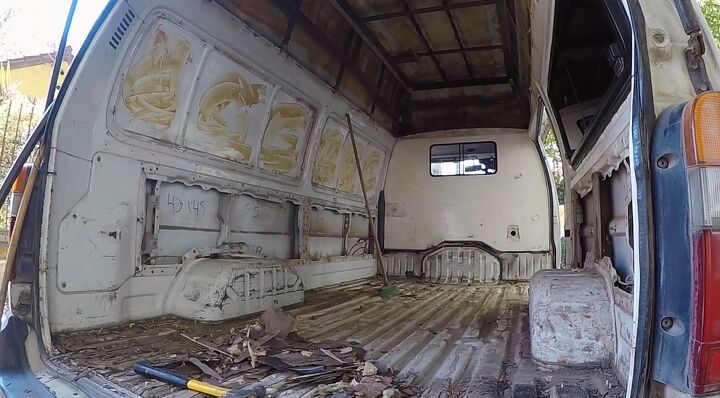
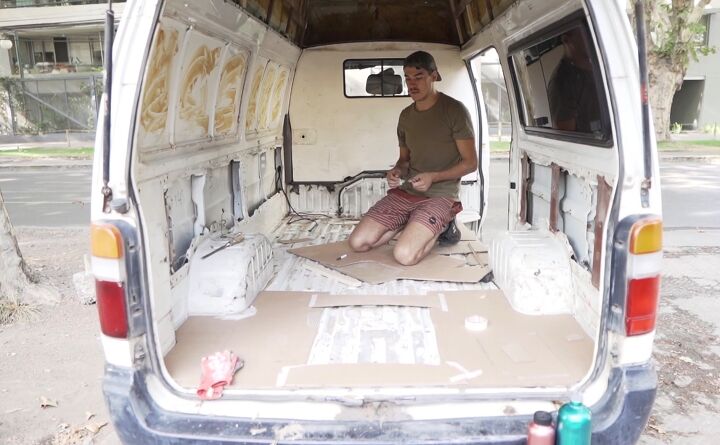
I’m going to show you how to design a camper van using this van. This is the new van that we're going to be traveling around the whole of South America with. First I'll give you a tour around before I start ripping into it and converting it.
We've got the original beach seat, the higher roof, a little cabin up here, and a little sliding window. The reason why this van is in such good condition is I think it's because it was an ambulance and it was looked after.
Take out what you won’t use
I ripped everything out of it so I could design the van to fit our needs. I was just grinding off the glue that was stuck down to the floor with the angle grinder. Now that we've stripped everything out of the van and we've cleaned it all up we are left with just a shell and the bare minimum.

Convert to a 3D model
The next thing I like to do is take a few measurements and convert the van into a 3D model so we can visualize it better on the computer. For this, I use a program called SketchUp. It's free software. It's quite easy to use if you got a little bit of know-how.
I'm not going to go into too much detail about how to use the software because there are a lot of tutorials already on YouTube.
I'm just going to show you how I do it, how I import the van into the model, and then you can visualize exactly how much space you have, what's going to fit, how you design, and your whole layout will fit together.
It's really good to get a 3D model of your design before you start cutting and building everything so you know it's going to fit.
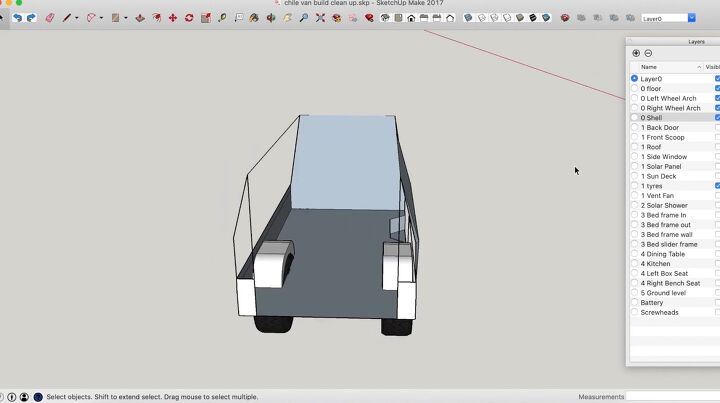
Create a floor plan
The first thing I like to do is to create a floor plan for the van. That's done quite simply by using a tape measure and measuring the width of the van at various points and then just connecting the dots. You can then add your wheel, arches, and tires for effect, and then you start to design the shell of the van quite simply.
There are a lot of YouTube tutorials that have to do this. This is pretty much the empty virtual shell of my van.
Design the interior
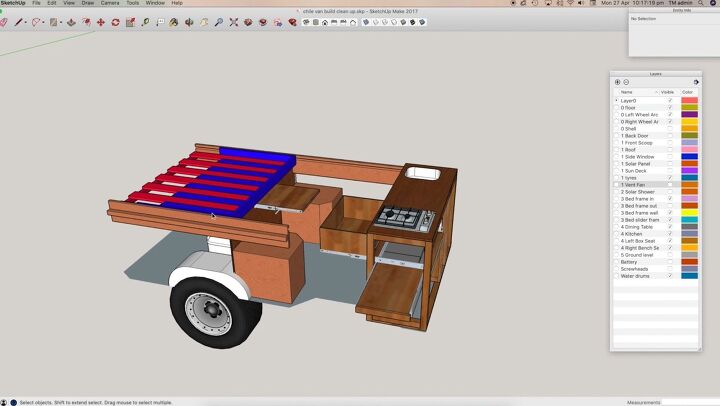
Next, I can start designing the bed, the kitchen, the seat, and how everything is going to fit. You just have to start to think about what you want to have inside your van. We were fortunate enough that we've already built one, so we know kind of what we want and what we don't want.
So what we wanted was some kind of a fixed bed or a bed that has less setup time than the one we had in our previous van. Our last van had a bed and table set up, which you had to make every day if you wanted to set the table up and then use the bed afterward.
We wanted a place where we had permanent seats and some kind of table that will be between the seats. We wanted a decent-sized kitchen where we could use the cooker in and outside the van. This is kind of sized as a medium-sized van.
I've modeled my ideas in the software and I'm pretty sure that they're going to be able to get me what I want in terms of a fixed bed, a sliding-out dining table, and a full kitchen, all in this small van.
Make adjustments
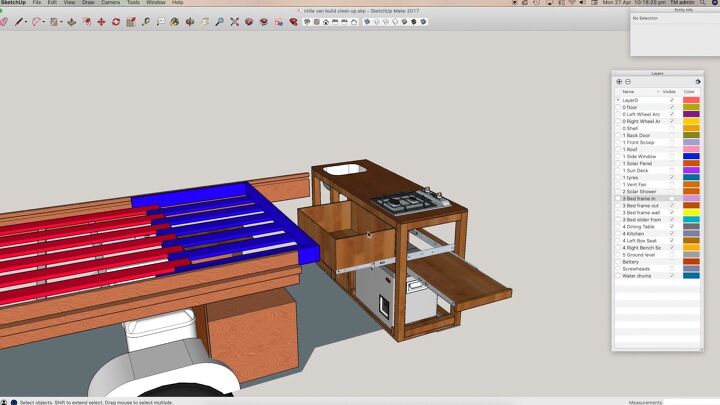
Okay, so here's my general idea of the van. If I remove some of the exterior walls, we'll get a better view of the inside. Here's the general layout of the van.
We have a sliding slat bed, so it's not fixed but it's going to be a lot easier to set up than a standard table lounge setup. We've got two bench seats and a slide-out table that slides under the bed with drawer slides. The bed will slide out through these slats and look like this when it is all extended.
Here is the general layout where we'll have a fridge that will pull out a couple of drawers and a slide-out table so we can work outside and cook.
Create floor template
At the moment, I'm just making the template for the floor. The best way I've found to do that in the past is pretty much to cut templates out of cardboard and then stick them together into the sizes of your plywood. It makes cutting so much easier. You'll get your cuts right the first time and there won't be gaps.
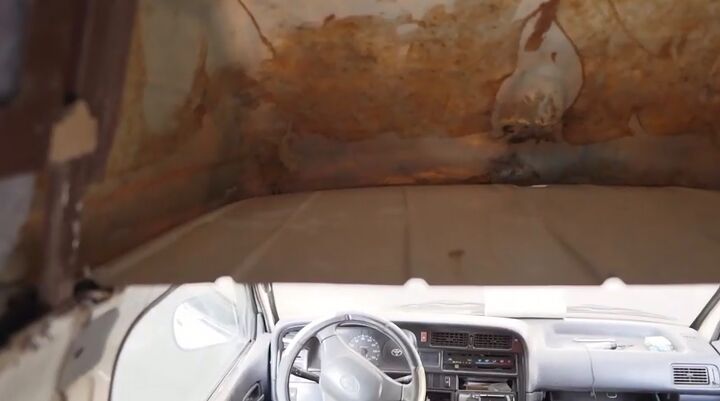
Now we’re cleaning the floor, prepping it, and getting it ready for the plywood flooring to go down. We had to scrape a lot of the glue away and a lot of the wood was stuck.
We ended up scraping it off with a chisel. We left some bare metal, so we're just going to paint over that with a bit of rust protection paint and we're ready to lay the floor.
Work on the interior
We were pretty productive yesterday and we started on the insulation. So we've got 60-millimeter polyester insulation, only half done at the moment. The original roof still is here, so we're going to cut that out, and make a nice flat plywood roof for our cabin.
After ripping out the fiberglass divider, we started cutting out the old roof with the jigsaw. We then had the meticulous task of trying to replace the metal we cut out with plywood and fix it for the cabin.
We then replaced the fiberglass divider with a plywood version that we screwed into the side of the van.
How to design a camper van
That's it for now for our tutorial on how to design a camper van using SketchUp, as well as how to start on the floor and insulation. I hope you like it. Comment down below what you think of the design.


Comments
Join the conversation
it’s a wonderful project many success with it . Can you built your own bathroom inside? Just wondering if that can fit in.