Take a Look Inside This Cute & Cozy DIY Family Skoolie

When we had our daughter, we wanted to do something epic for our family, like leave our jobs and enrich our daughter’s life. I wondered if we could comfortably live in a school bus? We decided to give it a go and we’re going to give you a tour of our family skoolie.
Why live in a skoolie as a family?
A great childhood
My daughter is young and won’t remember it all, but I want her to remember feelings she had, like all the amazing adventures we had together and that she grew up on a school bus.
Rare bus
We bought a rare, one-of-a-kind bus that we flew to California to get. They only made a few thousand of these buses and most went into the landfill. We saved one from being crushed.
Problem-solving
It’s been a project that has tested every one of my capabilities and made me a great problem solver. I had a little bit of construction experience, but nothing like this. I had to learn how to safely cram plumbing, HVAC, water storage, and electrical into a school bus.
Family skoolie tour
Great ceiling height
We bought this bus for a couple of reasons but one was because of the great ceiling height. We also replaced all of the hatches with boat hatches so we could get out onto the roof to reach the solar setup. It also brings in a ton of light and we get to have airflow. We kept all the bus’s original windows.
Couches
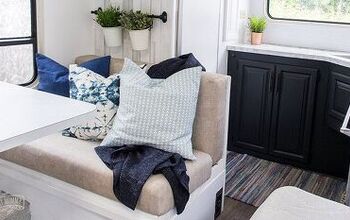
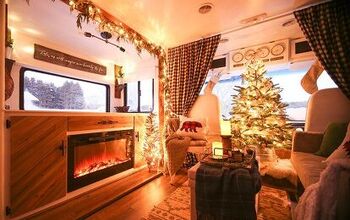
Our living room has two couches made from RV mattresses with custom covers that easily come off to wash. We painted the floors with low-VOC white paint. We didn’t want to lose head space by adding flooring, but we wanted something bright. We put some runners down for warmth.
Table mounts
We also have two tables installed on a click-down mount to give us more space.
Couch storage
We have storage underneath the couch cushions and in the dinette seats. We made a little wood storage box under one of the dinette seats.
Counters
We wanted a lot of kitchen counter space so we have 5 feet on both sides.
Cabinets
A local custom cabinet maker crafted the cabinet fronts.
Sink and backsplash
The sink is an excellent size to give Nova baths. The backsplash makes the kitchen feel like one that would be in a house and not just utilitarian for someone living on the road. It’s black with black grout so it looks cleaner.
Wall storage
There’s a little shelf over the cooktop and IKEA wall racks to keep knives and other utensils off the counter. Any type of on-the-wall solution for tiny living is helpful.
Base cabinets
We have tons of storage in the kitchen. We used IKEA cabinets for the base. I fill one up with small appliances and another with jars of dried goods. The lamp is from The Urban Electric Company.
Pantry
We also have a little pantry on the door of the electrical cabinet that we made using IKEA spice racks.
Fridge
We have a small fridge, we don’t need a lot of space. We got it off the floor by making a little box down there that is also a storage area.
Nova’s nook
We created a little sleeping area for Nova. The mattress is only 28” but it’s plenty big for her. The angled end walls create a bit more enclosed space for her.
There’s also a ton of storage under her mattress. The door Velcros shut for now, but Justin plans to build drawers in the space at some point. Nova’s light is from The Urban Electric Company.
There’s plenty of space here for her toys and blanket. And her dollhouse fits, too.
Nova has a magnetic chalkboard in her room, which is located on the front of the door to the bathroom.
Toilet
We have an Air Head Composting Toilet that we spent a lot of time researching. We have a space for a shower, too. We’re not in any rush to build one since we have one outside.
Closets
Our bedroom is in the back of the bus. We have a his-and-her closet. I have IKEA storage and shelving, and Justin’s closet is opposite of mine. The hot water heater is also in his closet.
Bedroom
Our bed is king-sized. We have tons of natural light with all the windows. We have a ductless mini-split AC back here to keep the bus cool.
Electrical cabinet
Here’s our electrical cabinet. We have 50 amps shore power running to a 120-volt AC panel. There are circuits that run underneath the bus and through the walls and ceiling. We have 12-volt power, an AC to DC converter which leads to a 24 to 12-volt converter, and then our 12-volt fuse panels.
We went 12-volt for as much as we could because we hope to be off-grid in this bus at some point. This is a work in progress so we need to add a few things.
Water pump and water heater
This is our 12-volt water pump and our 7-gallon electric water heater. This takes about 20 minutes to heat up. It’ll give you about an 8- or 9-minute shower.
Water tank
Underneath the bed, we have our 100-gallon water tank. We have space for more if we need it.
Front door
I took the front door and converted it from a bifold to a regular flat door with a standard house lock.
Exterior storage
We have two storage compartments to house surfboards and outdoor equipment. Our gray water system is in the undercarriage storage compartment.
Condenser mount
The mini-split condenser is on the back of the bus and it’s sturdy.
DIY family skoolie tour
We hope you enjoyed our family skoolie bus tour and learned a little bit about how to build one out. Let us know if you are planning a skoolie build. Let’s share our adventures!












Comments
Join the conversation
How well is a school bus insulated, and what king of heating system did you use?