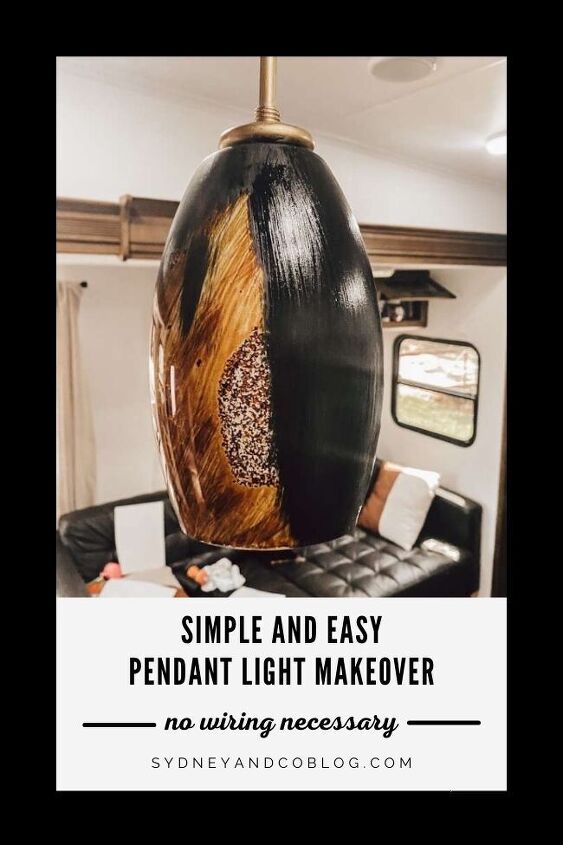
SIMPLE AND EASY PENDANT LIGHT MAKEOVER

A quick and inexpensive way to update any old pendant light fixture. I show you how I used paint supplies I already had on hand to update my RV island light fixture.
Just WAIT until you see the after on this thing!!!
All the time, I say that it’s crazy what a difference just a little bit of paint can make.
Yet, all the time, I finish up a paint project and end up in total awe of what a difference JUST A LITTLE BIT OF PAINT can make.
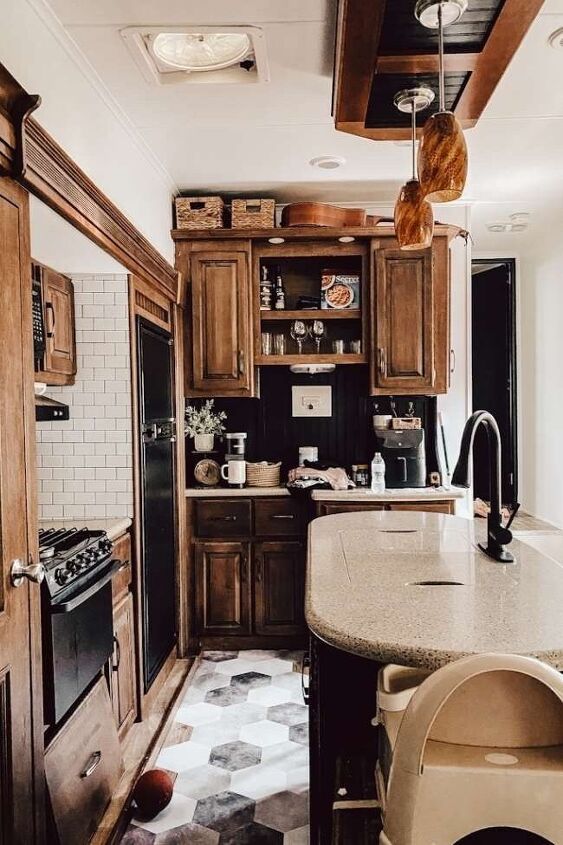
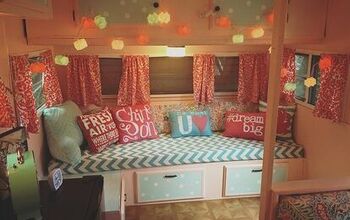
When we sold our house to move into an RV, I knew I was going to be updating the whole thing little by little.
SEE OUR WHAT OUR CAMPER STARTED OUT AS HERE
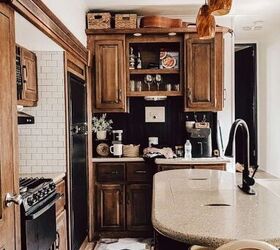
I painted the walls, added some backsplash, gave the floor a little pop, and updated the hardware. Yet, everytime I walked in the front door, I was greeted by these beautiful orange pendant lights.
Of course, I would love to replace the entire fixture, but I’m not allowed do do electrical work when my husband isn’t home. He doesn’t need to know that I disassembled most of the lights one day and realized it was a little more complicated than just changing out the fixture.
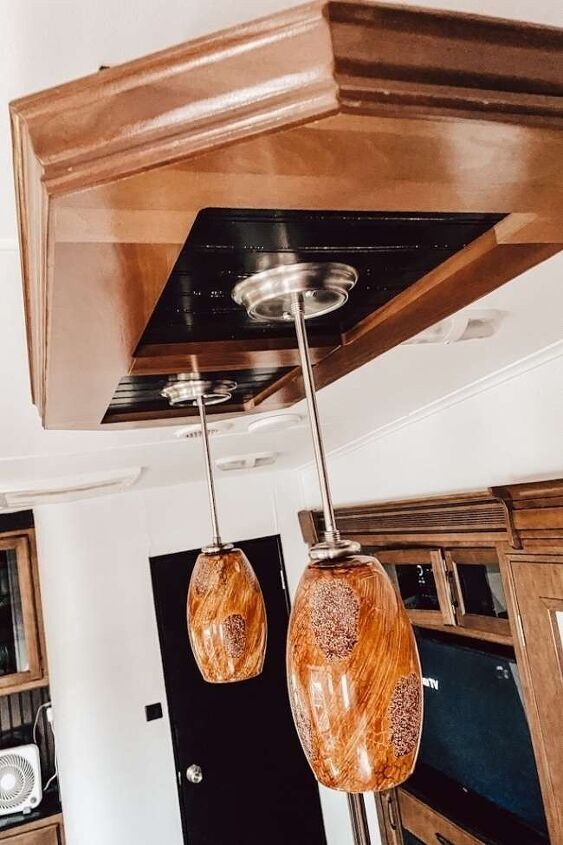
See that wooden thing, yeah all the electrical for these fixtures is inside of that.. NOT THE CEILING.
Not only would the wires have to be relocated, but it’s also leveling out the ceiling. Meaning, if I take it down, then my lights are going to be uneven.
So, of course, I decided to paint it and it turned out AMAZING.
RV PAINTED PENDANT LIGHT
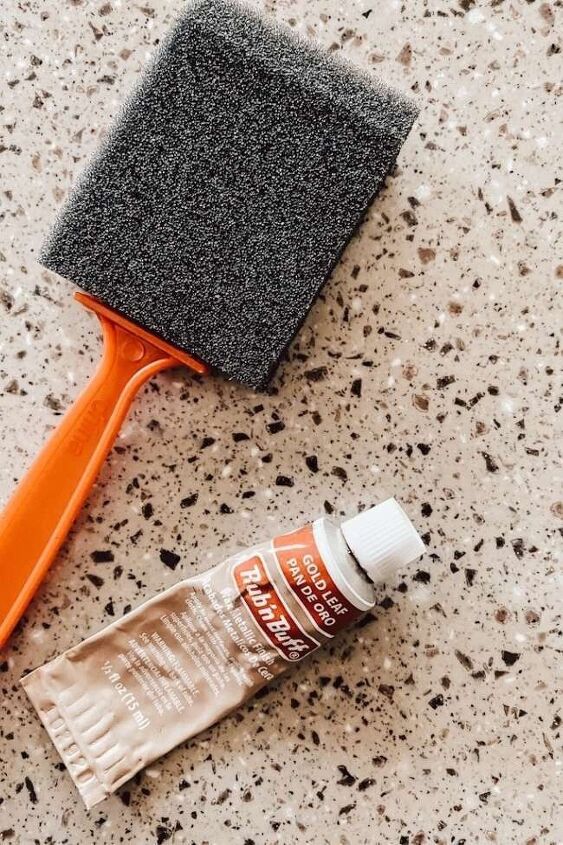
MATERIALS:
- RUB N BUFF
- CLOTH
- PAINT
- FOAM PAINT BRUSH
- BRISTLE PAINT BRUSH
- FOAM ROLLER
STEP ONE:
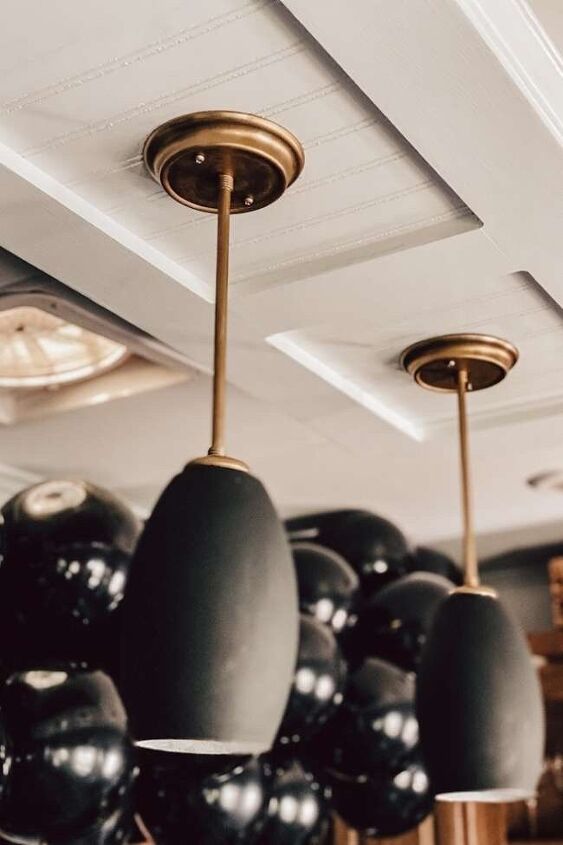
RUB N BUFF FIXTURE
This product is literal magic. I have the multipack of gold options, but the color gold leaf is my favorite. It’s the perfect understanded gold. Not to cool and “champagne” toned, which can look too silver in certain lighting. Also, not too warm and yellow/orange looking.
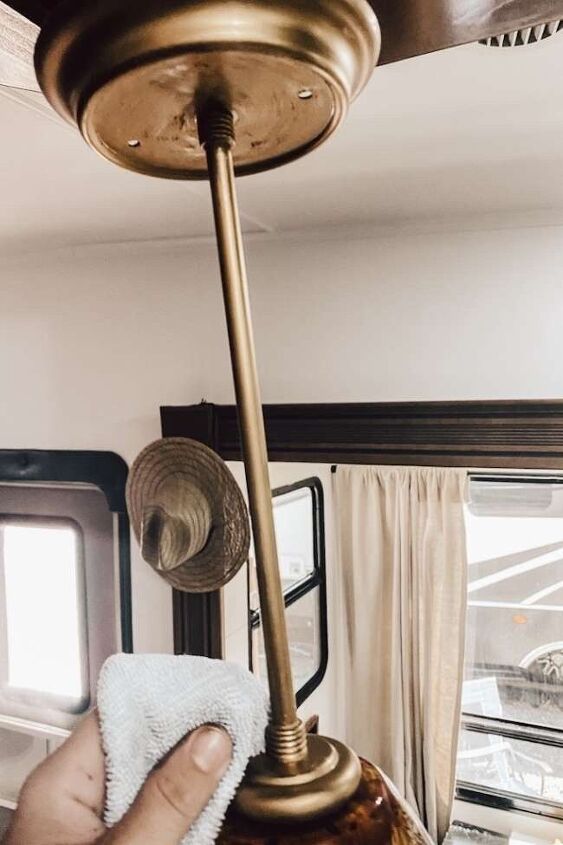
This is applied using a foam roller, then “buffed” to a shine with a microfiber cloth. You could also use any old rag you have laying around, or even a paper towel in a pinch.
Note the top part of the fixture in the above photo. I have yet to buff the product in and you can see streaks and brush lines. As you can see from the base of the pendant, these completely disappear once you finish this step.
STEP TWO:
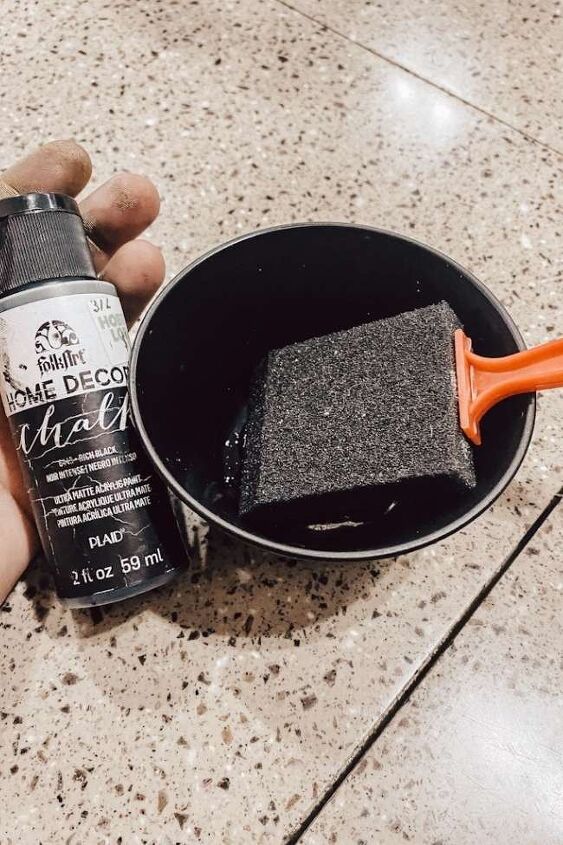
PAINT GLOBE
I applied FolkArt chalk paint, in the color “Rich Black”, to the outside of the globe. To the inside, I used the same type of paint, except in the color “White Adirondack.”
I happened to have these on hand, but they can be found on Amazon for cheap. I like them because they’re small enough to store in the cabinet, but can be used for so many different projects and crafts for the kids.
I just used a foam roller that I had on hand for this. It went on really well and dried to a super smooth and pretty ultra-matte finish.
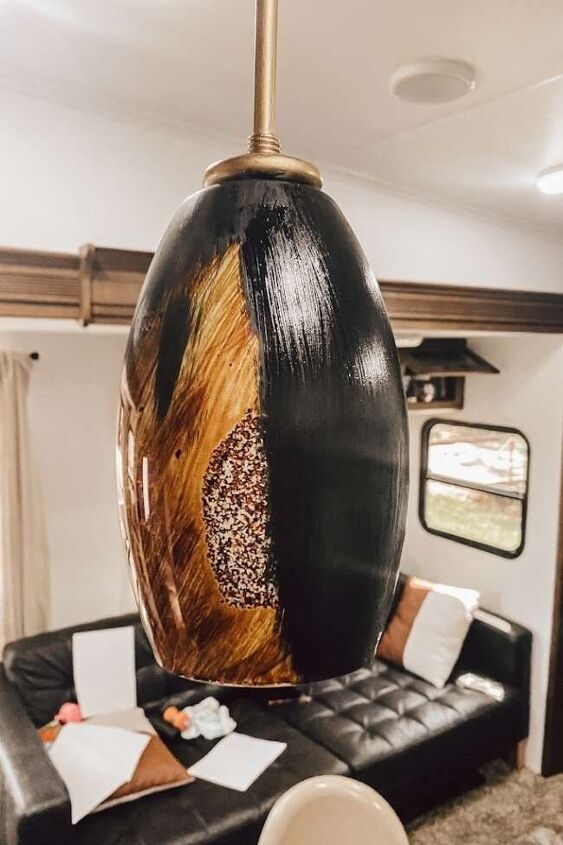
Once the first coat dried, I turned the lights on to see where I needed to focus my second coat to be sure none of the orange light from the glass was shining through.
Two coats covered the inside perfectly, while the outside needed a few touch-ups with a third coat.
This paint dries extremely quickly. Even if your fixture requires multiple coats, you will be able to complete this step in no time.
STEP THREE:
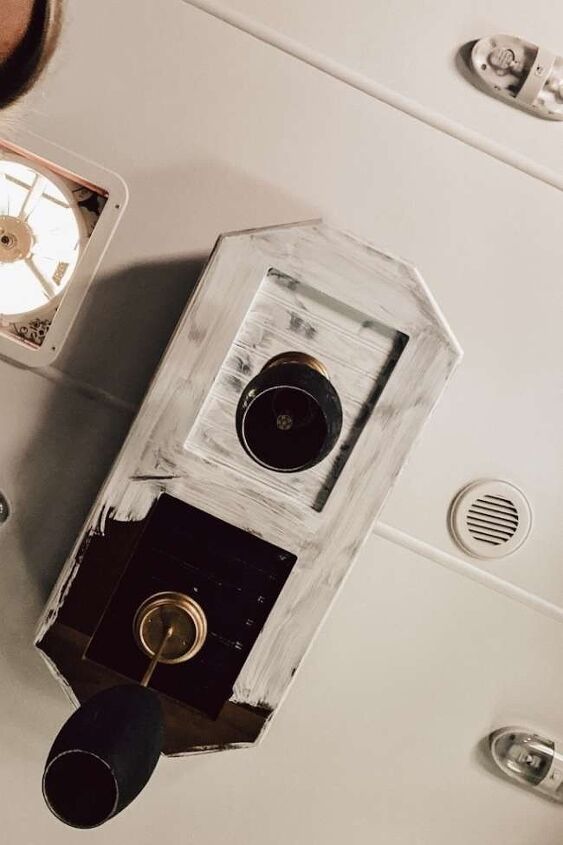
PAINT CEILING MEDALLION
This step is pretty camper-specific. If you’re painting a light fixture in a typical home, you can likely skip over this step.
I followed my tried and true method of painting in a camper, and applied one coat of bonding primer, followed by two coats of white paint in the color pure white by Sherwin Williams.
Once all parts of the light have been painted, it’s time to reassemble all of the parts and marvel at your handiwork.
This was one of those “project in a day” things for me. So, if you’re thinking about taking this on, go for it during a week where you just need a quick win, you won’t regret it!!!
BEFORE
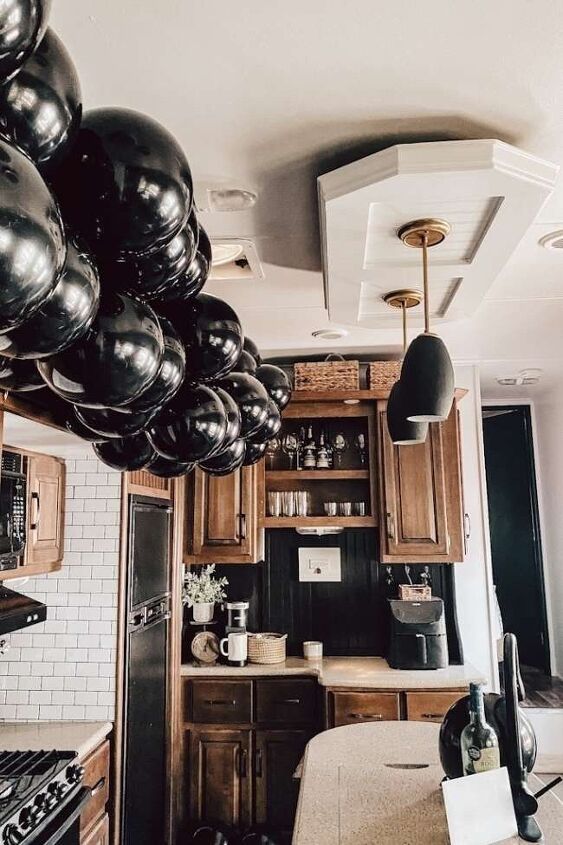
AFTER
{NOTE: I’ve been getting a lot of questions about the balloon garland in these pictures. I did NOT put it up to celebrate my newly madeover light fixture. Though that is just extra enough to be in my wheelhouse. My husband finished his first week at his new job this day & I wanted to do something a little silly and fun to show how much I appreciate him.}
Details on how to make your own also on my website.
are you brave enough to paint a light fixture in your home?
xoxo, Sydney


Comments
Join the conversation
Question: Does the heat from lightbulbs cause any problems with the shades being painted?
A complete transformation! Thanks for sharing. 😊