8 Tips to Help You Eat From Your Pantry
8 Tips to Help You Eat From Your Pantry
One of the first things I love to get organized is my home food storage and meal planning. I am blessed to be able to maintain a pretty full larder stocked with both store-bought items and home-grown and preserved ones as well.
I regularly “shop from my pantry” and plan our family’s meals according to what we already have on hand. I then either make a meal work out of just what we have or add the fresh ingredients necessary to make something yummy out of it.
I rarely (if ever) buy all the ingredients I need to make a meal at once.
In January, I tend to take things one step further and challenge myself to eat ONLY from the pantry (and fridge/freezer) for the entire month.
Okay, I’ll admit, I do tend to budget a little money for a few items like a few fresh fruits and veggies (since we don’t preserve quite enough) and dairy, specifically cream for coffee (because coffee and cream = life). But otherwise we try to make do with what we have on hand.
In the end, we save money, eat better, get our pantry organized AND sharpen our self-sufficiency skills (and gain insight into where we need to do better when it comes to our food storage which helps us with our planting and preserving later in the year).
Whether you’re ready to embark on your own pantry challenge or you just want to cut down your grocery bill or test your own self-sufficiency (not to mention your creativity in the kitchen!), here are my top 8 tips to help you eat from your pantry and plan meals around what you’ve already got on hand.
My 8-Step Plan to Help You Eat From Your Pantry (Like a Pro!)
Step 1: Overhaul your pantry, fridge and freezer
First, take everything out of your pantry.
Second, get rid of items you’ll never use and (either put them in a box to go to the food bank or toss them if they’re expired or otherwise not consumable).
If you’re not sure whether you’ll eventually eat something, consider how long it’s already been in your pantry. If it’s more than a year, probably time to toss it.
Next, put everything back in an organized manner. Be sure to put foods with faster-approaching expiry dates in front of foods with longer ones. Otherwise, how you organize your pantry will depend on your own needs, style and space. I organize mine into categories and sub-categories.
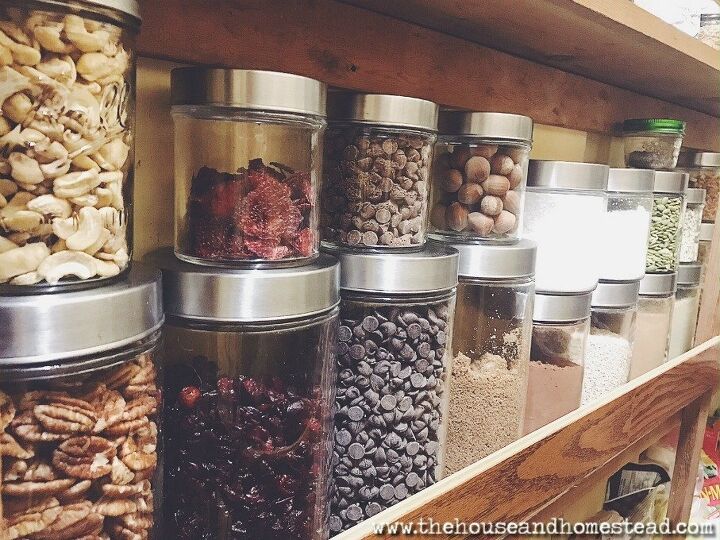
For example, on one side I have all of my dry goods, sweet condiments and treats organized into the following subcategories: dried fruit, nuts, seeds, cereals, spreads, baking ingredients, sweets and snacks.
On the other side I have mostly sauces, condiments, spices and grains organized into the following subcategories: oils, vinegars, herbs & spices, Asian foods, Mexican and spicy foods, Mediterranean food, Italian-style sauces, pasta and rice and other grains.
Once your pantry is organized it will be much easier to see what you have and take an accurate inventory.
If your pantry is deeper than it is wide or food is hard to see for any reason, you may want to do your pantry inventory as you put things back. Again, this depends on personal preference and needs.
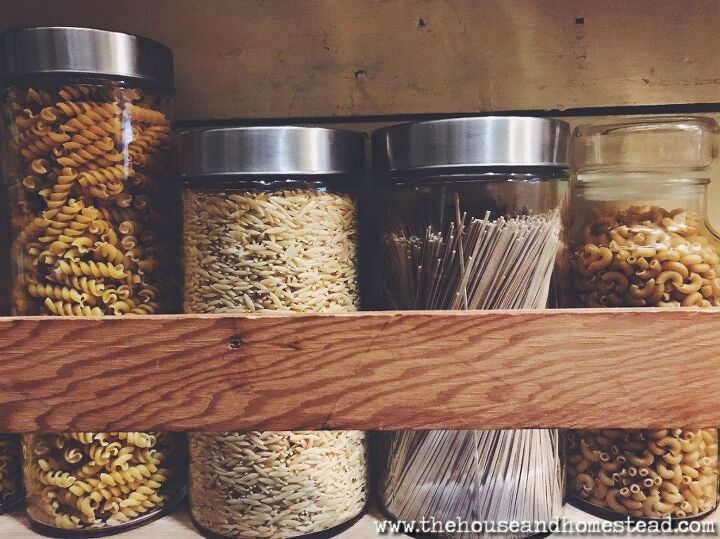
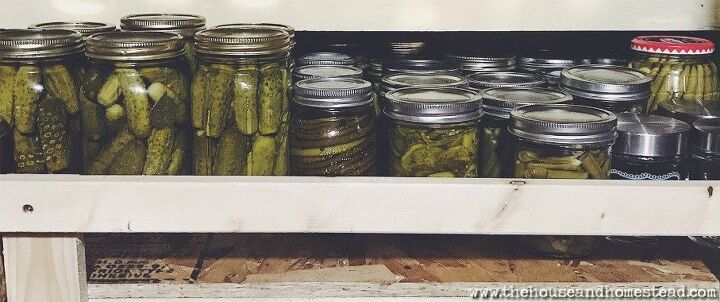
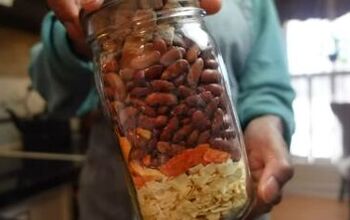
I also like to store many of my bulk and dried goods in large glass containers so I can see what I have and how much of it I have at all times. I buy my storage containers from the dollar store for a buck or two a piece and just keep adding one or two to my collection every time I shop there. Mason jars work great too!
Once you’ve completely overhauled and organized your pantry, do the exact same to your fridge, and then your freezer. (I organize my fridge by putting all of my leftovers and most perishable items on the top shelf in plain view so they have a higher likelihood of being eaten).
Step 2: Write out a complete inventory
Go through everything in your pantry, fridge and freezer and mark every item on an inventory list so you know exactly what you have and how much.
Check bottles to see how much is left in each one. Open boxes of cereal to determine whether you actually have a whole box or just a few crumbs hiding in the bottom. Count every onion in your cold storage and take note of all of the leftovers that need to be consumed before they perish.
Prioritize which foods need to get used up before others. Leave no potato unturned!
You can download my free Pantry, Fridge and Freezer Inventory Checklist by clicking the link and then finding them under the “Kitchen & Pantry” section of my free resource library. I’ve created categorized templates for each one as well as blank templates for you to fill in as you wish.
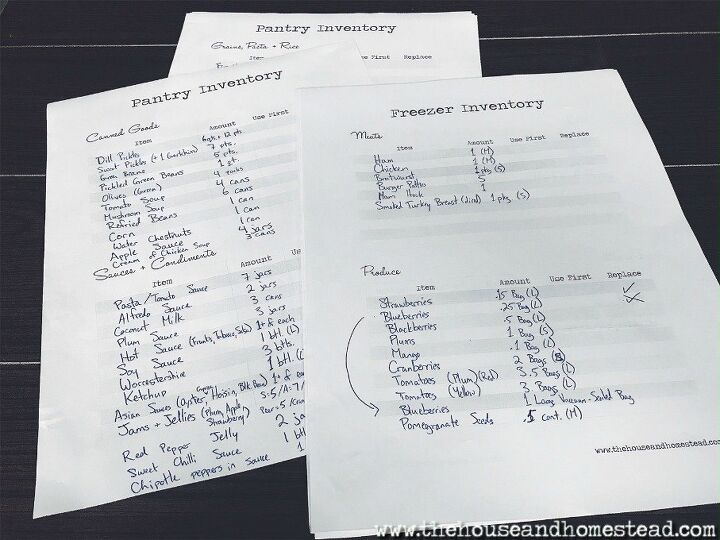
Here’s an example of my pantry, fridge and freezer inventory checklists.
I like to record everything I have and how much of each item I have left, so I write the item (ie. white flour) and then I estimate how much I have left and fill in the amount.
So I might estimate I have about 2 quarts of flour left, or half a bag. Or 1.25 large bottles of olive oil if I have one full one and another with a little bit left. That’s just the system that works for me and my brain.
After I write out my list, I decide if there’s anything I need to use up first. This mostly applies to items in my fridge that are perishable. I put one checkmark under “Use First” if it’s something I should use in the next few days or week and I put two checkmarks if it’s something that needs to be used right away (like the next day or two at the most).
Finally, I decide what needs to be replaced when I do finally hit the supermarket again. I put a checkmark under “Replace” for any item I’m running low on that I use a lot of and/or use frequently. This makes writing out a shopping list a breeze!
Step 3: Write a list of meals your family eats regularly
It’s funny how you can take a full inventory of all of the food you have and still not have any idea what to make with it. This is why I love to write out a list of all the meals we cook and eat regularly so that I can get some inspiration for using up the ingredients we have on hand.
Our list includes pasta, stir fry, rice bowls, sandwiches, soups, salads, tacos, “meat and potatoes,” breakfast foods and casseroles. Once we made this list it was much easier to plug in the ingredients we have to make these types of dishes. For example, this week we’re doing a turkey rice bowl, spaghetti squash lasagna, pasta with pantry ingredients from our “Mediterranean” section, bangers and mash and egg and potato hash.
You can also get my 31 Days of Dinner Ideas cheat sheet from the Kitchen & Pantry Resources section of my Free Resource Library.
Step 4: Write a list of meals you can make using the ingredients you have on hand
If you’ve completed the other steps until now, this part should be pretty easy. What do you have on your pantry, fridge and freezer lists that can be made into dishes your family loves to eat regularly?
If you have a lot of turkey leftover from Christmas, for example, try substituting it for chicken in a dish that you usually use chicken in. Or use the bones to make bone broth and use that as a base to create a soup with other ingredients you have to use up. Or make turkey tacos. Or turkey shepherd’s pie with leftover gravy, veggies and mashed potatoes.
Got some pasta and some sauce? Throw in any meat or veggies you have and make it a meal. Or bake it with cheese and make some super easy and frugal homemade bread to go with it. Or just eat the pasta and the sauce if that’s what it comes down to (at least throw in some of your own herbs and spices).
Step 5: Write out a weekly meal plan
Once you’ve got a list of meals you can make, plan out your meals for the next week by plugging them into the different days of the week. I like to assign simpler meals like pasta and stir fries to weeknights when life is busier and keep meals that require longer cook times and/or more prep work for the weekends.
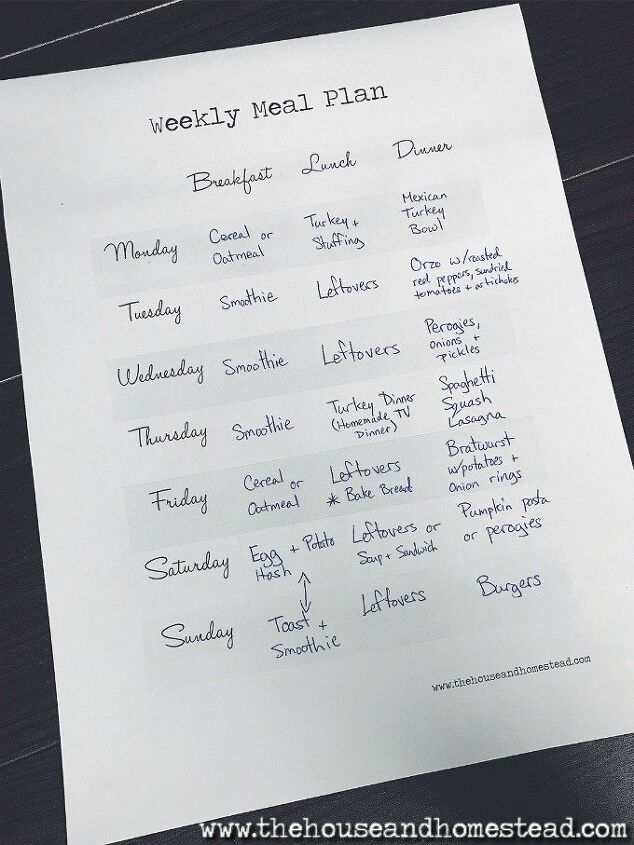
Write out all of your meals for the next week and plan to do so again the following week with whatever’s left. Plan leftovers for most lunches (if possible) and don’t waste a crumb!
For more help getting organized, you can also find my Weekly Meal Planning Template under the “Meal Planning” section of my resource library.
Step 6: Buy only what you need
Do your best to use up what you have on hand and get creative with your ingredients. Omit ingredients that aren’t necessary or find clever substitutes on your inventory lists. Only replace what you can’t live without (for us that’s things like eggs and cream for coffee… We drink a lot of coffee around here).
We also replace some fresh produce items like bananas, lettuce and other fresh fruits and veggies so that we’re sure to incorporate the nutrients from these items in our daily meals. But we try to use up the produce we already have first so that nothing goes to waste.
Step 7: Create a running shopping list and keep an eye out for deals
As you go through your inventory lists, put a checkmark under the “Replace” column for each item that is running low, out-of-stock or otherwise needs to be replaced soon. Then write out all of those items on one big running shopping list.
While I haven’t actually implemented this yet, I like the idea of using a white board in our kitchen like I’ve seen many cooks do in restaurants I’ve worked in. Items get added to and erased from the whiteboard as they get used up and replaced. It’s super functional and having it up on the wall makes it visible and accessible to use on a regular basis.
Check flyers for deals to stock up on essentials when they go on sale. As you find deals, stock up on those items if your budget allows so you never run out.
Related: 10 Tips to Help You Save Money at the Grocery Store
For items that you know you’re going to have to pay regular price for because they don’t tend to go on sale, decide what store you think will have the best deal and put those items on your shopping list for that store with an estimated price instead of a sale price. For example, I buy my milk and cream at Costco because their regular price is better than the other supermarkets around here. But I buy my cheese elsewhere because I don’t need as much of it and can get a smaller amount for much less money somewhere else.
Step 8: Stock up and cut down your grocery bill as you are able to
Build up that pantry! Set a little money aside each month to buy a little extra of the foods your family loves most when they’re on sale.
- Buy in bulk to save money.
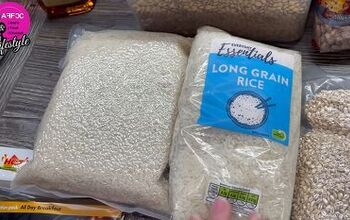
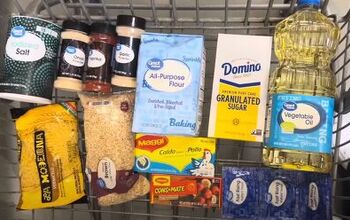
- Stock basic and versatile ingredients like flour, sugar, salt, spices, rice, oatmeal, oils, etc. that can be made into or used in many different meals.
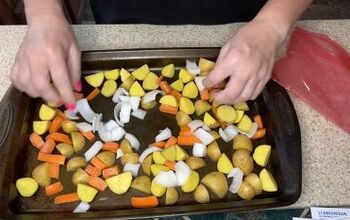
- Stock up on fresh produce when it’s in season and preserve it for later use by freezing, canning or drying it.
Cut down your regular grocery bill by choosing at least one thing to stop buying and start making at home. And consider growing some of your own food to eat and preserve (if you don’t already).
And last but not least, budget, budget, budget. Decide on a comfortable weekly or monthly budget for food items and plan your meals to fit within that budget by making use of ingredients you already have at home.
Soon enough January will be over and you’ll be able to afford a nice dinner out with all of that money you’ve saved! And that’s what Valentine’s Day is for;)
Bonus Step 9: Join the Homestead Pantry Challenge!
As I write this, it’s currently January, which means it’s time for our annual Homestead Pantry Challenge!
If you’ve never done a pantry challenge before, the basic gist is that you try to eat only from the food you already have on hand and avoid spending money at the grocery store, on dining out/take out etc. for a specified period of time (in this case, one month).
But the beauty of this challenge is that it’s a personal challenge with flexible “rules,” so anyone can join in, even if you don’t have a homestead or a pantry full of food!
Maybe your goal is to eat through the food in your pantry that always gets pushed to the back so that it doesn’t go to waste.
Or maybe it’s to push yourself to learn new recipes and cooking skills.
Or maybe it’s to put your self-sufficiency to the test and gain skills and confidence knowing that you and your family can rely on yourself to provide.
You can go all in or simply use this challenge as a way to get organized and know exactly where you need to focus your food storage efforts this coming year.
No matter your reasons for doing a pantry challenge or how far you want to take it, I encourage you to join me, along with hundreds of other challenge participants, by registering right here.
It’s totally free to participate and is a great way to kick off the new year.
What are you waiting for? Join the Homestead Pantry Challenge now!
Looking for some more inspiration??
Head over to Youtube to see a full tour of our pantry and what we typically eat in a week during a pantry challenge (it might surprise you!)
Are you participating in the Homestead Pantry Challenge this year? What are your biggest goals for your own pantry challenge, or what have been your biggest takeaways from past years? Let me know in the comments below!!


Comments
Join the conversation