15 Easy DIY Spring Decor Projects to Make With Thrifted Items

Let's create some DIY spring decor. I'll share 15 of my favorite spring DIYs using easy-to-find thrift store items and materials from around the house. If you're ready to add a touch of spring to your home, let's get started.
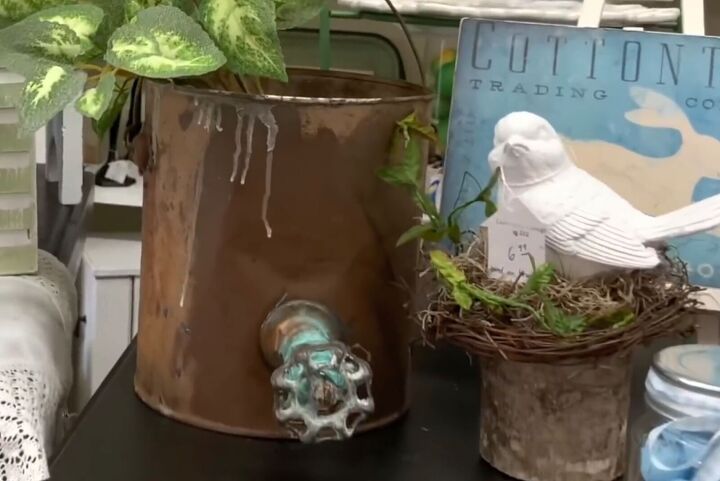
1. Paint bucket planter
Take an old paint can and a faucet and clean them. Mix two-part epoxy, apply it to the back of the faucet, and attach the faucet to the can. It cures in 4-6 hours.
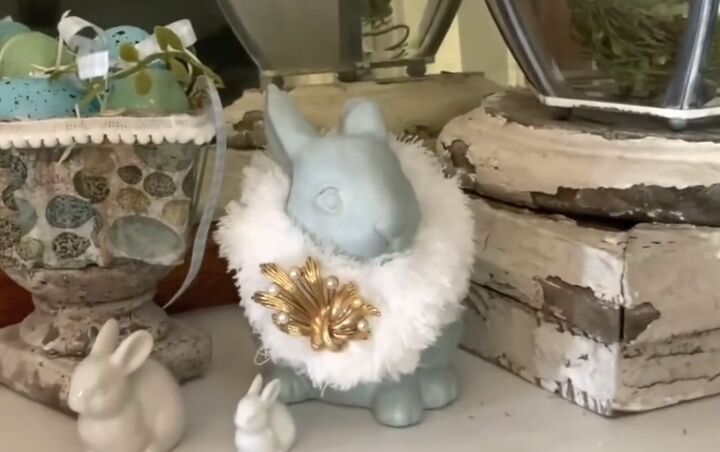
2. Furry rabbit
Spray-paint a thrifted rabbit blue and apply white wax using a wax brush. Cut down a fuzzy mop head and wrap it around the bunny. Finish it off with a brooch.
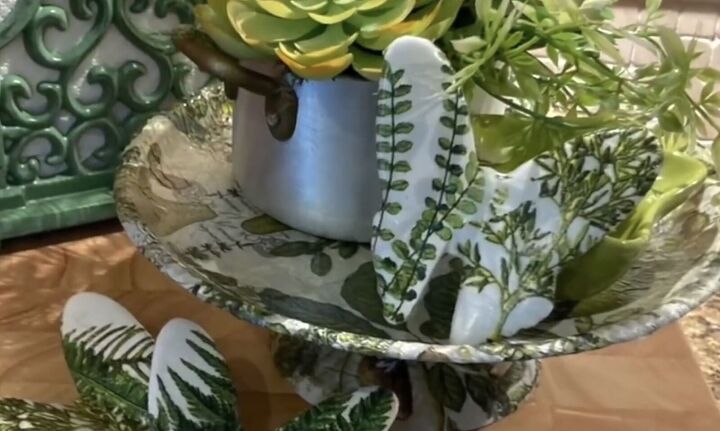
3. Botanical butterflies
Clean and paint ceramic butterflies white, then decoupage them with a botanical print napkin, working with the printed top ply.
Apply a thin coat of Mod Podge and small pieces of the napkin. Let them dry, flip them over, and apply napkin to the backs.
Once dry, spray with a clear top coat. Use E6000 glue to attach clips to the backs.

4. Floral jars
Cut apart a Dollar Tree floral bush and put it in a jar. Tie a bow around the top with jute twine. Make a second floral jar using angel hair vine, shaped in a circle, to create a small bird's nest. Attach it to the front of the jar using florist's wire.
Hot-glue moss and small bird eggs into the nest. Wire a pussy willow stem to the back, then pushed the stem into the jar. Hot-glued the nest to the front and add a twine bow.
5. Spring art
Paint pressed wood blocks with chalk paint. Print four vintage spring images, and apply Mod Podge to the back of the images and the wood block. Distress the wood and use clear wax to seal the chalk paint and the paper image; then, spray three light layers of clear top coat.
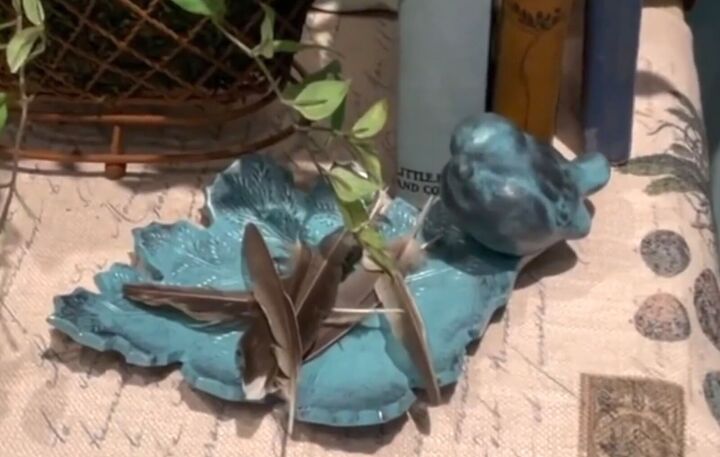
6. Metal bird tray
Spray paint a metal leaf and a ceramic bird, then attach the bird to the leaf with E6000. Let the glue dry overnight, then brush on agave blue chalk paint and lightly rub it off.
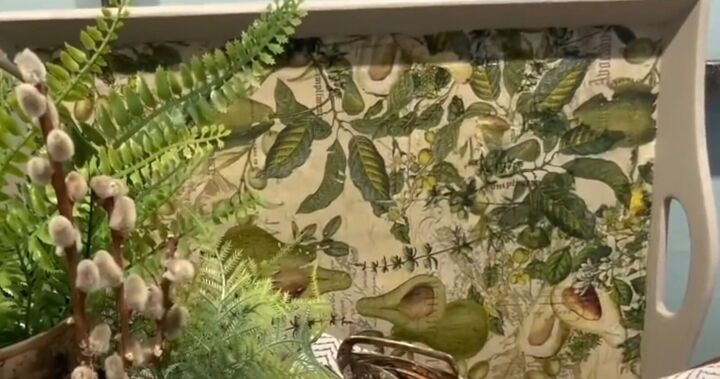
7. Botanical tray
Separated the top layer from a three-ply napkin, brush the base of the tray with Mod Podge, then apply the napkin, using a utility knife to cut off the excess when dry. Use three light layers of clear top coat to seal.
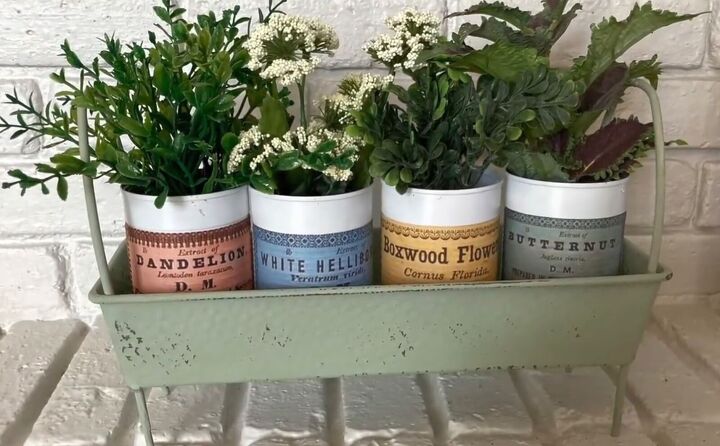
8. Metal planter
Use a bread pan and two lamp harps with the extra pieces removed. Using a drill bit about the same diameter as the lamp harp, drill holes in the four corners of the baking pan.
Insert the legs of your harps through the holes. Fill in around all four holes with hot glue. Paint the pan with green chalk paint and, when dry, distress it with fine-grit sandpaper and apply clear wax.
Spray-paint four tin cans white and print out vintage shaker labels, then decoupage them to the side of each can. Fill each can with packing styrofoam and top it off with coffee, then add greenery to the styrofoam.
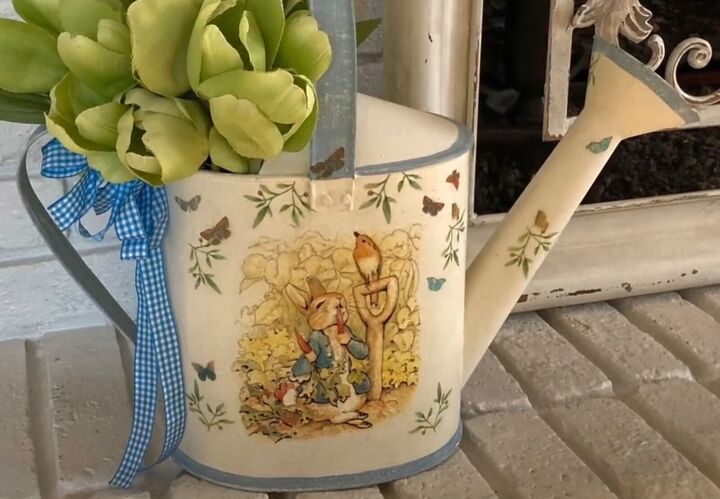
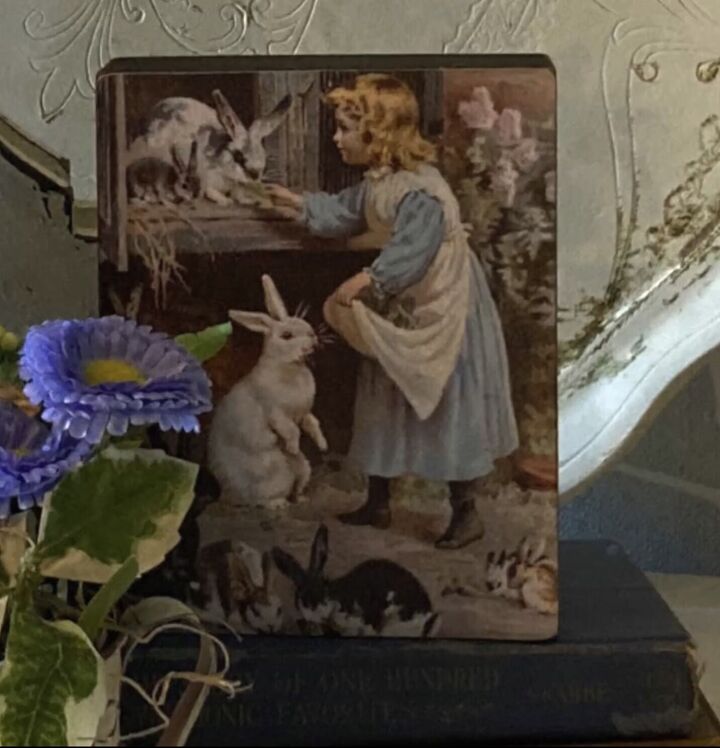
9. Spring watering can
Painted a watering can with cream chalk paint. Then, separate a two-ply napkin, setting aside the pattern portion for later, and tape it to a piece of cardstock. Run it through an inkjet printer, printing a Peter Rabbit image.
You can use this process again to create another image for the back of the watering can. Brush on a thin coat of Mod Podge and apply the napkin images. Finish with a top coat of Mod Podge.
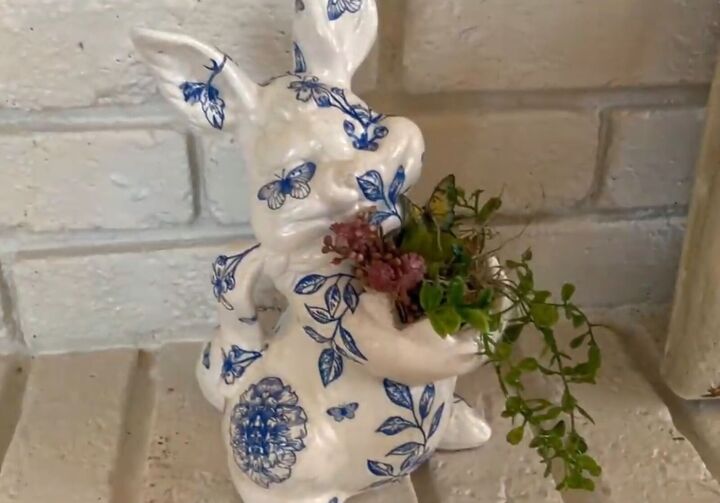
10. Decoupage bunny
Spray-paint a ceramic rabbit with white and cut out images from a patterned napkin.
Apply Mod Podge to the rabbit and then carefully apply the cutout images. Once adhered, go over it with Mod Podge. Finish with a piece of styrofoam, some greenery, and flowers in Spanish moss.
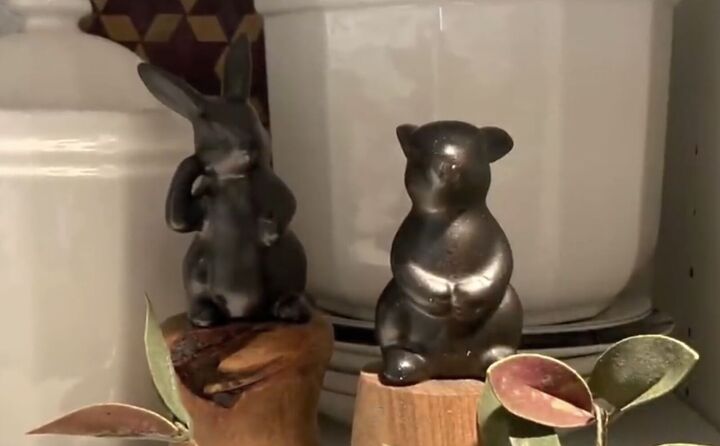
11. Chocolate bunnies
Spray-paint ceramic bunnies with oil-rubbed bronze spray paint. Use a miter saw to cut two slices from a furniture leg's rounded lower leg section, then sand them down to the bare wood.
Using an orbital sander, apply wood stain to the pieces. Let it dry overnight, then glue the bunnies to the wood using E6000.
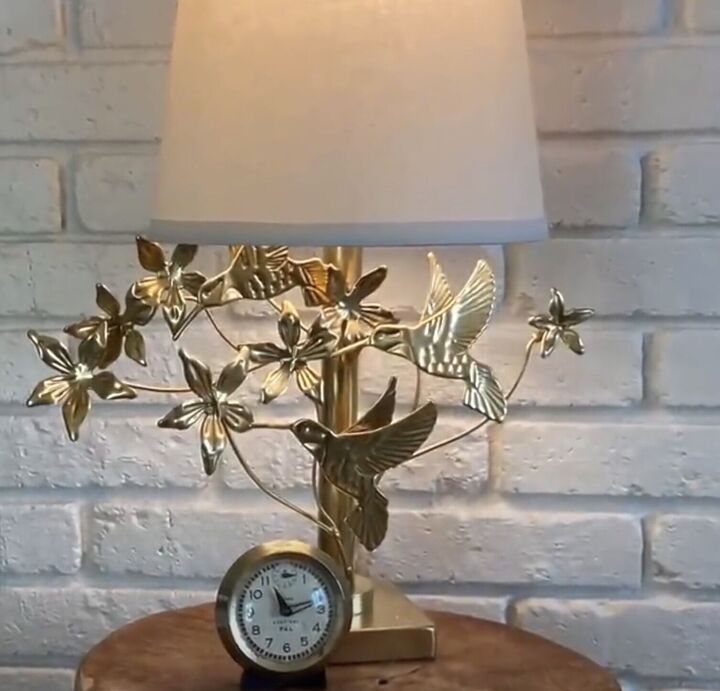
12. Hummingbird lamp
Merge some metal hummingbird wall art with an old lamp. Clean both and painted them with gold spray paint. Once dry, drill a small hole in the lamp's base on the opposite side, away from the cord.
Apply E6000 glue to the hole and the end piece of the metal wall decor. Push the end into the hole and rearrange the branches.
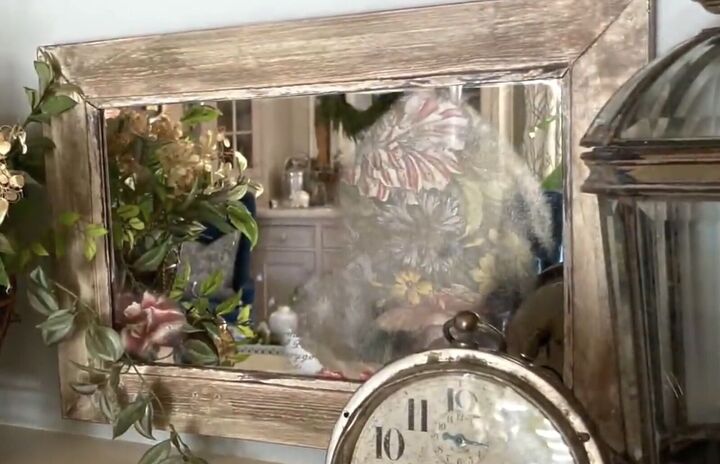
13. Mirror
Disassemble an old mirror. Paint the frame with ivory chalk paint and distress the edges with 220-grit sandpaper. Then, apply Valspar antiquing glaze.
Use an orbital sander on the back of the mirror to age it, place an IoD transfer behind the mirror, then add a few transfers to fill empty spots. Attach the IoD transfer to the cardboard backing.
Using a glue stick, put the mirror and cardboard backing back into the frame and fold down the staples. Attach a sawtooth hanger and apply one small floral IoD transfer to the corner of the mirror frame.
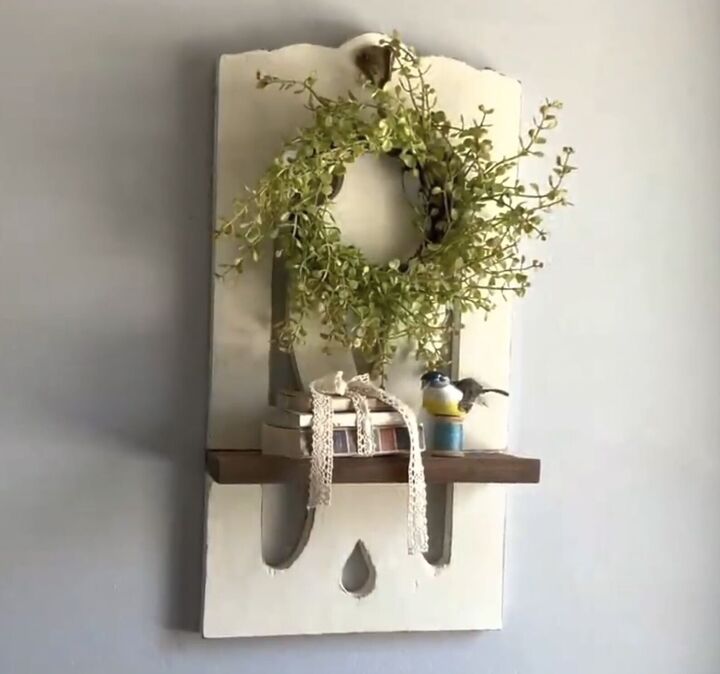
14. Architectural salvage shelf
Cut a scrap piece of wood to the width of one of the broken decorative table pieces and then cut the decorative piece into two separate pieces. Paint them with cream chalk paint and stain the scrap piece of wood with Waverly antiquing wax.
Sandwich the stained piece of wood between the two cut pieces of the decorative board and glue them together. Clamp them together using construction adhesive and wood glue, and let them dry overnight.
The next day, lightly distress it with sandpaper and apply clear wax to the entire piece. Attach a sawtooth hanger and a hook to the back to hang a small wreath.
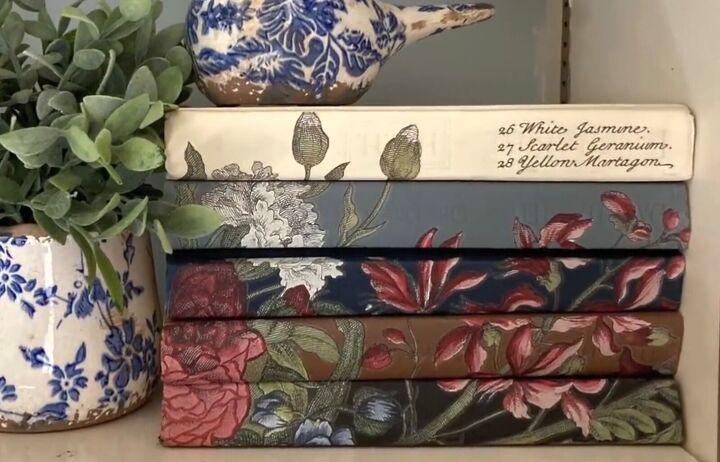
15. Floral book set
Remove the dust jackets from thrifted books. Then, use Goof Off to remove the printing along the spines.
To decorate the books, apply a floral IoD transfer and line up the transfer on the book bundle, then cut the image into separate strips to fit on each of the five books. Add some typography from the transfer to fill in some space.
DIY spring decor
I hope these ideas inspire you. What spring DIYs have you done? Share in the comments below.


Comments
Join the conversation