The Best Ways to Use Scheduling Whiteboards & Avoid the Mess of Ink

Do you have a scheduling whiteboard you don’t use anymore because the ink was always getting on your hands or walls and causing a mess? You can repurpose a whiteboard to help you plan your time, visions, and goals without the mess of ink.
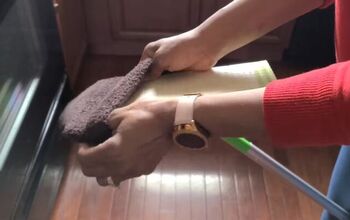
I’ll show you how to set up a whiteboard using reusable sticky notes made with a label maker. I’ll also show you in this tutorial how to get ink off of your walls, frames, and hands, and even how to get old ink out of a whiteboard.
1. Using sticky notes
The trick to setting up your whiteboard and keeping it clean is to use sticky notes. Sticky notes easily stick and unstick to whiteboards so you can use them over and over again for repeating tasks.
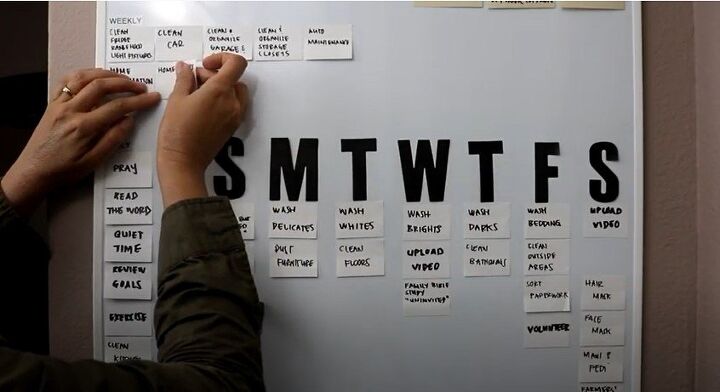
Scheduling whiteboard for weekly tasks
Here are sticky notes used for a whiteboard schedule of weekly tasks.
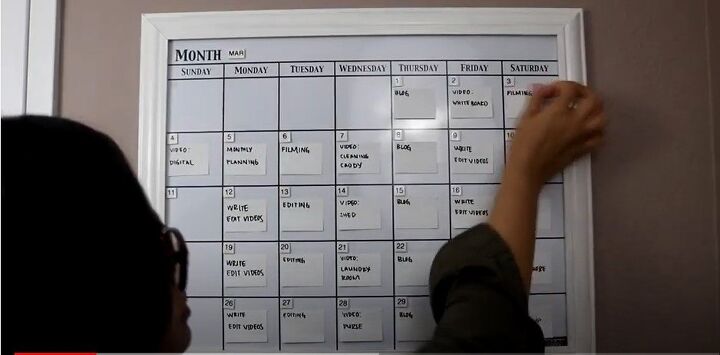
Scheduling whiteboard for monthly tasks
Here sticky notes are used on a whiteboard of monthly tasks.
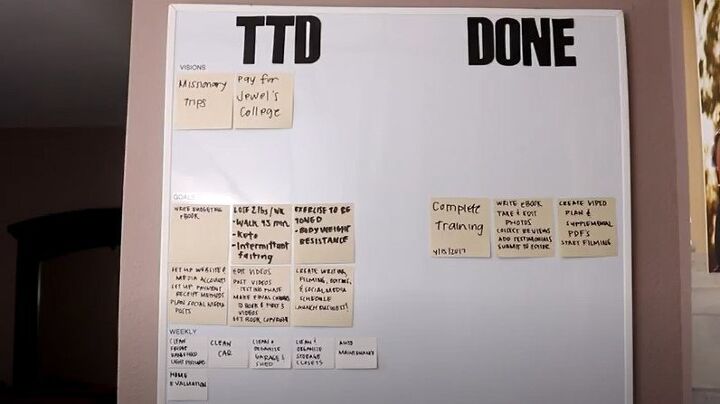
Visions and goals board
This whiteboard uses sticky notes to keep track of visions and goals.

2. How to set up a monthly calendar
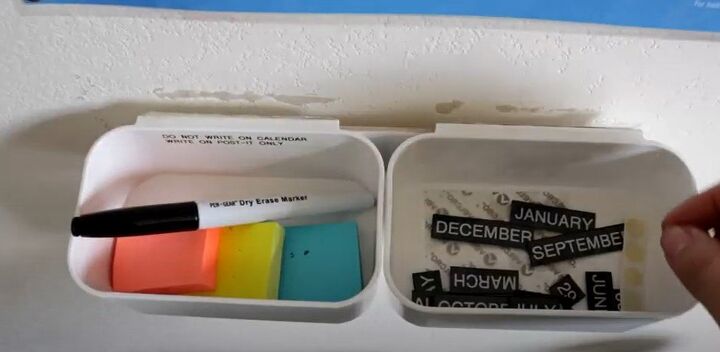
Here’s how to set up a monthly calendar so you can easily move the months and days around as they change. You’ll need a monthly whiteboard calendar, cardstock, Velcro dots, and a label maker.
You can also use premade letter and number labels or print numbers and letters on your cardstock. If you prefer, you can write on your cardstock.
Use label maker tape
I’m using label maker tape because it’s durable. Packing tape will also protect the front of your cardstock.
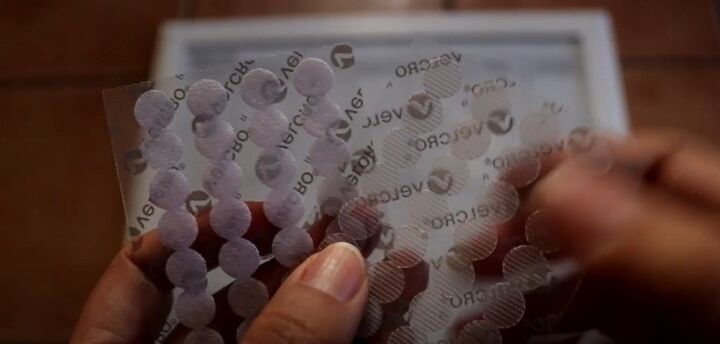
Velcro dots
Velcro dots can be found at Michael’s or other craft stores. I used a coupon for these and I only paid $1.88.
Choose a font size
To create your month and number labels. Choose a font size that will fit the Velcro dot.
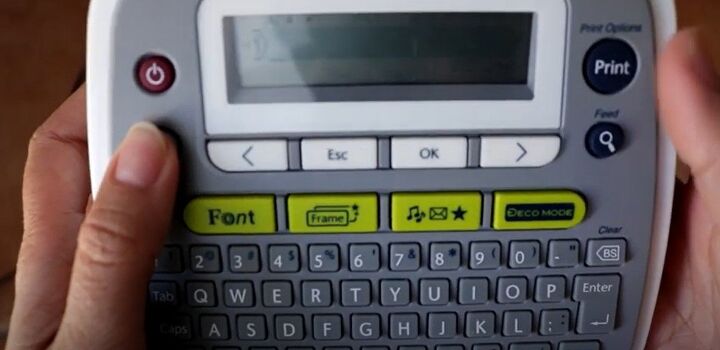
Here’s my label maker.
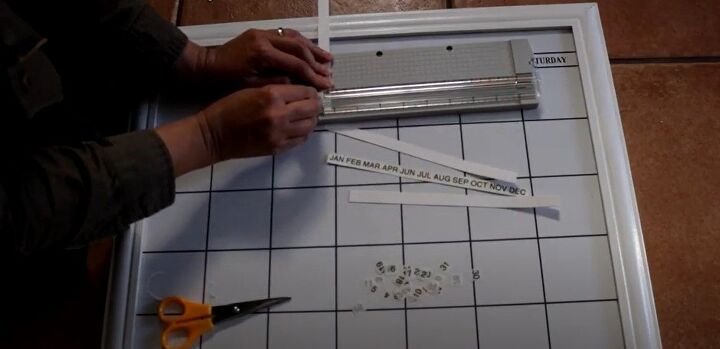
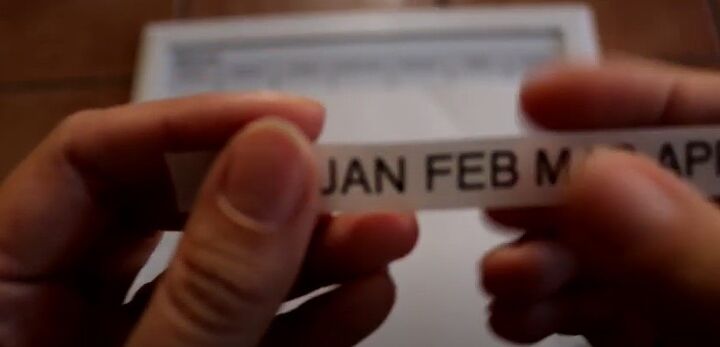
Cut the card stock
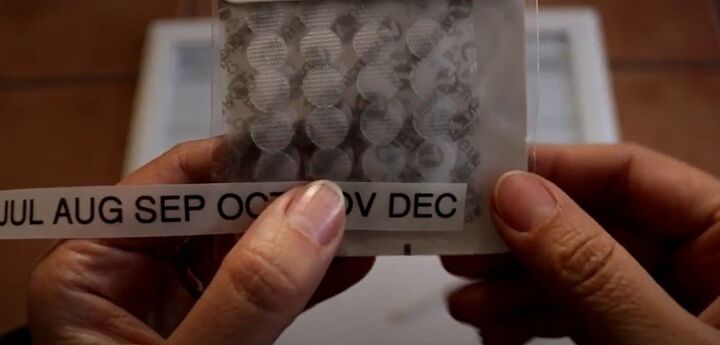
I cut the card stock into squares that are the width of the label tape for the numbers. For the months, you can stick the whole label tape down in one strip on the card stock and cut the months apart.
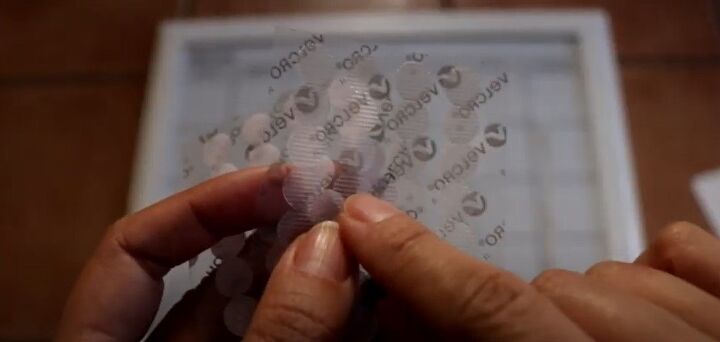
Apply the Velcro dots
The Velcro dots have a clear grippy side and a soft white side. You’ll want to stick the clear grippy side to the white part of the board and the soft white side to the cardstock.
On the whiteboard, I applied two dots for the month and 35 for the days. You only need to add one dot to the back of the month labels. You will want to let the Velcro dots cure on your whiteboard and card stock for 15 minutes to give the dots the chance to adhere properly to the surfaces.
You will be able to move these months and days around super easily and with no mess.
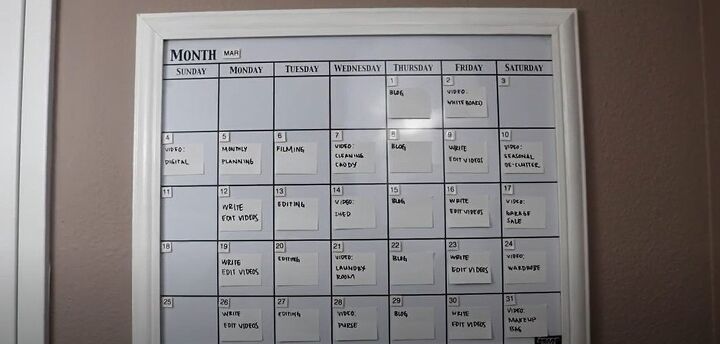
I use my monthly calendar specifically for video planning and writing. You can also use your monthly calendar to keep track of appointments and events.
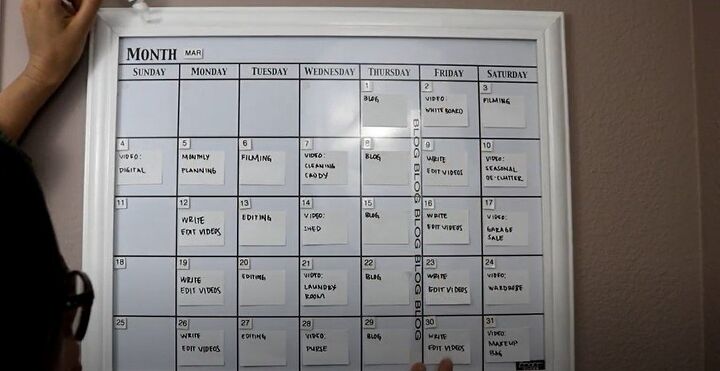
Blocking out days
For any tasks you do consistently on certain days, you can place a strip of label vertically down that day of the week. For example, I keep every Friday open to work on my blog. Using a strip down the day keeps the block of space open for another sticky note with another task you need to do that day.
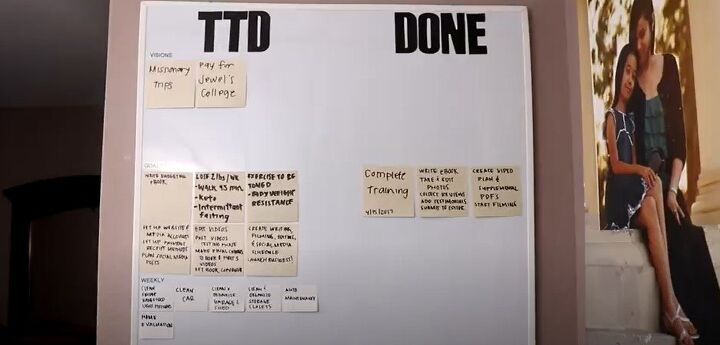
3. How to set up a visions & goals board
I use one large board for my visions, goals, and weekly/daily tasks. It looks different from my monthly whiteboard.
The top half is used for Things to Do (TTD) and Done sections. Your visions will be things you hope and pray for–you can’t necessarily work towards them by taking action but by putting them on the board, they are always in your thoughts. Your goals will be things you can physically work towards, even if you do it little by little.
There’s such a sense of satisfaction when moving the sticky note from the TTD section to Done. If you want to make your board more visual, you can put up images.
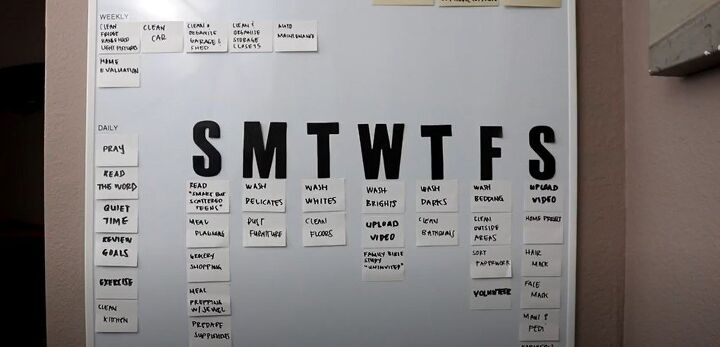
4. How to set up a weekly/daily tasks board
The bottom half of the board is used for weekly and daily tasks. I use sticky notes here for things I need to do weekly and daily. The daily section is a small area on one side of the board and the weekly is a much larger section.
The best ways to use a scheduling whiteboard
Spending a little bit of time setting up these whiteboards can save you a lot of time and will help you stay on top of planning. I hope these whiteboard schedule ideas were helpful. Please let me know how you use your whiteboards in the comments below.


Comments
Join the conversation
You've done a nice video however as someone trying to listen to you speak, and you have a naturally soft voice I had a hard time hearing you over the music. I don't have a hearing problem and don't need nor wear hearing aids. I'm sure you chose popular music for the background. BUT the purpose of the video is how to set up a whiteboard NOT the latest happy tune. There was no way to shut off the background music and just listen to your great suggestions beyond turning off all spoken/music and go with close captioning. Keep up the good work and either speak up or turn down the music or maybe a combination of both.