7 Crafty Ways to Use Dollar Tree Fabric This Fall

I cannot wait to show you these 7 brilliant reasons to buy Dollar Tree fabric. I always buy fabric from Dollar Tree because it's beautiful only $1.25 but I usually just have it sitting on the shelf. When I saw these beautiful new fall fabrics in the store I figured I needed to do something with them.
I hope you enjoy these DIY fall crafts and that they give you tons of inspiration for the season!
1. DIY picture frame
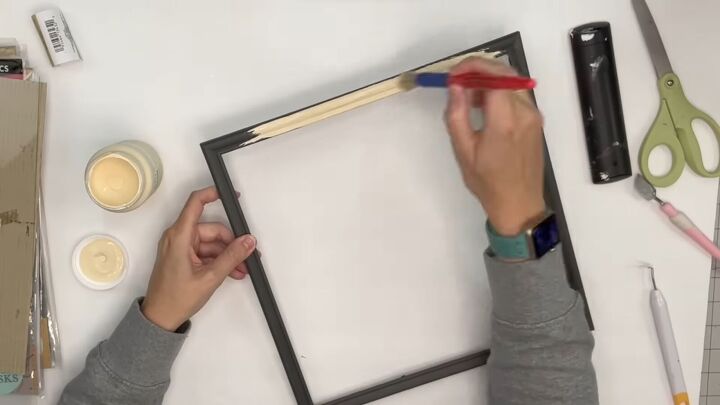
We're going to start with a picture frame. Take out the glass and cardboard. I’m going to grab the shade Cashew by Waverly and paint the frame. I really like this color because of its vintage vibe.
Next, put the glass on top of the fabric, and cut the fabric, leaving a small overhang on every side. I'm putting a line of hot glue on the glass edges and then folding the Dollar Tree fabric onto it as tightly as I can.
Now, I'm going to take my Iron Orchid stamps, put ink on them, apply them to our fabric, and roll over them to print a pumpkin.
I'm going to put a plastic mask over the pumpkin shape before applying the leaf stamp so it looks like it's going behind the pumpkin.
Now, I'm going to take these cursive stamps. You need to overlap the lettering as you are stamping. Don’t forget to use the pumpkin mask.
Put the glass back in the frame, and it’s done!
2. DIY toilet paper pumpkins
We're going to spread out the Dollar Tree fabric, place the toilet paper roll on it, and tuck the ends into the middle of the roll.
Then, we're going to grab a craft stick, along with a small leaf, and put it inside.
This is so simple, but once you accessorize, it makes a big statement.
3. DIY pumpkin craft
We are going to take cardboard shaped like a pumpkin and cover the back with craft paper (because it has a previous design on it).
Now, I'm going to take my painter's tape and add stripes, then paint the pumpkin with Cashew by Waverly.
After this dries, we're going to peel that painter's tape right off. Now we're going to cut notches in the Dollar Tree fabric to allow us to rip strips. Then, we'll make fabric flowers with the strips.
I'm gluing a starter piece to the pumpkin, then twisting the fabric around it in a circle, gluing as I go.
I decided I wanted to add a little bit of greenery, so I glued on a leaf and wrapped my fabric over it. Now, I'm going to take another fabric color and make another flower.
I added a pearl and two little gemstones. What's fun about crafting is, if it doesn't completely go your way, you can change it as you go. I also made a bow for the top.
This is how beautiful it turned out.
4. DIY plate decor
I'm taking a glass plate from Dollar Tree and putting Mod Podge on the back. Now, take the fabric of your choice and smooth it out on the back.
I cut the excess fabric off after the Mod Podge dried and put another Mod Podge coat on the bottom of the fabric. I just took my finger and went around the plate to smooth down the frayed edges.
I grabbed my decals and put them on the plate. Look at how cute this is. This was so easy to create.
5. DIY fall cutting board
I'm going to pop these thumbnails out of this Dollar Tree cutting board. We are going to reuse them, so save those.
I'm going to grab scrapbook paper, and press around the square in the middle, then cut the paper to shape.
I'm going to glue the paper on top with Mod Podge. Then, I'm going to put those push pins back in. If it's hard to find the original holes, you can hammer or hot glue it in.
I'm going to take this image of a vintage pumpkin spice jar and Mod Podge it onto the wood, then glue the wood to the cutting board.
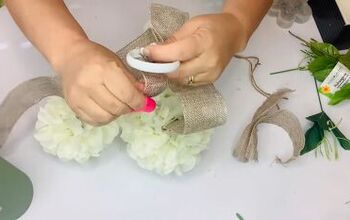
Now, we are going to make a fabric bow. First, cut notches on the Dollar Tree fabric and tear it, so it has frayed edges and looks tattered and rustic. I'm going to put the fabric strips around my hand to make a circle, making sure to leave tails.
I'm going to take another piece of fabric and tie the circle tightly. Now, mess up the ends of the fabric.
Hot glue that to the board, and look at how adorable this is.
6. DIY fall tray
Grab your Dollar Tree fabric and cutting board (or you could use any wood surface). I'm going to trace the board on the fabric and cut it to shape.
Use Mod Podge to glue the fabric to the cutting board. Apply it in sections, while holding the fabric with your other hand, so it lies flat. After it dries, put Mod Podge on top of the fabric.
After that dries, I am going to glue wood beads “legs” to the bottom of the tray, with wood glue.
I am also gluing on a finger bow and an orange button on top. That looks so cute staged with accessories.
7. DIY fall book stack
I'm taking a book and hot gluing one piece of the fabric to one side of the cover. Then, I'm going to flip the book over and cut the excess fabric off (leaving a small amount to glue on the other side of the cover).
Now you're going to go to the other side of the book cover and pull your fabric towards you. Apply hot glue and stick the fabric onto the other side of the cover. Pull the fabric and close the book towards you as you glue, to make sure it is pulled tight. Then cut off the excess fabric.
After I'm done covering three of my books, I'm going to wrap my book stack with twine.
I tied a knot on top and added a tag and some leaves. You guys, this turned out so stinkin’ cute.
Fall DIYs with Dollar Tree fabric
Fall is a great opportunity to experiment and get crafty. What do you do to celebrate fall? Let us know in the comments.










Comments
Join the conversation
Very cute ideas! Definitely going to try these out. Thanks for sharing!