How the GreenStalk Planter Helped Me Save Money and Space in My Garden

Container gardening is great, but it doesn't maximize space, and it isn't efficient, so I finally decided to purchase a GreenStalk planter.
I'm a homestead dreamer, grafting myself into a more natural, self-sufficient lifestyle in a small space and doing it in my spare time.
That means any move I make is centered around taking readily available conventional information about gardening and tweaking it for those of us who are in small spaces.
A GreenStalk planter is going to save you money and space.

1. Set the planter up
A GreenStalk planter comes carefully packaged with everything you need to assemble a garden without tools and minutes.
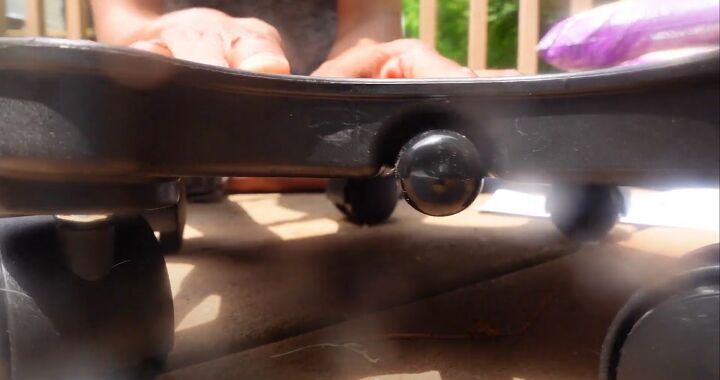
Once you assemble your planter, secure it to the base by locking the feet of the planter to the design of the mover.
You'll hear the unmistakable click that lets you know things are secure.
2. Begin planting
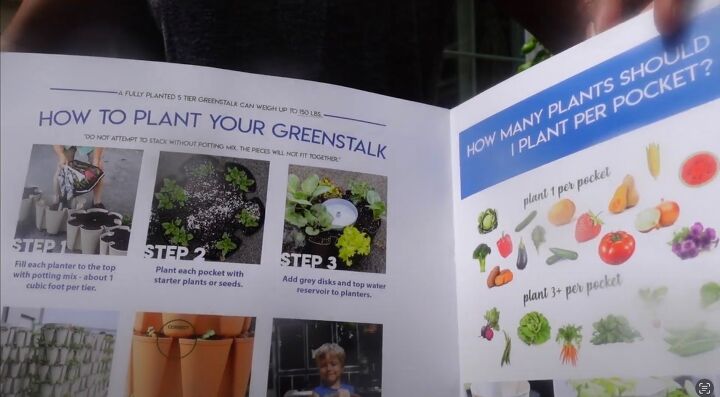
Next, fill your planter with one cubic foot of quality potting soil to the indicated fill line, being careful not to overly pack in your soil. After this, make sure you have your seeds or starts nearby.
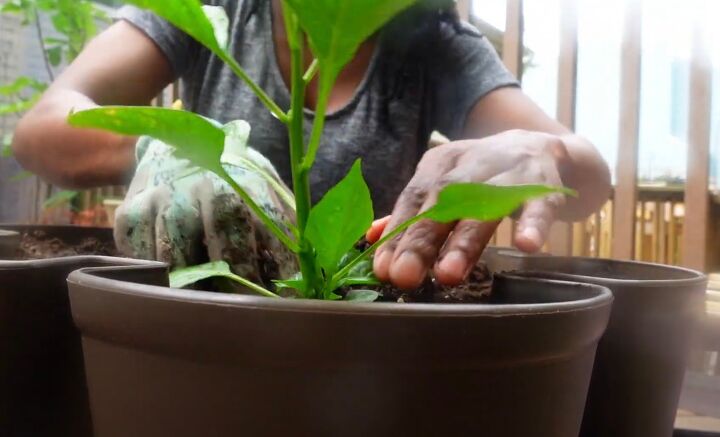
I'm using a combination of plants that I grew from seed and starts from my local nursery.
I'll be growing a combination of pollinators, herbs, fruits, and vegetables. If you intend to do mixed plantings like I am, you'll want to grow smaller plants towards the top and larger plants towards the bottom to provide equal sun exposure.
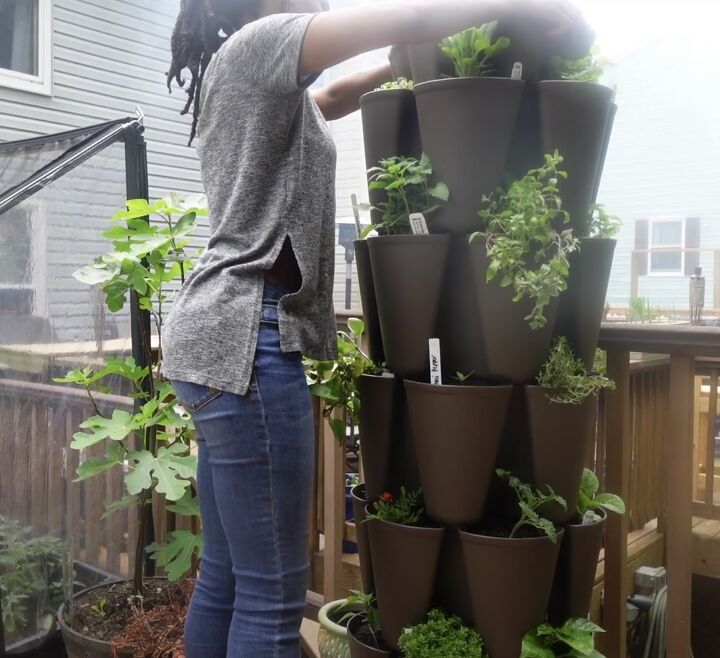
I cannot tell you how excited I was to double my planting options this season in just two square feet. Each planter pocket is 10 inches deep and 7.5 inches wide.
You can combine vertical and companion planting by mixing vining crops like beans, tomatoes, and squash with low-growing herbs and veggies that stick closer to the base, like lettuce and radishes, in a single pocket to grow well beyond 30 plants.
3. Add the water source
Next, you'll add a gray disc water reservoir to the top of the planter.
4. Stack
It's already time to expand your garden and stack another planter on top.
This is also super easy, and you'll know you've done it correctly because the planter's feet will interlock on the planter below.
To avoid getting residual soil into the opening of your planter as you dump it in your soil, I covered the opening with a plastic bag. It easily slides off after the planter is filled.
The steps are repeated from here as you add potting soil and plant your garden to your heart's content.
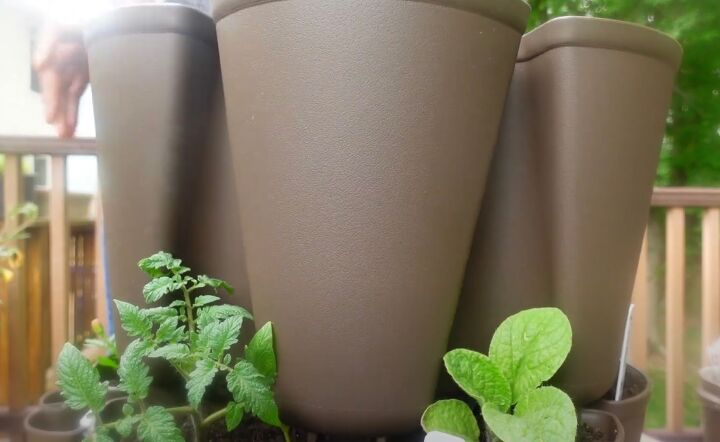
Structurally, the GreenStalk planter is an attractive accent in any garden. It comes in the chocolate color I have or traditional green, classic terracotta, and stunning stone.
5. Growing vertically
I want to touch on specific reasons that got me over the hump to growing vertically and how I made the decision to go with the GreenStalk.
I am very grateful to GreenStalk for offering small space growers an affordable and effective growing option and an additional discount to other small space growers.
The ease of watering and fertilizing your garden is one of the biggest reasons I chose it. Just fill the top water reservoir to the fill line and add your water-soluble amendments.
You'll know each level has been watered when the excess drains from the drainage hole. Just two weeks after I got mine going, my garden is growing so healthy and full.
6. Starting and expanding container gardening
Like many beginner gardeners who tipped their way into gardening, I started my container garden with about 8 to 10 5-gallon buckets because they were cheap and accessible. It didn't feel like I was spending too much money on my gardening hobby.
Over the next few seasons, I amassed 20 of those $5 Lowe's blue and white paint buckets, and I successfully grew a variety of full-size fruits and vegetables in them. They were a great idea until they just weren't.
Over time, I grew frustrated that plastic is non-biodegradable. I wanted something more eco-friendly in my garden, so I switched to cloth bags. Cloth bags had the added benefit of root support, drainage, and temperature, but they still didn't solve my problem of needing more floor space.
I'm in a townhouse for now, but in a couple of years, I won't be. I want something that will still be useful even when I'm in a larger growing space.
7. More GreenStalk benefits
I have enjoyed seeing how homeowners and country dwellers use their GreenStalks to start their seeds inside under the protection of a garage or a greenhouse and simply wheel them outside on nice days.
I've also seen how gardeners with limited mobility can still enjoy gardening without bending or stretching. A GreenStalk also helps you to create a more enjoyable and efficient gardening routine.
I fit gardening in after work and family during the weekday and a bit more on the weekends. So, the ability to spot-check over 40 different plants by standing in one spot and pivoting my garden to water or fertilize my plants has been downright liberating.
Now that I can grow more things in a small space, it's been so rewarding for me as a small space grower because I have room to grow things that just captivate my heart or are intriguing.
Greenstalk planter
With a GreenStalk planter, you don't have to let a small space stop you from growing a garden.
Do you do vertical gardening? What has been your favorite part of gardening in containers? Share your experiences in the comments below.


Comments
Join the conversation