How to Save Seeds: Seed Saving for Beginners
How to Save Seeds: Seed Saving for Beginners

Learning how to save seeds will help you increase your self-sufficiency and grow healthy, productive plants year after year. Learn more about seed saving with this comprehensive guide!
* * *
It’s officially fall, which means it’s time to start wrapping things up in the garden, save of course for those fall crops like beets and brussels sprouts that we planted mid-summer to take us through the fall and right into the winter.
But aside from prepping our annual garden beds for winter and continuing to preserve the last of the summer harvest before we pull all of our summer annuals out of our garden, this is also the time of year when we need to think about saving seeds for the coming year and beyond.
Of course, you don’t need to save seeds. You can always purchase them from a seed catalogue or local garden supply store. But if you can save seeds, there are many reasons why you should.
Why you should save seeds
1. First of all, learning how to save seeds allows you to take one more step toward self-sufficiency. By saving seeds, you’ll be able to produce your own seed and stop relying on outside sources to provide seed for you (plus, you’ll save money too).
2. Second, saving seeds from your healthiest, most robust, most productive plants and replanting them year after year means you’ll create your own strain of healthy seeds that are specially adapted and optimized for your specific environment, which tends to mean higher germination rates, bigger harvests and less disease.
3. Finally, saving seeds allows you a unique opportunity to create your own heirloom seeds to pass down through generations in your family. By handing down family heirloom seeds, you’ll be passing on a legacy and gifting future generations with the gift of self-sufficiency. How cool is that??
But before you start saving seeds, there are a few things you need to know to ensure the seeds you’re saving are actually viable.
Before I dive into how to save seeds, I also made a video on the subject, so if you’re more of a visual or auditory learner, I’ve included the video just below. Otherwise keep scrolling to read more:)
The Science of Seed Saving
Hybrids, Heirlooms and Open-Pollinated Plants
When you’re just getting started seed saving, the first thing you need to know is whether or not the plant you want to save seeds from is an open-pollinated, heirloom or hybrid plant.
You only want to save seeds from open-pollinated plants because these plants will produce seeds that will reproduce true to their parent plant (meaning the seeds will regrow into the same type of plant as they came from).
Heirloom seeds are open-pollinated seeds that have been carefully selected from the healthiest, most productive plants and passed down through generations. These are a fantastic choice for seed saving! All heirloom plants are open-pollinated plants, but not all open-pollinated plants are heirloom plants. Still, either or will produce seeds that can be saved.
Don’t waste your time trying to save seeds from hybrid plants. Hybrids are plants created by humans deliberately cross-breeding two different plant species to make a new type of plant that has certain desirable traits from both parent plants. They’re not GMOs (they’re not created in a lab and crossed with different species and all sorts of other weird things), but they’re not completely natural, in the sense that they wouldn’t necessarily cross-pollinate with each other without man’s intervention.
That being said, if you try to save seeds from a hybrid plant, when you replant the seed, the plant that grows won’t be the same as the plant that you saved the seed from. Instead, it will either revert back to one of the parent plants that were used to create the hybrid plant, or it will be a strange combination of the two that might be edible, but usually ends up being generally pretty unpalatable So why bother growing it and taking up valuable garden space, right?
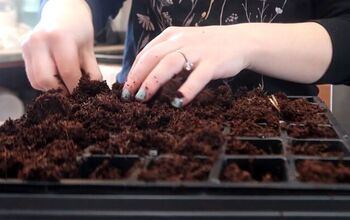
You can often tell if store-bought seeds are hybrids or open pollinated seeds by checking the packet. Open-pollinated seeds will be marked with the abbreviation “OP,” as in the image below.
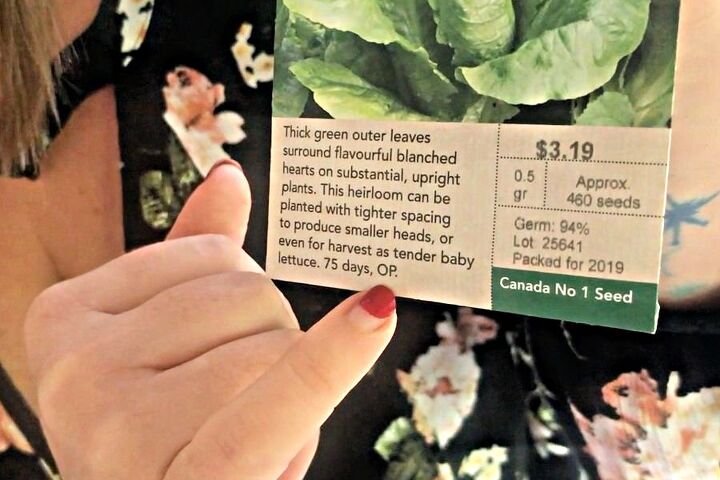
(Pay no attention to my nails, which obviously need another manicure! *Dies of embarrassment*)
Hybrid seeds will be marked with “F1,” short for Filial 1, which essentially means the first generation of a plant from two cross-bred parent plants.
As for GMOs, home gardeners and small, organic farmers don’t need to worry about planting GMO seeds by mistake. GMO seeds are sold directly from the supplier (typically Monsanto) to the farmer (typically large-scale, monoculture crop farmers). They’re not just on the shelves at your local garden supply store.
Cross-Pollinating Vs. Self-Pollinating Plants
The next thing you’ll need to know before saving seeds is whether or not the plants you’re saving seeds from are cross-pollinating or self-pollinating plants.
Cross pollinating plants require pollen from other plants in the same species in order to become fertilized. Self-pollinating plants fertilize themselves. This difference is important because cross-pollinating plants can actually cross with different varieties of plant in the same species, which can result in seeds that grow into plants that are a strange mix of the two parent plants rather than the plant that you saved them from (similar to the offspring from hybrid plants).
So, for example, squash are cross-pollinating plants and different varieties are notorious for crossing with each other. Pumpkins can cross with spaghetti squash, zucchinis can cross with butternuts and the resulting offspring can be a strange mix of both parent plants that’s actually quite unlike the plant that you saved it from. Plants in the brassica family (broccoli, cabbage, brussels sprouts, etc), will also cross-pollinate with each other.
While it is possible to save seeds from cross-pollinating plants, it can take a fair amount of time, effort and experience to get it right.
Self-pollinating plants, on the other hand, are incredibly easy to save seeds from even if you’re a new gardener or seed saver. Seeds from self-pollinating plants will breed true, meaning they’ll produce offspring that are the same plant as the one you saved them from.
Self-pollinating plants include peas, beans, tomatoes, peppers and lettuce.
Choosing which plants to save seeds from
When saving seeds from the plants in your garden, select the healthiest, best producing plants to save seeds from. Just like humans and animals, plants take on the characteristics of their parents, so if you want to produce strong, healthy, high-yielding offspring, start with strong, healthy, high-yielding parent parent plants.
Next, let the fruit ripen completely before saving seeds. Let it over-ripen, even. This helps ensure that the seeds have matured as much as possible and mimics the natural conditions of a plant that is ready to seed itself.
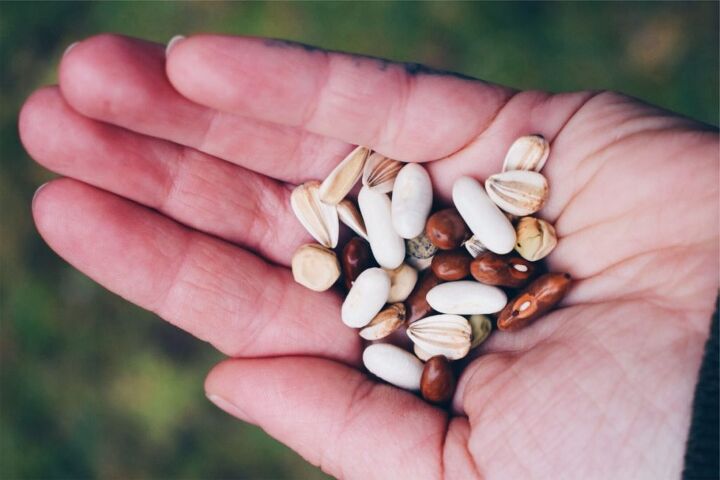
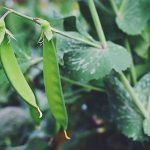
How to save seeds from peas and beans
Peas and beans are probably the easiest plants to save seeds from. Just let the pods ripen and dry out on the vine, then pop them open and take the large seeds out. Lay them out to dry somewhere indoors where there is good air circulation, but out of direct sunlight. (Also, don’t use a dehydrator as the higher heat can affect germination rates).
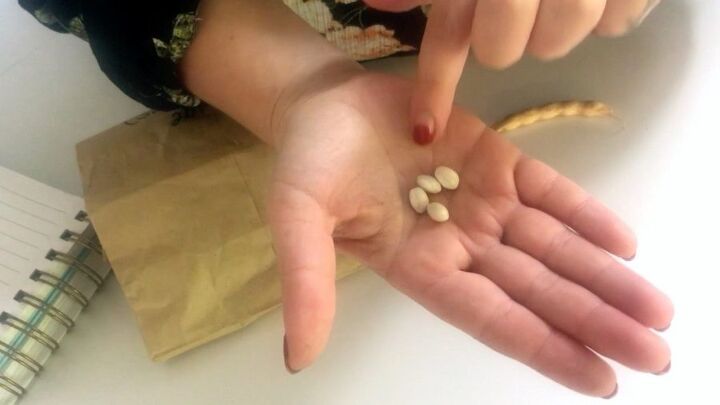
Once the seeds are completely dry they’re ready to store. If you’re not sure if they’re dry enough, push the edge of your fingernail into the side of the seed. If it makes a dent, they’re not quite dry enough yet. Leave them out to dry for a bit longer. If there’s no dent, they’re dry and ready to store.
How to save seeds from tomatoes and peppers
Tomato and pepper seeds grow inside the fruit, as you’ve probably noticed if you’ve ever cut into one of these common fruits/vegetables (and who hasn’t?)
Let the tomatoes or peppers you’ll be saving seeds ripen fully on the vine before harvesting them. Then, to save seeds, simply cut them open and remove the seeds from the inside.
For peppers, all you need to do is lay out the seeds and let them dry just like peas and beans. For tomatoes, technically you can do the same, but allowing them to ferment for a couple days actually makes it easier to save seeds from them AND makes the seeds more viable in the end.
To ferment tomato seeds, remove them from the tomato and put them in a jar along with whatever pulp that’s naturally attached to them. Then, cover with a couple inches of water and place a coffee filter or some cheesecloth on top (just to keep bugs out).
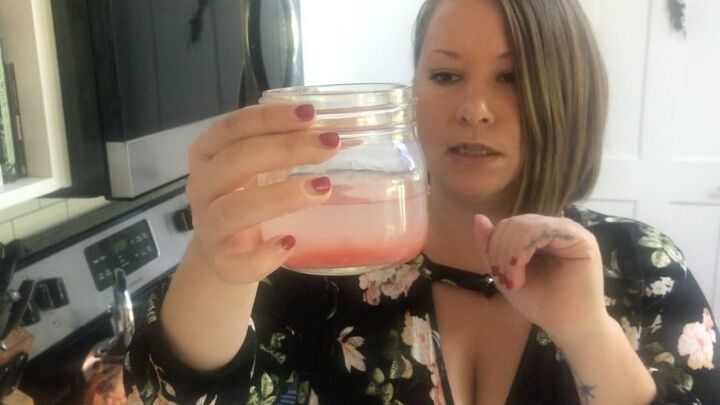
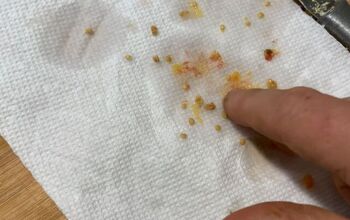
I’ve got some tomato seeds here that have been fermenting in water for about 4 days. It’s time to strain them out and dry them to store for next year!
After three or four days the seeds are ready to be dried. First of all, discard any seeds that have floated to the top. Usually this is a sign that those seeds are not viable, so fermenting helps to weed out the “bad” seeds. Next, dump the water out and strain the seeds through a fine mesh sieve. Run them under cold water and gently rub them against the sieve until all of the pulp washes away. You’ll be left with nice, clean tomato seeds.
Lay clean tomato seeds out to dry (I like to put mine on a paper towel) and allow them to air dry for a few days until completely dry, then store.
How to save lettuce seeds
Lettuce seeds are easy to save, but a little more finicky. To save lettuce seeds, allow the plant to flower and let the flowers die and go to seed. The flower heads will turn white and fluffy, similar to what dandelion flowers look like once they’ve gone to seed.
Pull out the white fluffy bits and the seeds will be attached to the ends. Gently pull the seeds off and discard the fluff. Dry seeds and store.
Saving seeds from biennial plants
Some plants are called biennials which means they take two years to produce seeds. Biennials include carrots, beets and onions.
In order to save seeds from these plants, you’ll want to leave them in the ground to over winter. Then they’ll start growing again in the spring and by late spring/early summer you should be able to collect the seeds.
How to store seeds properly
All seeds should be completely dry before storing. They should be kept in a paper envelope or paper bag to ensure they are well aerated and won’t go moody if there’s any hint of moisture left in or around them. However if they are really dry, you can store them in a Mason jar or even a plastic ziplock bag. Paper envelopes are best though, which is why store-bought seeds are sold in similar style packets. You can purchase small envelopes for storing seeds here.
Store seeds in a cool, dry place out of direct sunlight. Most seeds will be viable for up to four years after saving them. Some will stay good much longer than that. But as a general rule, germination rates drop with every year that the seeds are not planted, so newer seeds are better.
Finally, ALWAYS label your seeds! You think you’ll remember which are which, but you won’t always, especially if the seeds are from the same species of plant but different varieties and the seeds look similar.
You can also download some free printable labels for your seed packets from our Resource Library. Just search the “Labels” section of the library!
There’s so much more we could dive into on the topic of seeds and seed saving, but that’s more than enough to get you started!
To summarize…
- Only save seeds from open-pollinated and/or heirloom plants.
- Choose self-pollinating plants if you’re just getting started or want to keep things simple.
- Save seeds from your healthiest, most vigorous, highest-yielding plants.
- Allow fruit to ripen completely before saving seeds to ensure the seeds have had enough time to fully mature.
- Air dry seeds completely before storing. Keep them out of direct sunlight and high temperatures.
- Store seeds in a cool, dark, dry place, preferably in a paper envelope or bag to ensure good airflow and no chance of mold.
Oh, and here’s some more info to help you with seed-saving:
- A Complete Guide to Organic Gardening for Beginners
- How to Plan a Seed Saving Garden
- 8 Things to Think About Before Starting Seeds
Wishing you homemade, homegrown, homestead happiness:)

Related Posts:


© The House & Homestead | All Rights Reserved | Legal


Comments
Join the conversation