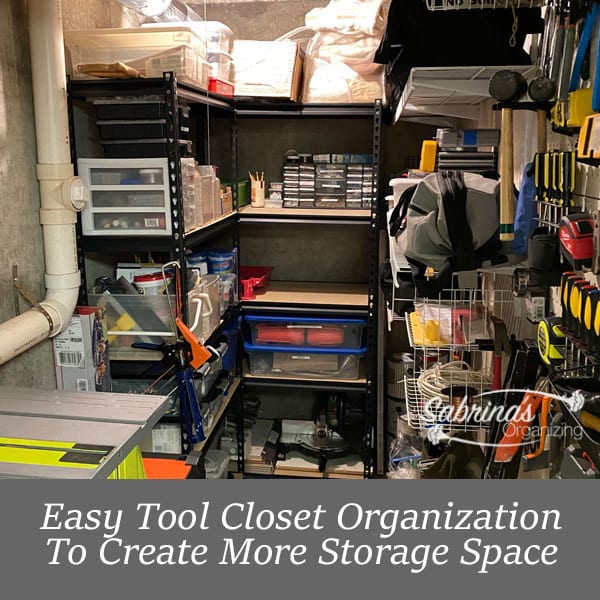
Easy Tool Closet Organization To Create More Storage Space
****Visit our "Disclosure Policy and Cookies" for details.****
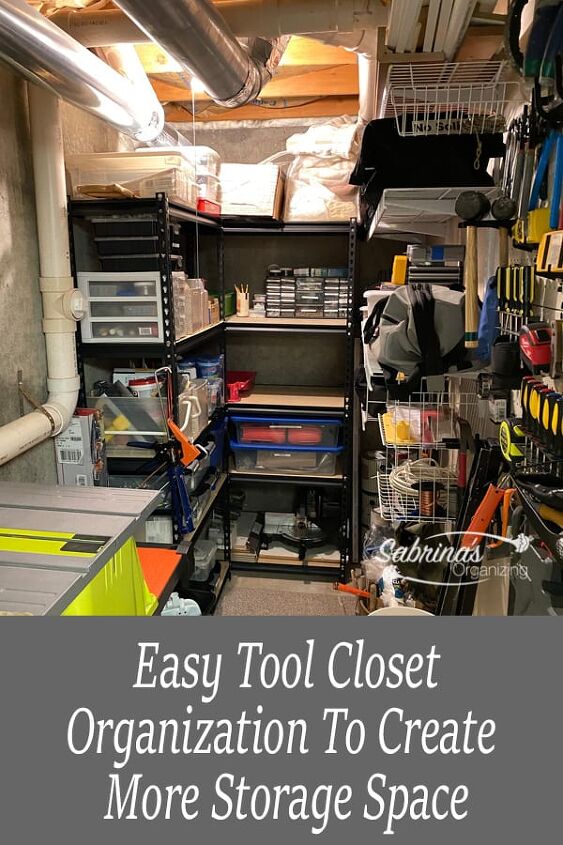
Over the years, our tool closet has transformed and expanded its usability to hold EVERYTHING we need to improve our home, complete home craft projects, and repair stuff. Today, I will share with you the next evolution of our tool closet organization.
But, first, let’s revisit the past and share the other posts that show our Tool Closet.
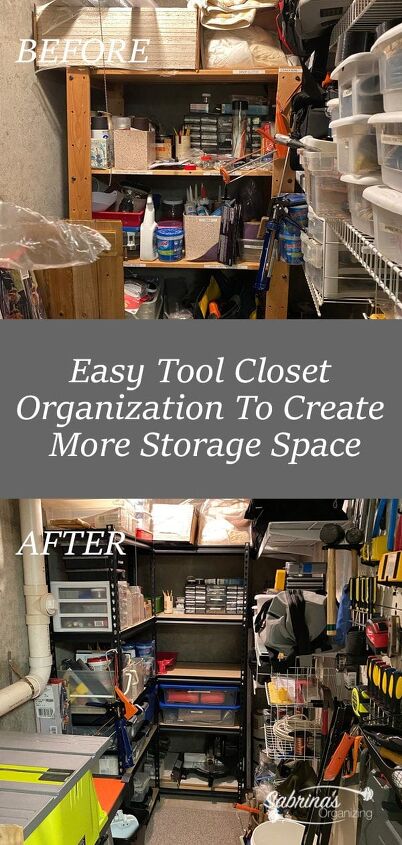
Here is our updated tool closet we did over six years ago. CREATIVE WAYS TO ORGANIZE TOOLS IN A CLOSET Over the years, we updated and modified the tool closet to make it work better for both of us. While it worked well, we realized some items needed homes in the last few years, and our bins were overflowing. Can you relate? We had to go through and sort all the small things and group them to find the correct containers or bags for the items. Follow along and see how we transformed the space, and, as a result, it gave us even MORE space in this small closet!
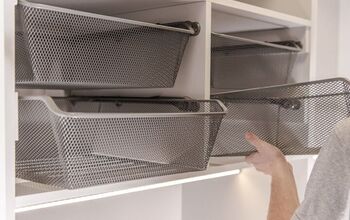
Before Tool Closet Organization Transformation
This is where we left the existing tool closet. As last you saw it in the post link above, we had added the wood shelf unit and removed the desk so my husband could use it again, and we would be able to go more vertical with the storage.
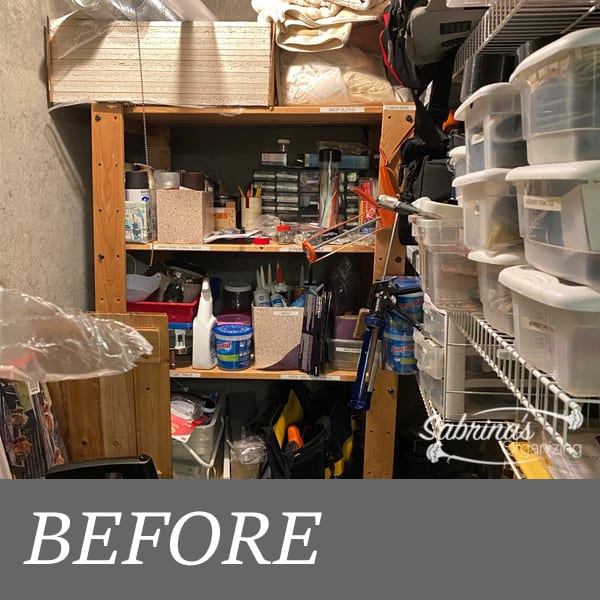
As you can see in this picture, the wood shelf unit was pitching to the right and very wobbly. So getting rid of it was very important. But, when we removed it, we realized that a narrow-tall shelf would fit in the space - creating an L-shaped shelving unit when we put both of them together. Yay!!!
Since my husband installed metal pegboards a few years ago, we didn’t do much on the loose hand tools. But, we needed to review the small items that were not sorted very well in the bins on the shelves.
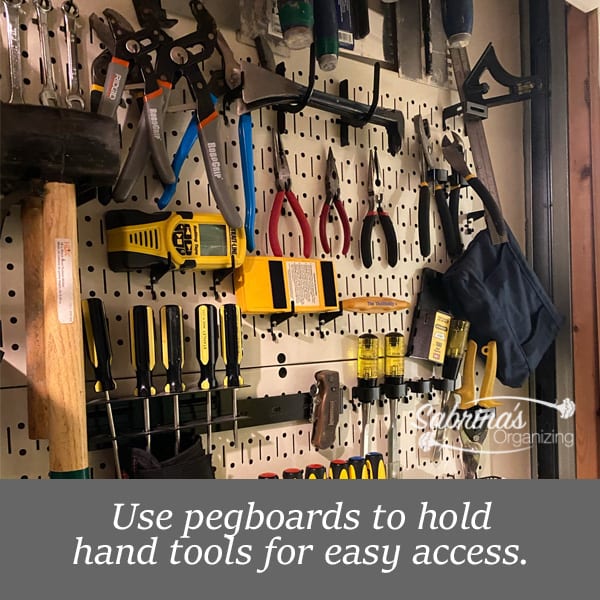
Here’s an updated image of the pegboard for our hand tools. He did a great job, didn't he?
Find the right shelving unit for your tool closet to do your tool closet reorganization.
First, we decided to measure the depth and width of where the wood shelf was located. It turns out we could fit two tall shallow shelving units in its place to create an L-shape. Here are the two shelving units we purchased from Ace Hardware.
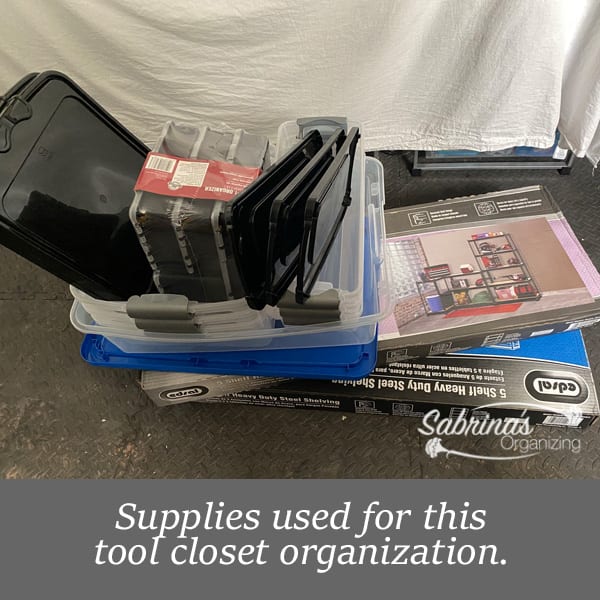
Supplies needed:
1- Edsal Muscle Rack 72 in. H x 34 in. W x 14 in. D Steel Shelving Unit
1- Edsal Muscle Rack 72 in. H x 36 in. W x 18 in. D Steel Shelving Unit
3 - Storage organizer with compartments and has lids
AD from Released Repurpose Reorganize: Want to Organize Your Home But Are Stuck? Check out this product! You can do one card task a day and get it done!
1 - 3 set drawer organizer
Assorted other containers open and with lids (reused and purchased new)
A label maker
UPDATE 2022: PEGBOARDS USED FOR THIS PROJECT: All of these were purchased on Amazon (affiliate)
Wall Control Pegboard 6 inch Reach
And, a Wall Control 10 inch Hook
Wall Control Beige Metal Pegboard - keep in mind these pegboards have a vertical and horizontal direction. Pick the right one for you.
And, a w all Control Deep Pegboard shelf 6" black
We used several of these: Wall Control Slotted U Hook 3" peg hook
Wall Control Slotted Pegboard U hook
This one is a set you can buy, but we needed more: Wall Control Hook pieces kit.
Below are just some of the items we purchased from Ace Hardware. We had to go back and buy a few more things to finish the tool closet organization project.
Repurpose bins you already have.
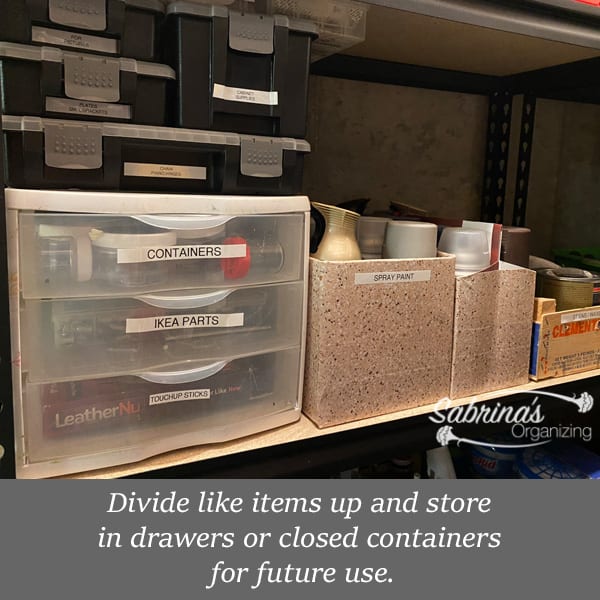
The older three drawers were used for small empty containers that we use to keep organized. The IKEA parts are handy if we need them. Touch-up sticks and paint drawer is for the pieces of furniture, doors, and cabinets we recently replaced. Many of these items tend to get lost in a space like this or a garage, so having a drawer for them helps you know where things are quick.
How to organize spray can bottles?
The spray can bottle Organizer DIY project was also added to the shelves. Check out this post to see how I created them, HOW TO MAKE A DIY SPRAY BOTTLES ORGANIZER. This was created by repurposing glassware cardboard boxes and beer six-pack holders. Check it out.
Organize the small items into groups.
Above the drawers, we sorted and organized chains, piano hinges, plates and L brackets, cabinet supplies, and supplies for pictures.
Use open bins for items you use often.
We used a bin with sandpaper. Since we had a variety of caulk, it had its container. And, we used a shoebox for lubricants and glue bottles.
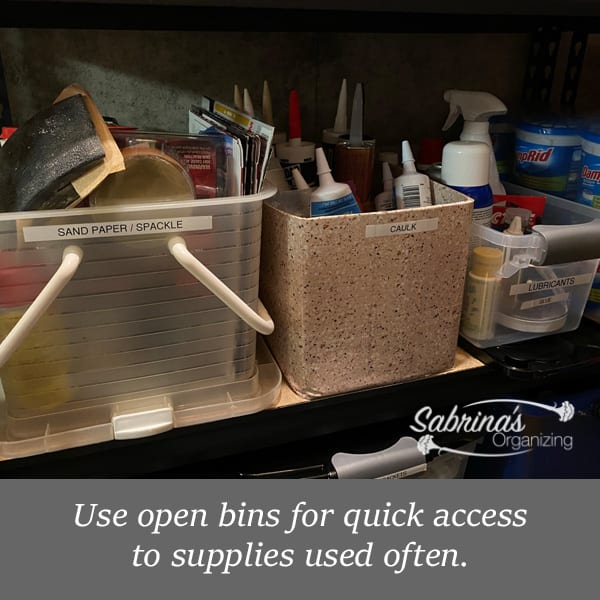
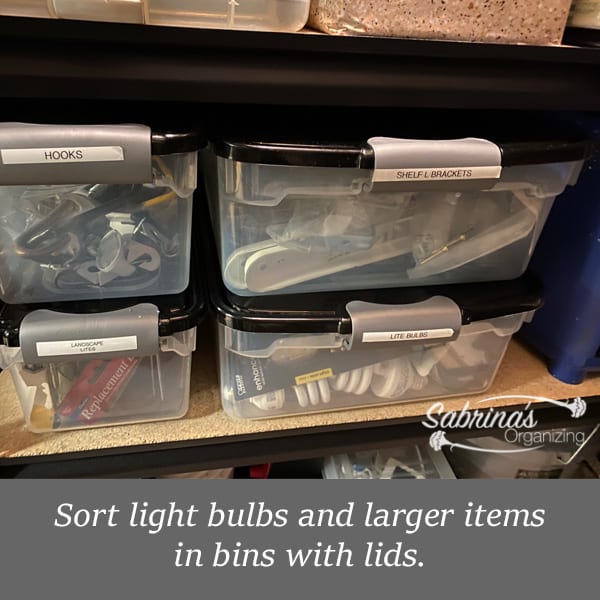
We had a lot of hooks, so we used a shoebox-size bin to hold them all. Also, we divided our landscape lighting and indoor lights into two containers with lids. I use large L brackets that I usually pull from and reuse when getting rid of things, so I had a bin for them as well. I know what you are thinking; that is a little overkill, right? Our goal was to organize everything so the whole family knew where the items would be.
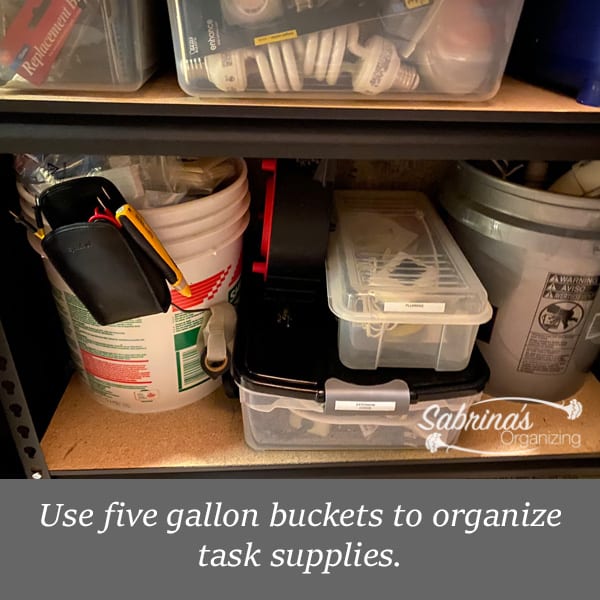
Five gallon buckets are great for task organizing
We like to use 5-gallon buckets to hold task supplies like electrical, plumbing, tiling, and painting. But, these bins were overflowing, we realized we needed to adjust and remove some unnecessary items. And, we have a variety of extension cords, so it needed a home as well.
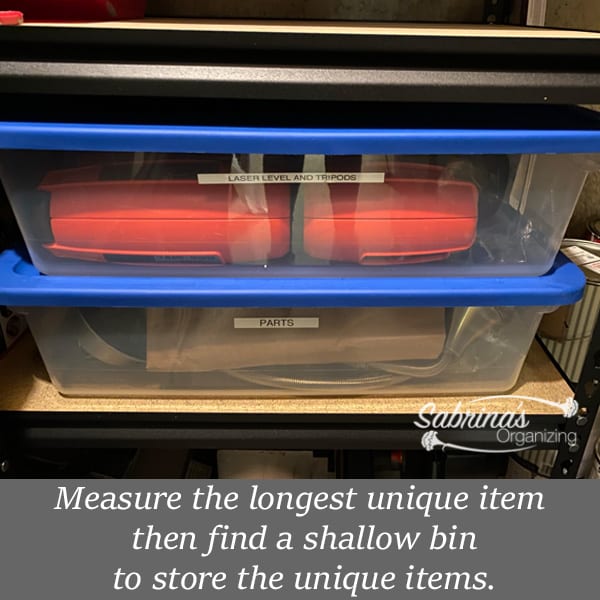
Now here comes the big and awkward items.
There were tripods used for levels and parts for the faucet supplies we have in the home that we needed to find homes for, so using shallow rectangular bins worked nicely and stacked together easily.
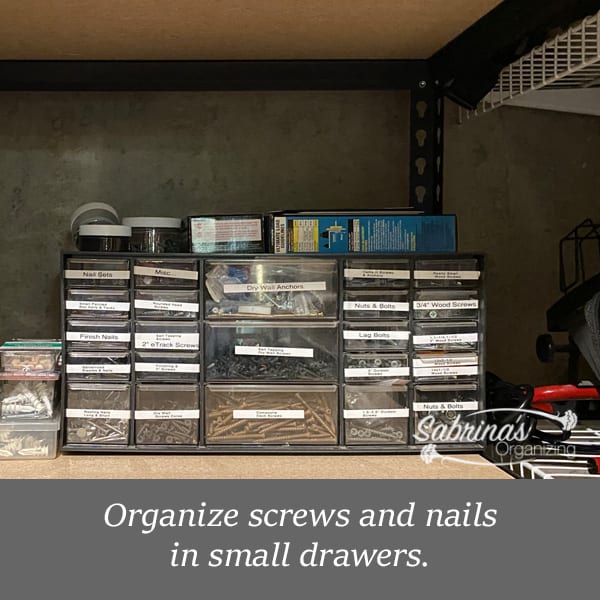
Organize the screws into drawers.
This was all my husband. He went and measured and labeled all the screws, nails, etc... and placed them into the appropriate size drawer. Here’s what that looks like.
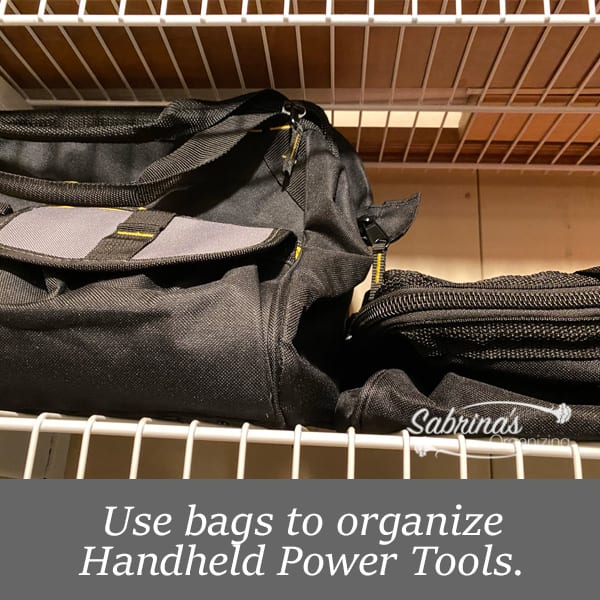
Store handheld power tools in bags.
My husband is a big fan of bags for handheld power tools. It fits everything, even bits, and other accessories, and can easily be stored on a shelf. So we went and bought a few more generic bags, so the hand tools that did not have a bag now have one. There were only a few needed this time around.
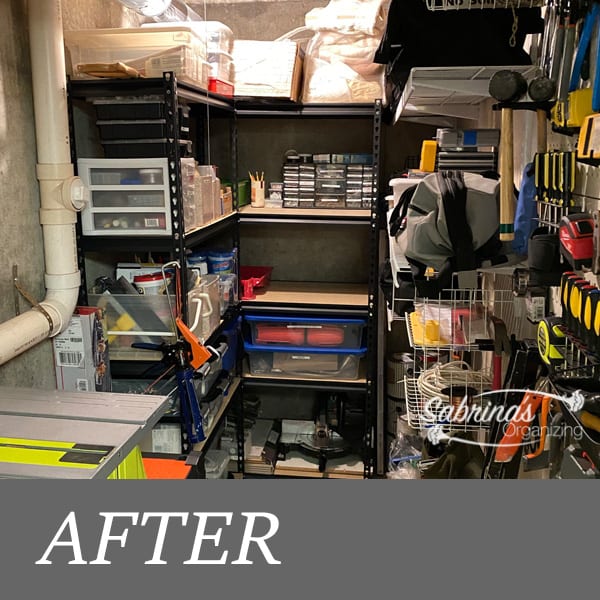
After spending 4 hours assembling the shelves, sorting the items, and adding them to the bins.
Below is the finished project. As you can see now, the tool closet organization is complete. What do you think? We love it, and it is super easy to find items there. I even find myself going in there to put things away instead of just laying them on the shelf. We also have extra space on the shelving. Yay!
UPDATE 2022:
Within one year of using this space, we found a few more adjustments that needed to be done. Below are the other things we did to make this tool closet even more organized!
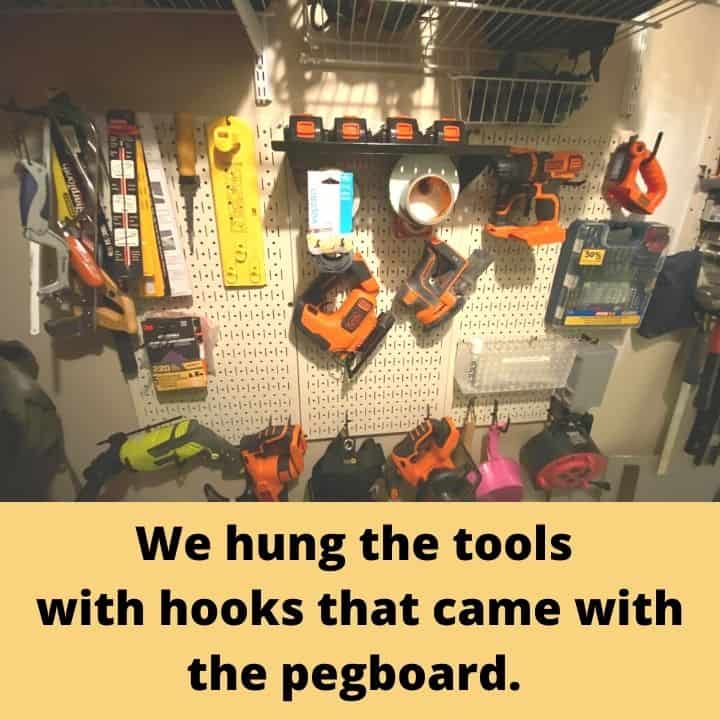
- To have a little more room, we decide to shorten the shelf and move our cordless tools to metal pegboards like we did with the hand tools above.
- We also found that there were a lot of small items in small containers that made it easier for us to use two drawer systems. This was my husband's project. He felt that it would work better for him. I was totally fine with the task divider cases.
- We wanted to get the hand saws out of a bin and placed on the pegboard.
Some issues we encountered.
We had to figure out where we would place the individual tools from each cordless drill. This took some thinking since we didn't want them to be just thrown about.
And, we wanted to find a place for the batteries for these tools and keep them in one place.
Our solutions for the update of our tool closet:
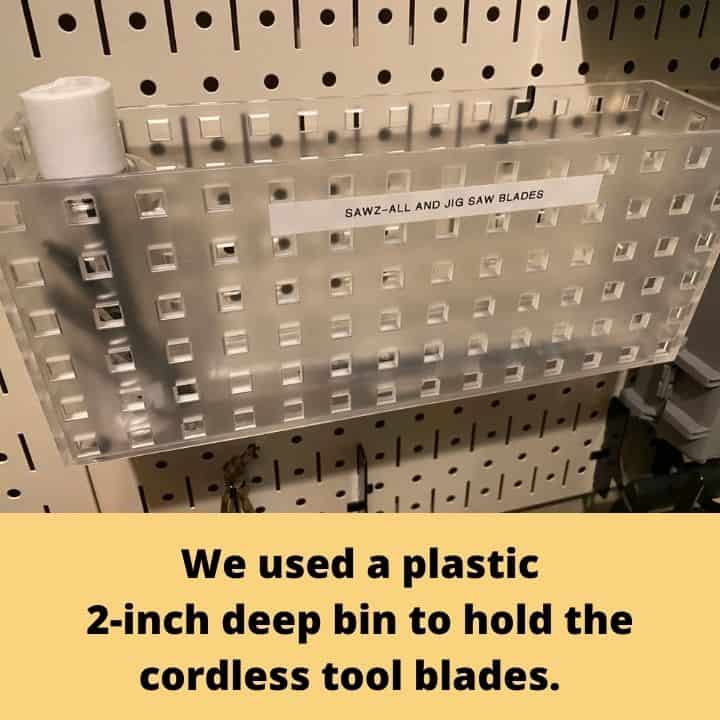
First, we found a home for the saw blades. These blades are for all the saws we have. We used a plastic 2-inch deep bin with holes, and it was about 4 inches deep for the blades to store there. We labeled it to know where the blades were for the hand and cordless tools.
The next was the shelf for the batteries. This pegboard unit also had a shelf accessory. It worked pretty well. This and many other brands have pegs in different sizes. So, we made sure to get a bunch of the larger ones for these tools and our other items.
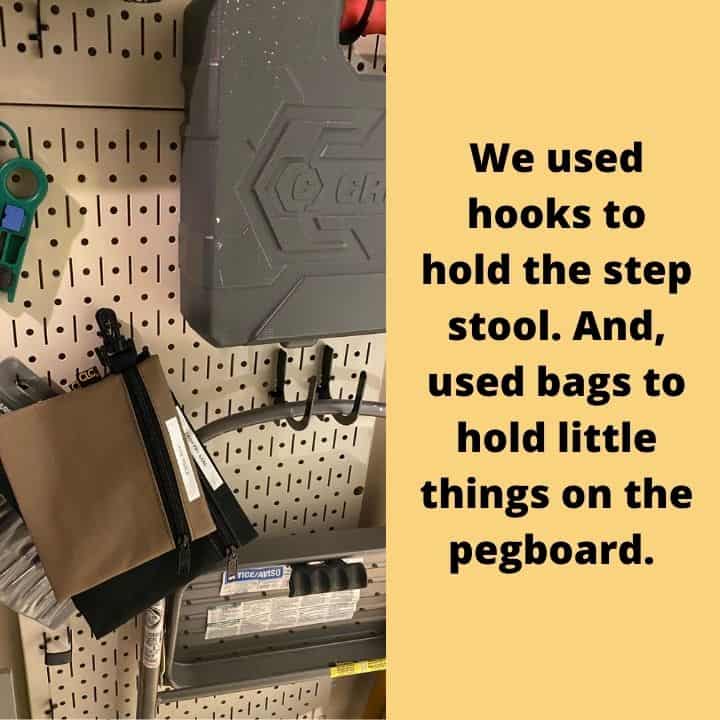
Then, we used some of the hooks for the step stool to get it off the ground. And a few bags with a hook to hold some other small items.
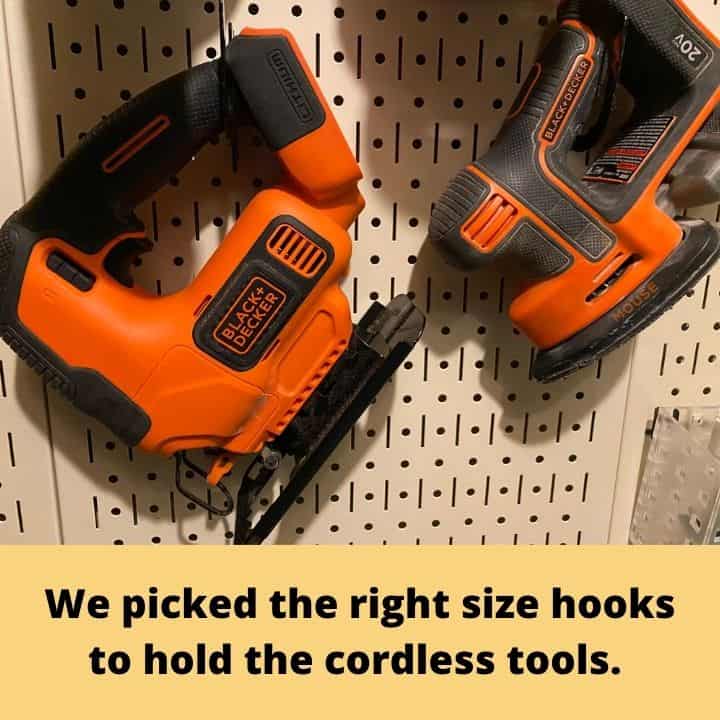
And lastly, we hung the cordless tools using the right size hook that fit the handle area. We also added the hooks to the bottom of the pegboard so that it didn't take any valuable space on the pegboard itself. These two cordless tools were the only ones that were on the pegboard.
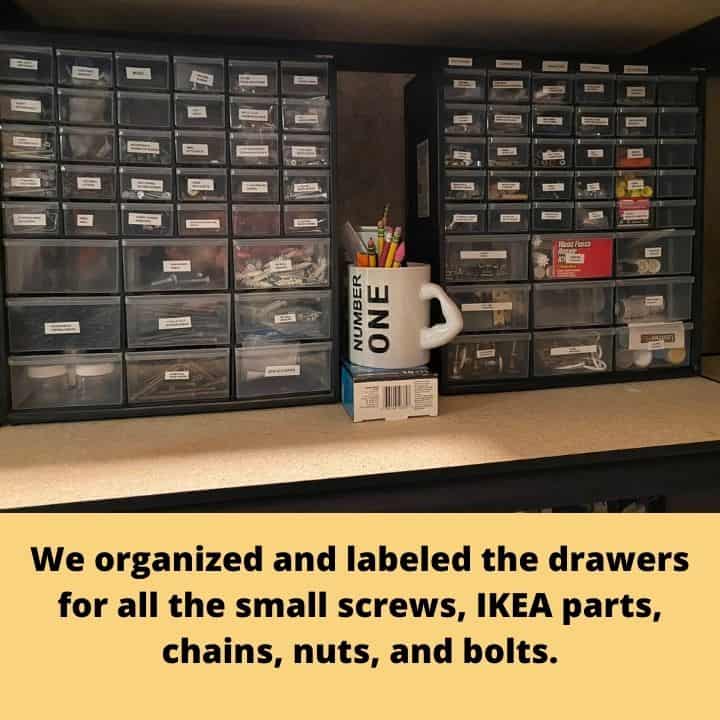
And, on the shelf, my husband took his valuable time and labels and added all the small items, like screws, IKEA parts, hooks to hang pictures, anchors, chains, nuts, and bolts, and placed them in these drawer organizers. He even labeled them.
Below are some other tool closet organization articles I found online. Feel free to check them out and get even more inspired.

Do you live in South Eastern Pennsylvania? Don't know where to start organizing in your home? Need a plan? Check out our Sabrina's Organizing Solutions Consultations


Comments
Join the conversation