9 Thrift Store Flips For Bedroom Decor on a Budget


Are you living in an apartment filled with neutral colors on the walls that you can’t change? Do you have a guest room that needs a facelift?
Are you just bored with your decor, but can’t afford $1,000’s for a room makeover? Do you have thrift store or hand-me-down furniture that you want to update but don’t know how?
I’m going to show you how turned a chaotic toy room into a fun guest room and I spent less than $200 to do so – all by updating furniture or making frugal decor items to create the new look.
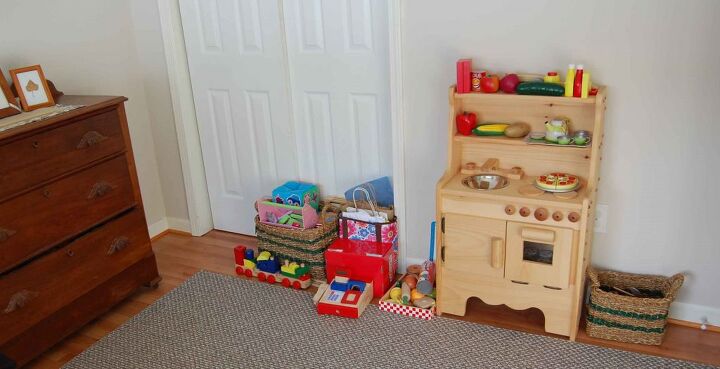
Here is a picture of our guest room “before” I started the frugal makeover.
At the time, it was being used as more of a toy/playroom rather than a guest room. I needed a space for my oldest to play while my baby was napping.
But as time went on and my oldest was in school all day, (now they are both in school all day) and I didn’t need a separate toy room from their bedroom. So the first thing I did was to move all of the kids toys back into their bedroom.
Then I got busy re-arranging the room and giving the furniture a face-lift, while crafting up some cool decor items.
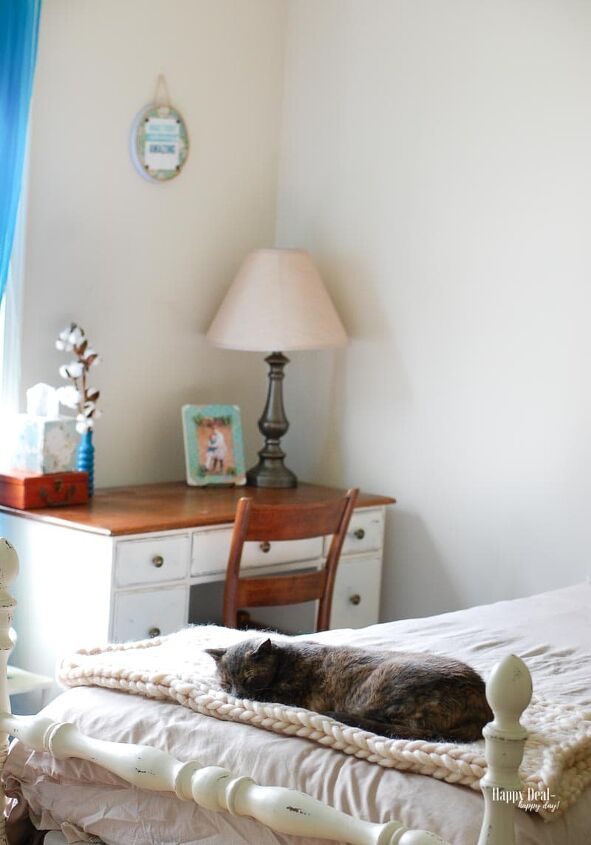
Project Updating a Hand-Me-Down Bed
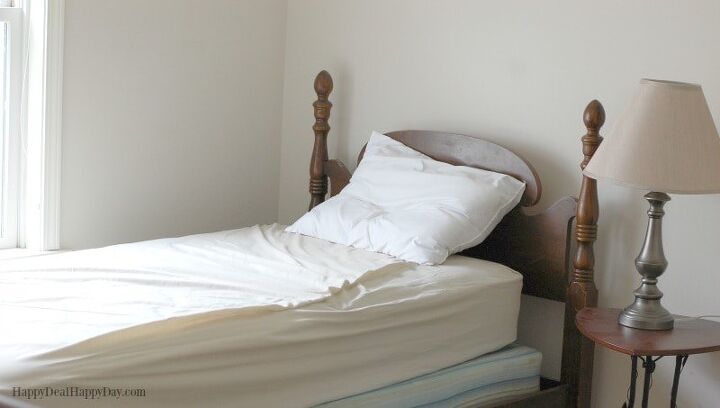
There was a bed on the other side of the room – a hand-me-down bed that was once my husbands when he was a kid.
The Bed Before:

Even though this was my husbands bed as a kid, the mattress was newer, and the structure was sound. It was something that one of our girls could grow into eventually and was fine for a guest.
The style of the wood on the other hand – not the most up-to-date. So instead of donating this to Goodwill and spending $100’s on a new bed frame, I decided just to paint it “antique & distressed” style to both make it up-to-date and brighten the room.
The Bed After:
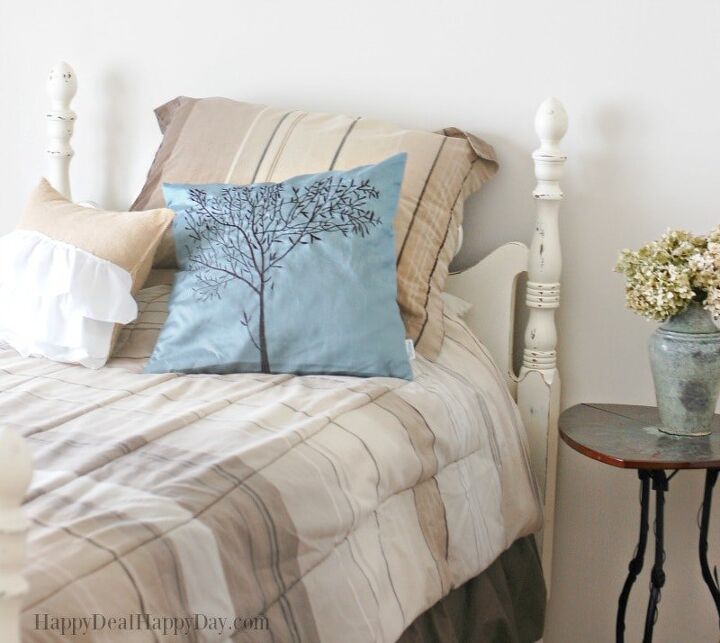
I took the bed frame complete apart and gave it a couple of coats of Antique White spray paint. I probably used 6 cans.
It was faster than brush painting, but I don’t recommend spray painting when it is windy out. (I learned that the hard way when one of the cans of paint mostly blew away!)
Then I used the Dremel Multimax Sanding attachment and went to town creating the distressed marks on the wood along the edges and where I think it looked natural. Don’t try sanding this by hand. It will take you forever!
Just get and electric sander in some form to make this go fast and fun!
I also made the burlap and white ruffle pillow on that bed out of a table runner! This was a no-sew project that is posted over here.
I got a plain tan duvet cover over on Wish.com to cover the strips and make for a cleaner look. The other throw pillow was a cover I got over on Amazon.
I also got the chunky wool blanket over on wish.com – that apparently my cat Zoe now owns. 😉
Project 2: The End Table
End Table Before:
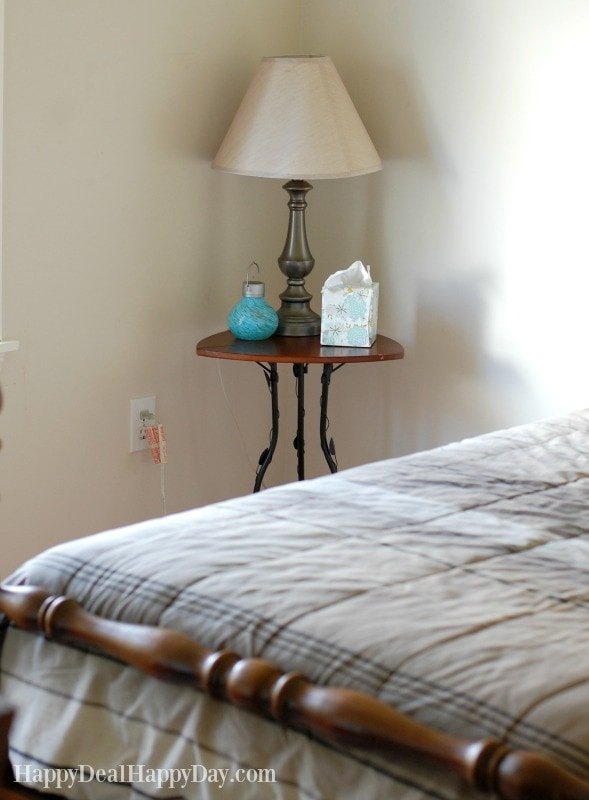
The next thing I did was to give this end table a pop of color and a fun design using Unicorn Spit.
End Table After:
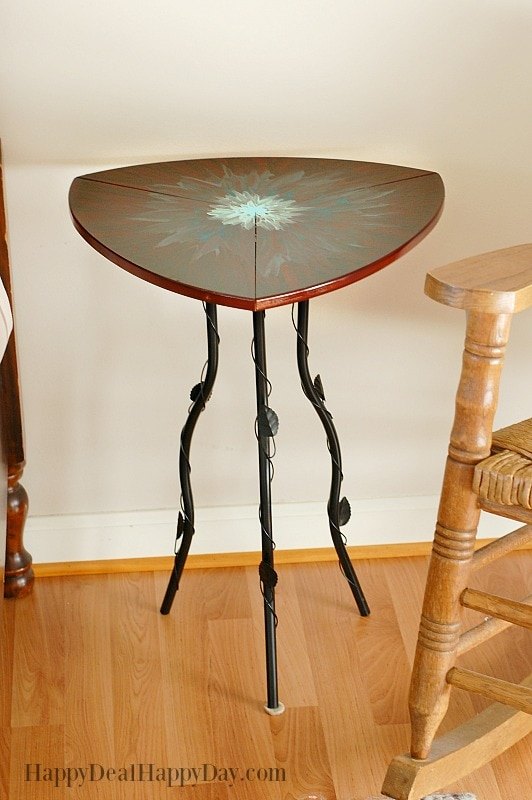
If you are new to Unicorn Spit, then head over and read this tutorial on How To Update An End Table Using Unicorn Spit
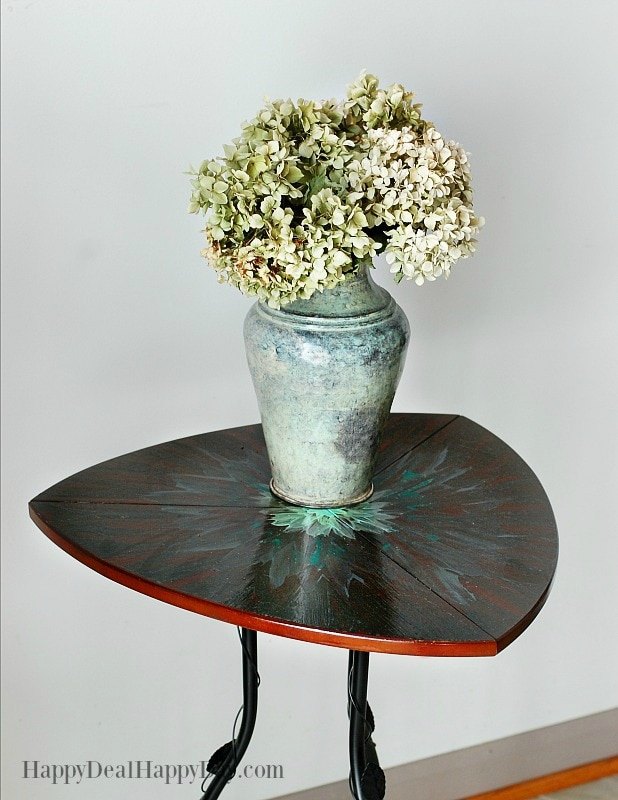
I found this vase at a thrift store and dried the hydrangeas from my own garden to ad the final touch to this end table.
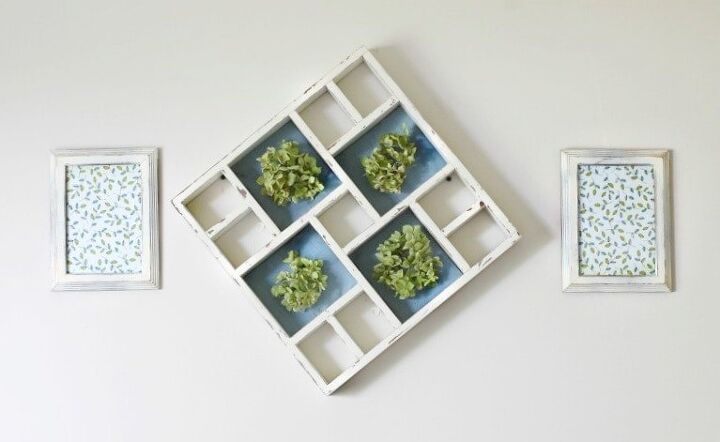
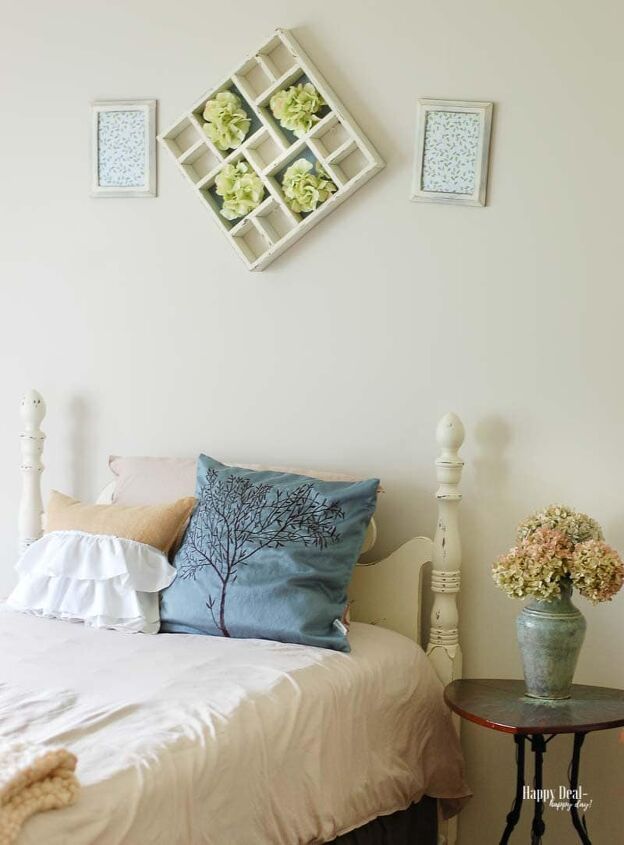
Project #3 Display Shelf Make-Over
Since this was a neutral room with tan walls, tan throw rug, tan & brown patterned comforter, it desperately needed a pop of color. I decided to go with a teal/turquoise and light green as my accent colors to add to the tans that were the majority of the color of this space.
Because I didn’t want to spend a lot of money on new wall hangings, I decided to get creative with some items I already had on hand, but were not using.
This display shelf was another item that my husbands parents passed onto us when we got married, but was collecting dust in the storage area of our basement. I decided it needed a makeover and I could give it new life.
At first I just left it brown and I attempted to paint some items that I grabbed at Goodwill to give it a pop of color, but I honestly didn’t like how it turned out.
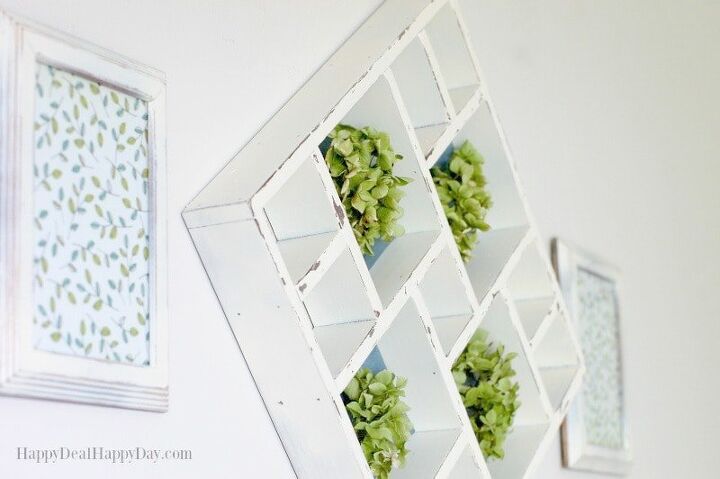
Display Shelf Before:
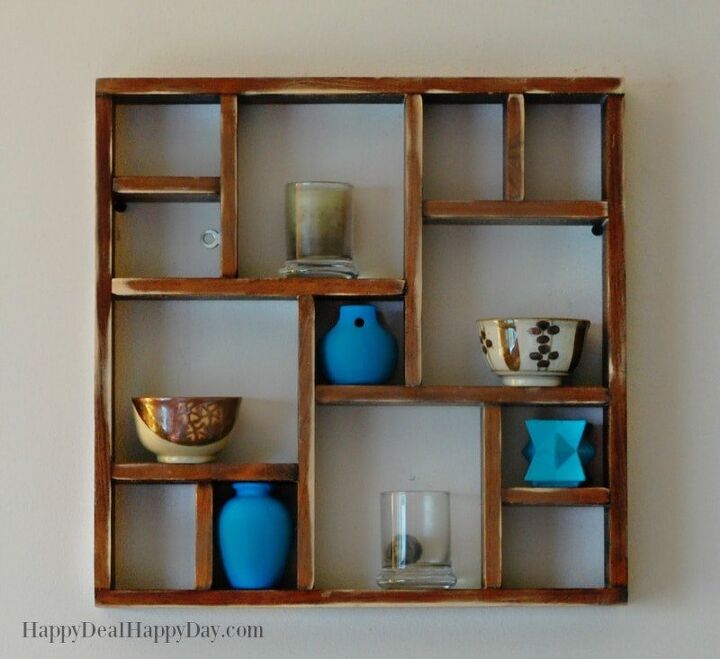
But I did end up painting it, distressing it, and adding a more uniform display with color and dried hydrangeas. Find the full tutorial for that over here: Frugal Decoration Ideas | Shabby Chic Display Shelf Makeover
Display Shelf After:
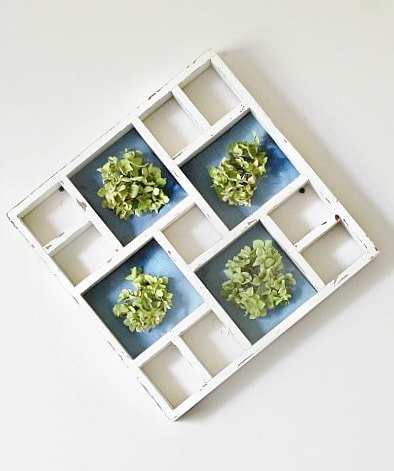
Keeping the colors simple and even just turning this shelf at an angle gives it all new life that is a gorgeous centerpiece above the bed.
Eventually though, the dried hydrangeas lost too much of their green color, so I did end up replacing them with faux hydrangeas that wouldn’t lose their color.
Project Distressed Dollar Store Picture Frames
Picture Frame Before:
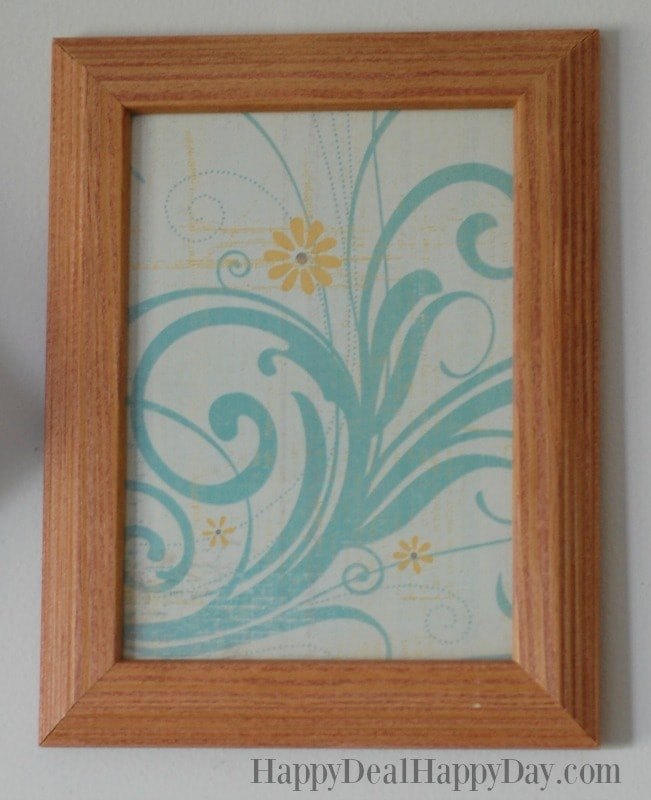
I also wanted to frames on the side of that center display shelf to match – so I went ahead and got some frames from the dollar store, and found some patterns in my scrapbook paper collection and made over these frames to match the made-over display shelf.
Find the full tutorial over here how I did that: How To Distress A Picture Frame From The Dollar Tree!
Picture Frame After:
Project 5: The Desk
The Desk Before:
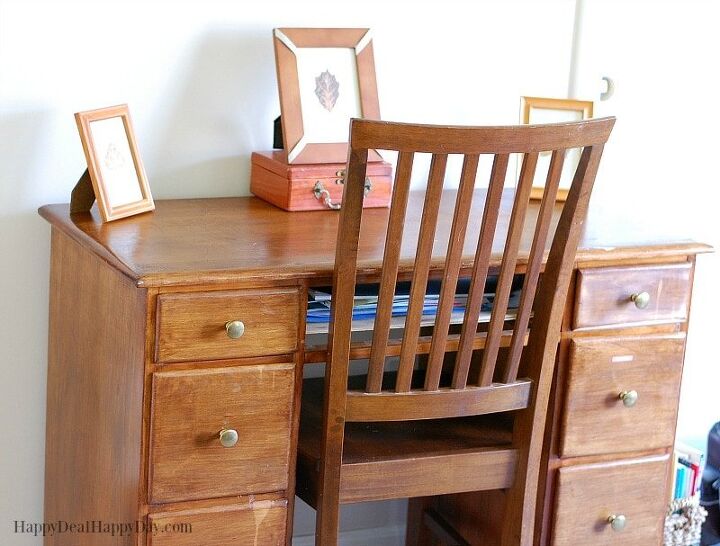
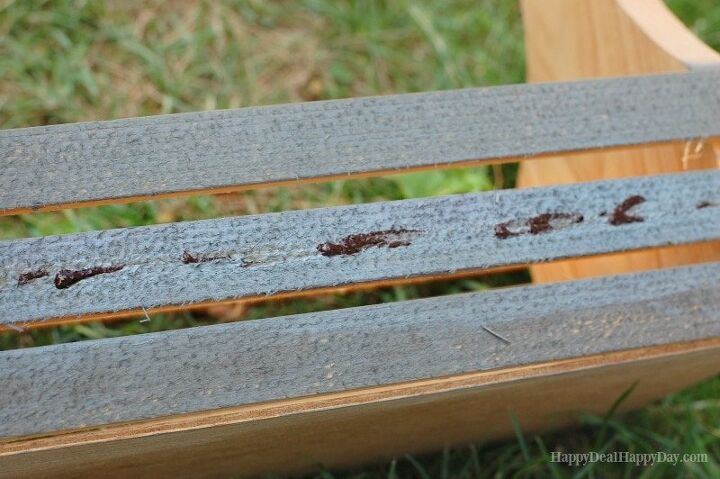
This desk was another hand-me-down from my Father-in-law. It was a nice solid desk, but the finish on it wasn’t my favorite (and some turpentine spilled on it once making the drop marks on the drawers.)
I decided to do the same thing do the desk as I did to the bed – I painted it the same color using Antique White spray paint. I left the top of the desk the original brown color.
I got out my Dremel MultiMax sander attachment and distressed it. I got some new hardware for the drawer handles at Walmart.
The Desk After:
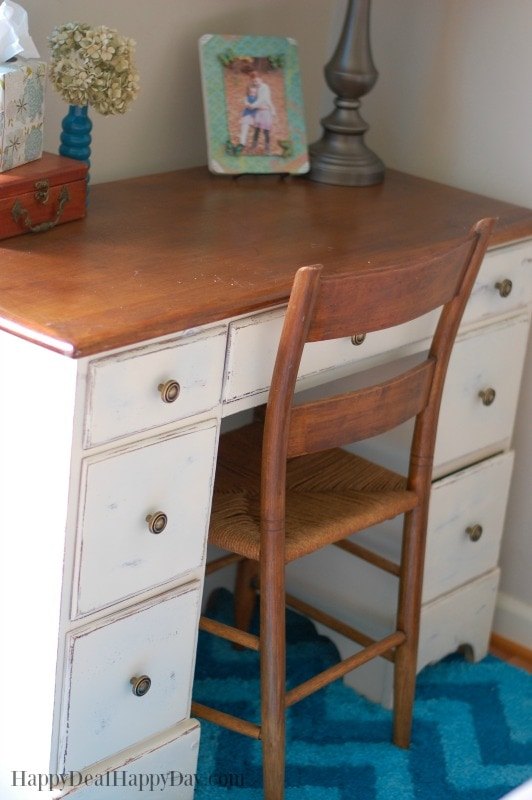
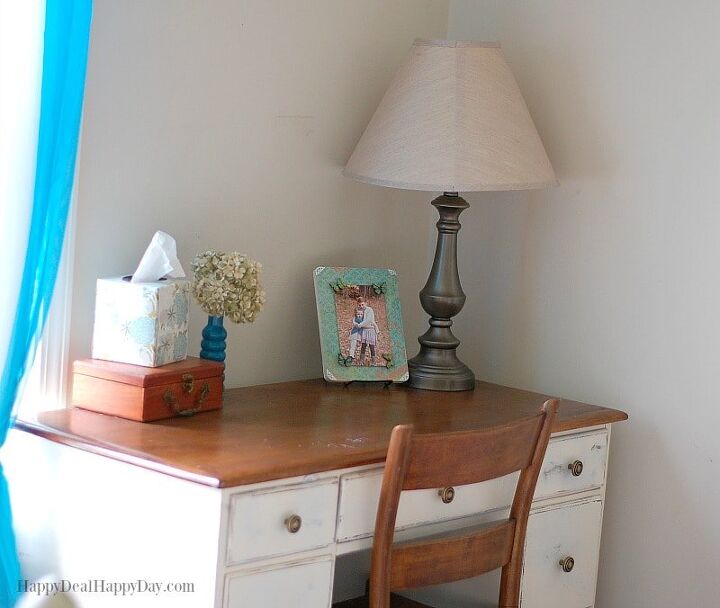
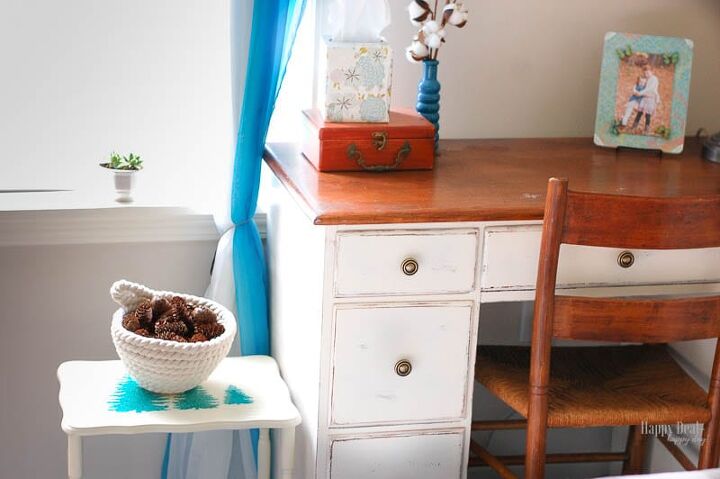
I also have a thrift store end table a makeover to put on the side of the desk. Check out that tutorial over here!
Project The Mirror
The Mirror Before:
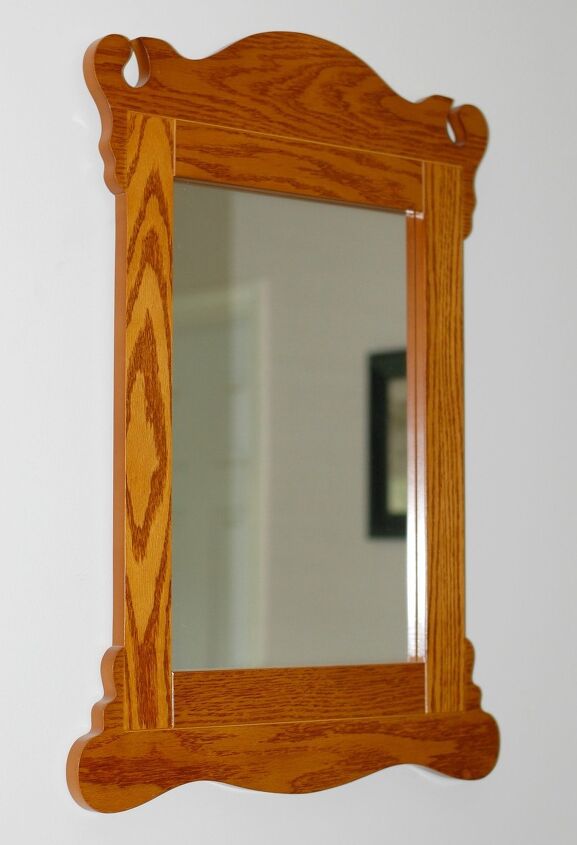
The next project I decided to tackle with an update was this mirror that was given to me from my parents when my husband and I got married. It is a solid wood framed mirror in great shape. But I wanted to give it the matching distressed look like I was doing with the rest of the room.
The Mirror After:
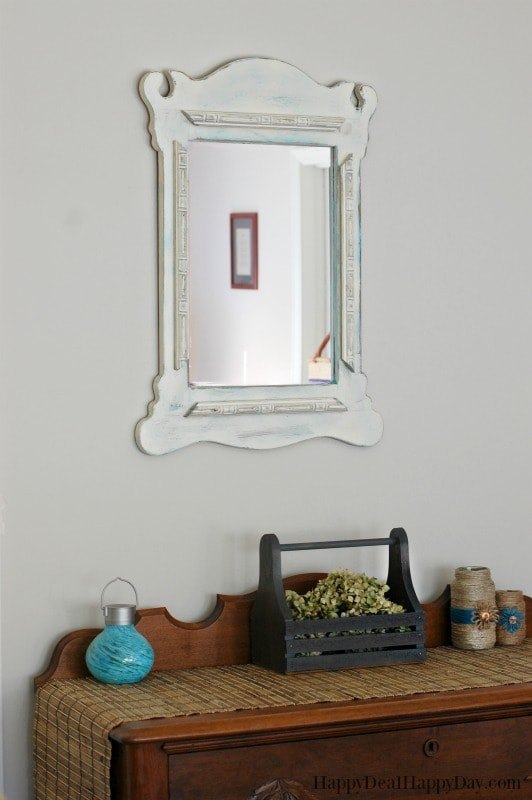
Here is the “after” of the mirror. You can find the full tutorial over here: Distressing Wood On An Old Mirror Using Unicorn Spit!
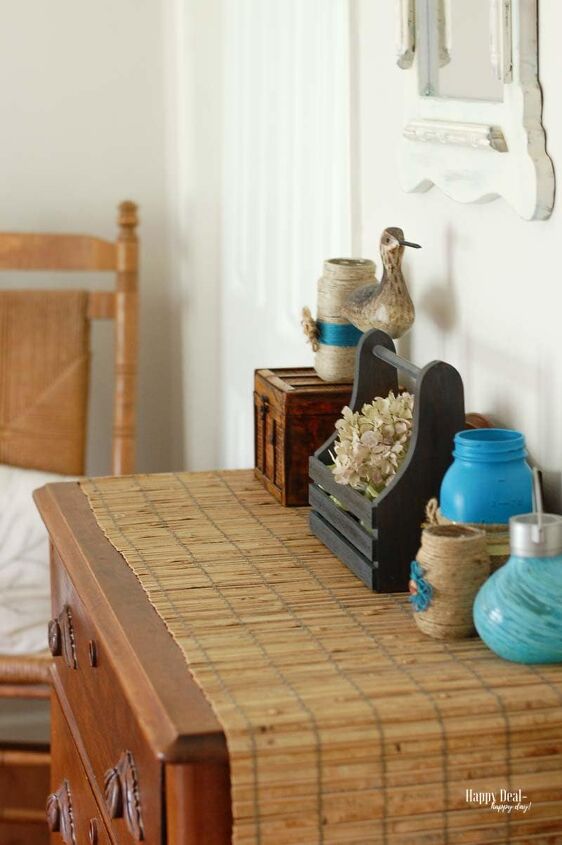
Below the mirror is a mid-century hand-me-down dresser that used to be my grandmothers.
Project The Wood Tote
Wood Tote Before:
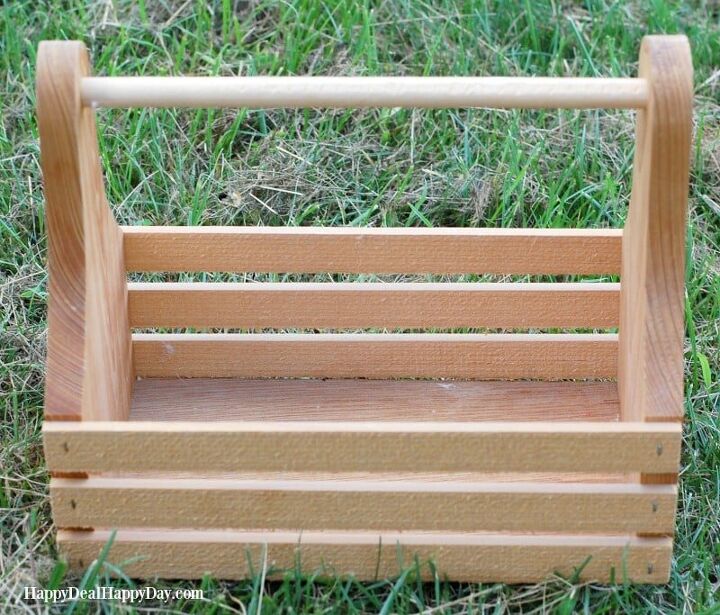
I found that wood crate in the center at Goodwill for $2 and painted it using Weathered Daydream & Rustic Reality Unicorn Spit. I covered the entire crate with gray Weathered Daydream. Then I dotted on some brown Rustic Reality to give it a bit more depth and contrast. I filled it with more dried green hydrangeas from my garden.
Project Twine Flower Jars
I also made those twine-covered jars on the right – along with the flowers.
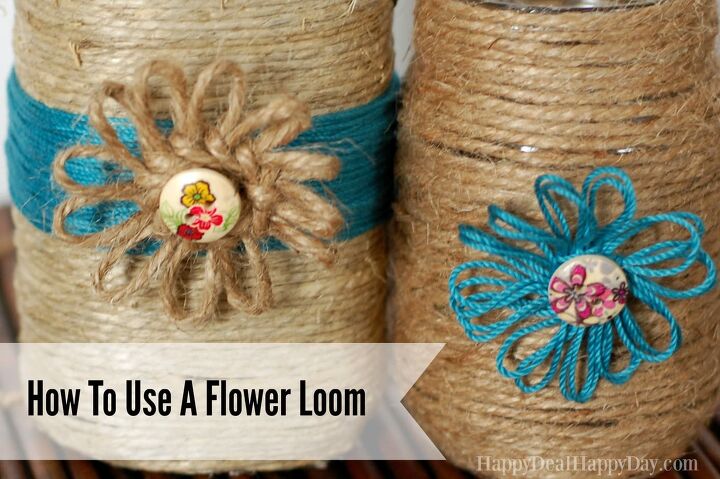
Find the full tutorial over here: Rustic Home Decor: How To Use a Flower Loom
Project DIY Magnet Board:
Make your own simple wall hangings like this DIY Magnet Board! I made the magnet board photo frame below out of an oven cover from the Dollar Tree. I covered it with some scrapbook paper with a pattern that matched the accent colors in the room.
I printed out an inspirational message and hung it on the board using coconut shell button magnets! Check out the step-by-step tutorial on how to make your won over here.
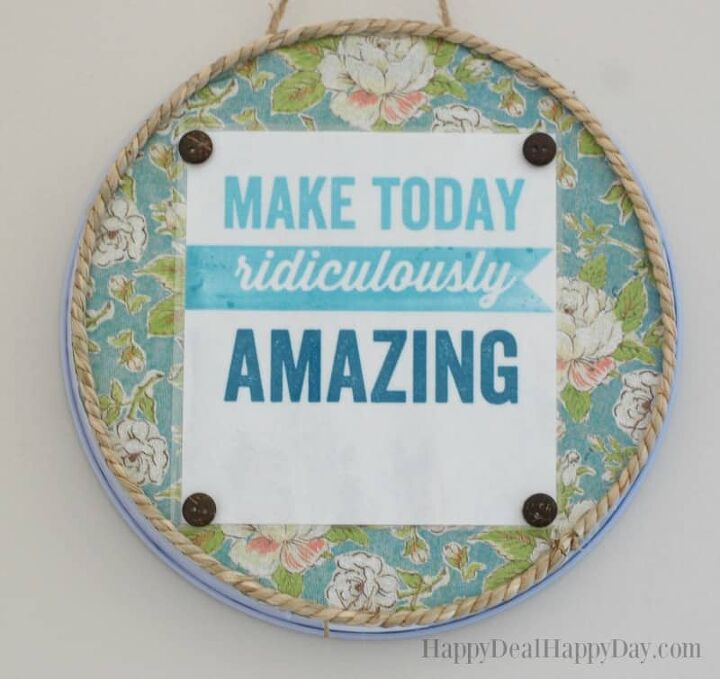
OR: Shop for inexpensive handmade items over on Etsy and support a Made in America handmade business! The frame/magnet board pictured above is what I make and sell over in my Handmade Amazon Shop called Magnet Menagerie.
They are all less than $20 including free shipping – I have many styles available and take custom orders if you have specific colors in mind.
Miscellaneous remaining details:
- That glass turquoise tealight on the dresser is something I already had on hand from Uncommon Goods – and it went perfectly in the room!
- Don’t spend a fortune on window treatments – you can find cheap curtains on Amazon that can add a pop of color to your room. Each panel was just $3.45 + free shipping, making the total less than $15 for curtains!
- I found a brown curtain rod from Walmart that had a bit of turquoise on the ends to match the accent colors in the room.
Looking for more ways to update your home on a budget? Check out these projects:

![101 Items to Get Rid of With No Regret [Free Declutter List]](https://cdn-fastly.thesimplifydaily.com/media/2022/08/30/8349390/101-items-to-get-rid-of-with-no-regret-free-declutter-list.jpg?size=350x220)


Comments
Join the conversation
You did a great job. Love your style. Thanks for sharing!