3 Colorful DIY Dollar Tree Planters to Brighten Your Home

I decided that I'm going to do a Dollar Tree planter DIY, and I'm going to put a little fun, colorful twist on them to brighten all of our spirits. Plant pots can be so boring.
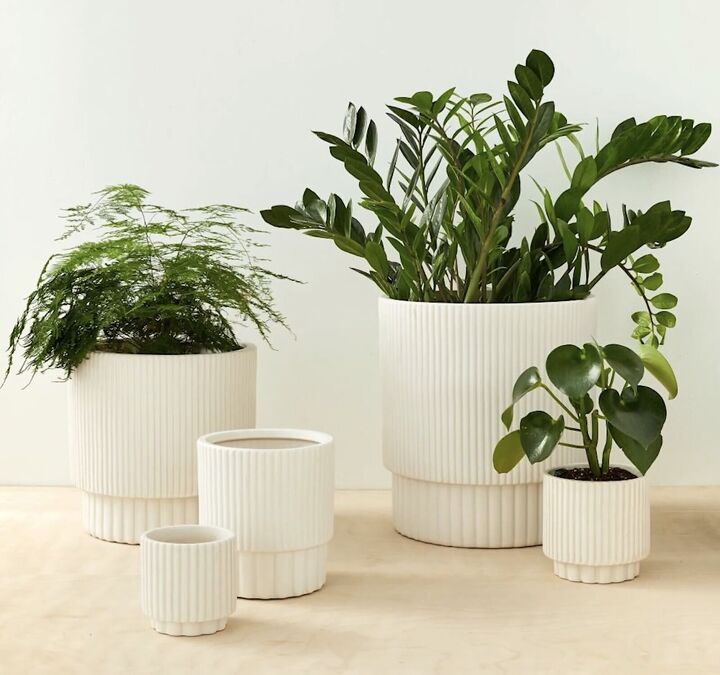
The popular home decor places have cute planters with some beautiful silhouettes, but their prices are high, and the colors they come in are way too basic for me.
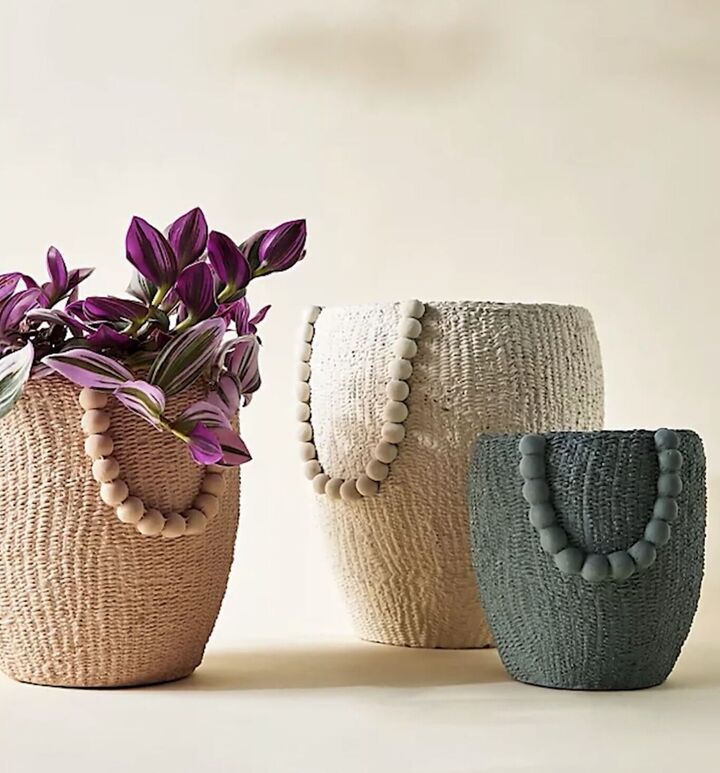
Anthropologie-inspired planter
I am creating a DIY Anthropologie Mesa pot. It has adorable little bead handles, and it's $38 for a nine-inch pot.
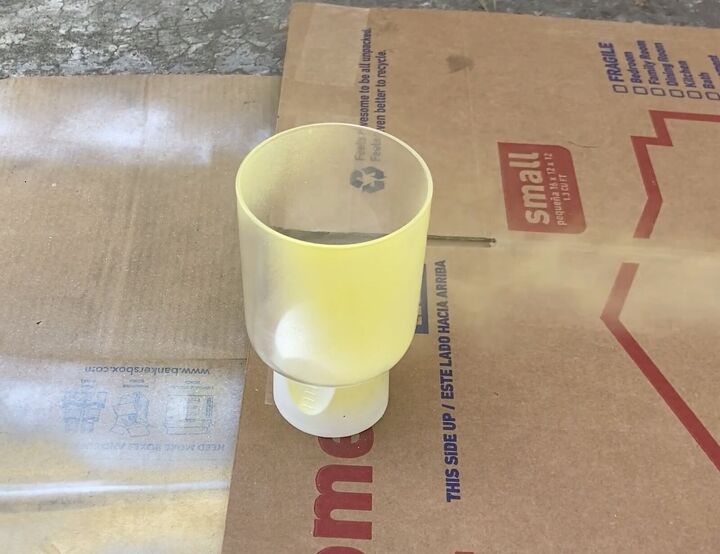
I bought a Dollar Tree fishbowl and wanted to find wood beads that would be appropriate to scale. The craft section at my dollar store did not have wood beads, so I went to the pet aisle, and I found bird swings, which have little wood beads on them and are the perfect size to make these handles out of.
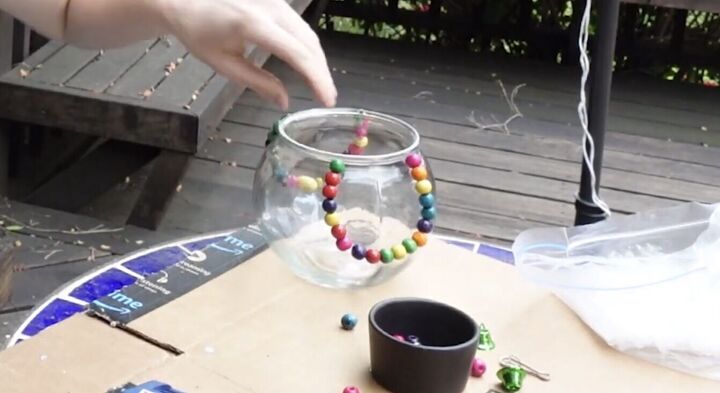
I'm going to use Gorilla Glue to put the beads on.
We're going to paint these after. If any of these beads fall off during that painting process, I'll glue them back on.
I wanted to give this a ceramic look, and I wanted to do a very bright and cheerful color, so I have this incredible coral pink kind of color and I'm tossing in some baking soda.
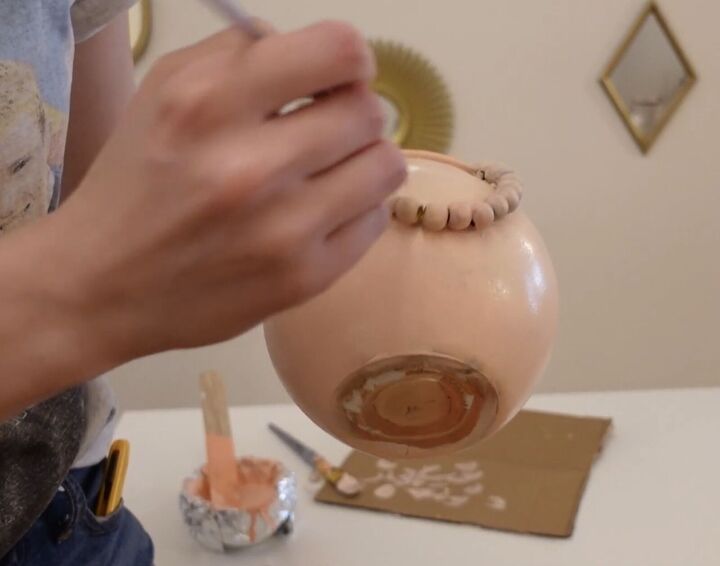
Let's let it dry, then do a second coat.
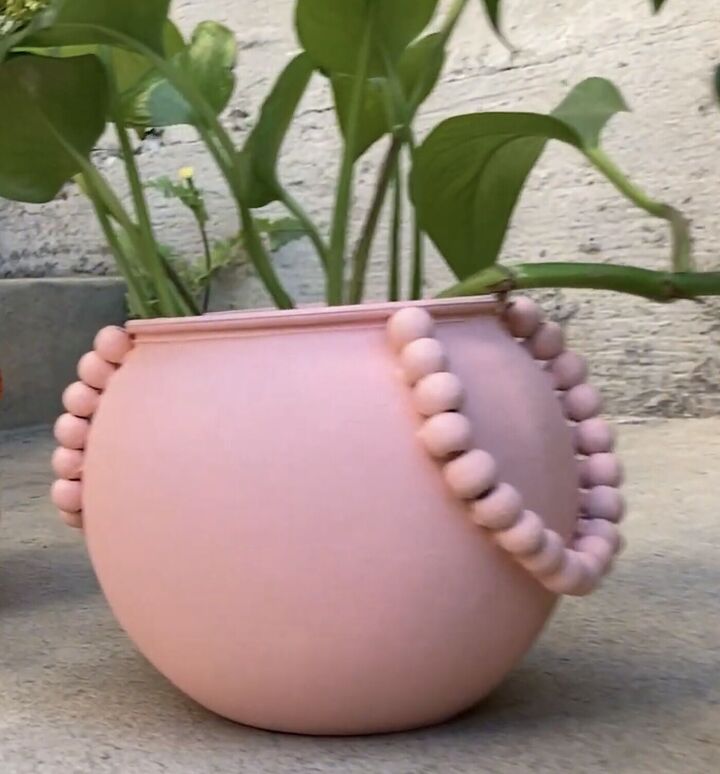
Here's the finished planter.
West Elm-inspired planter
Next, we are creating a planter inspired by the West Elm Ceramic Fluted Planters.
It's simple but sophisticated—these range from $29 to $179. They have a cute pedestal base and fluting all around.
I have a thrifted base and two floral foam rounds to make these planters. These are super hard Styrofoam. You can get them at the dollar store, and they make the perfect little pedestal base.
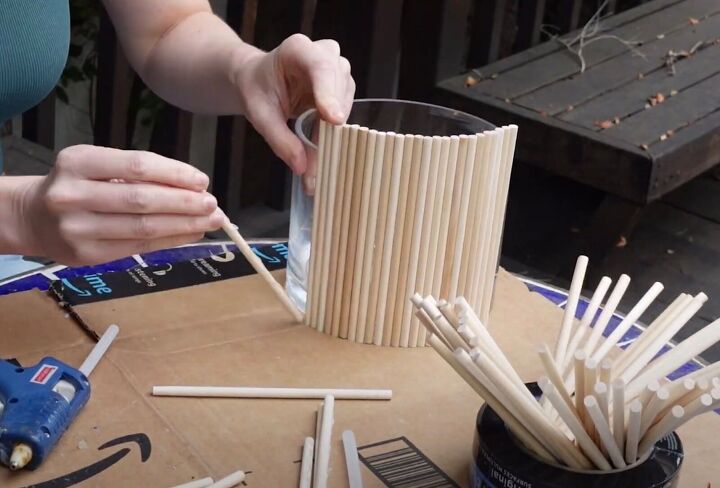
We're using little dollar-store wooden round dowels to put the fluting on the outside.
You can get these in all sizes and cut them down to whatever size you want.
To start, we are hot gluing these two floral rounds together. Now we are just going to start hot gluing these all around. The pedestal base of the original planter has a fluted pattern.
I have a piece that used to be part of the roll top of a cabinet that I flipped.
It does have that divided fluted texture. I will cut out a strip of that and hot glue it around. It's time to paint.

I am painting it lavender; Gloss Gumdrop by Krylon.
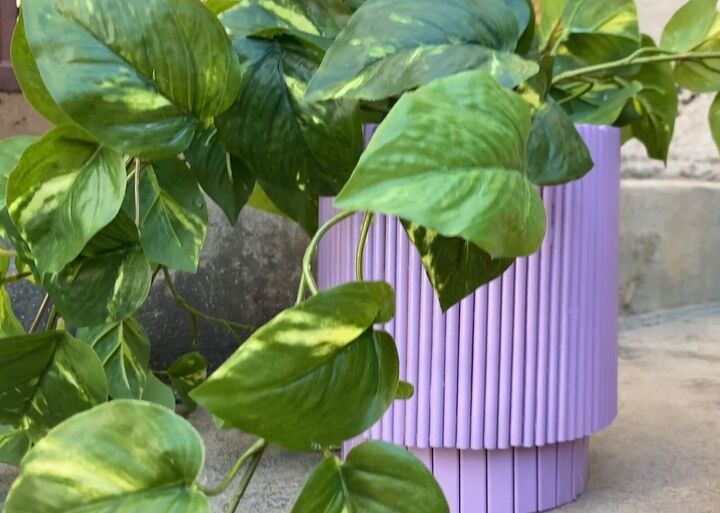
Those are going to dry, and once they do, I'm going to hot glue that base back on.
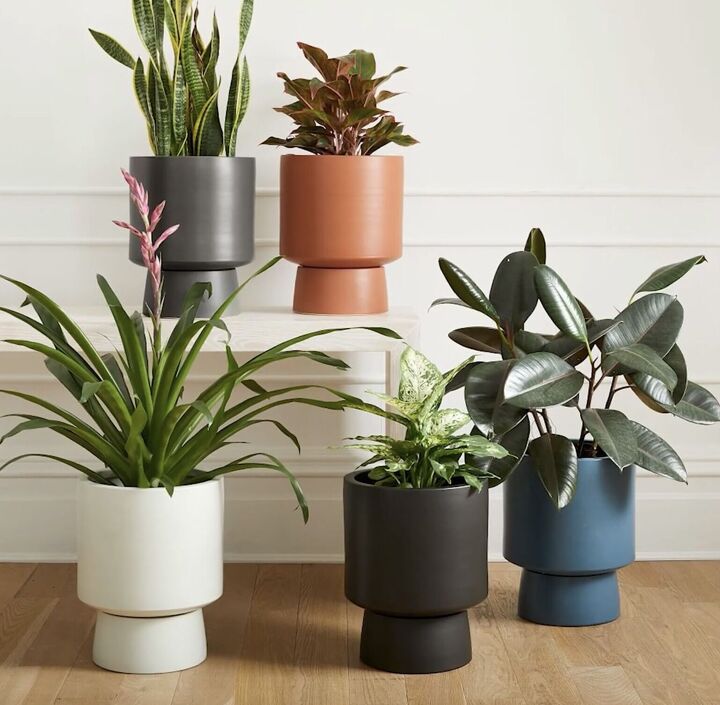
West Elm Bishop-inspired planter
The Bishop planter from West Elm has a cute base and top.
I want to do a mini version, and I want to make it a little sassier. I have thrifted a little ceramic ramekin, and I'm pulling an old candle jar from my collection that I've removed the wax from. We're going to glue the ramekin to the bottom.
Now we're going to spray paint this top part, and we are going with gorgeous, delicious Gloss Citrus Green by Krylon.
This is perfect for our colorful spring vibes. Now we have this beautiful lemon-lime green vase.

I want to make a simple pattern that is fun, wavy, and almost groovy.
I'm using regular chalk paint for the pattern, giving this a two-textured look.
I'm going to let these dry, hot glue these together, and we're moving on.
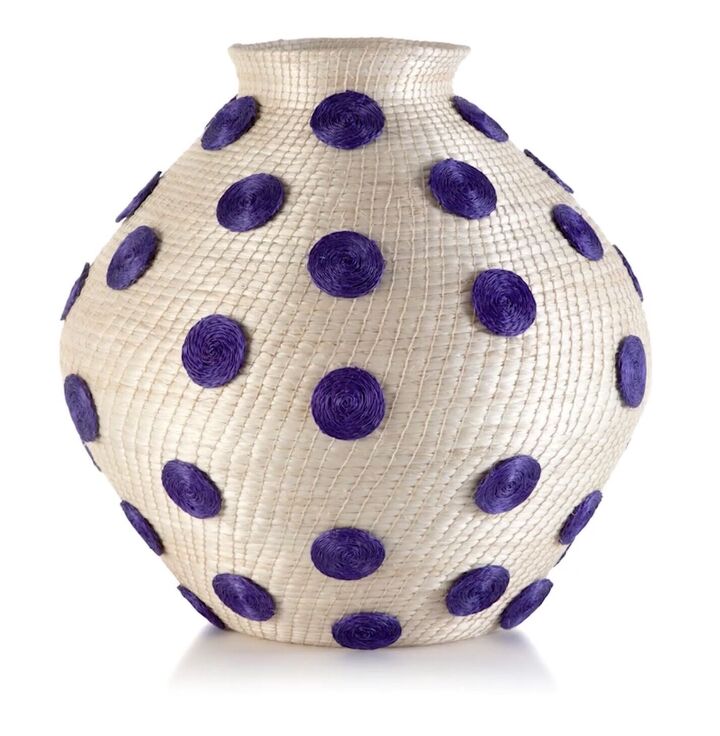
Charlie Sprout-inspired vessel
What we're making next is not technically a planter. This piece is inspired by the Charlie Sprout line of woven vessels that sell for $490.
I like the ones that have these fun little polka dots on them, but I thought we could duplicate a similar look with very simple supplies, and that is a dollar store base and cotton twine.
You could spray paint these, but I wanted to bring in a fiber texture because these vessels are technically woven.
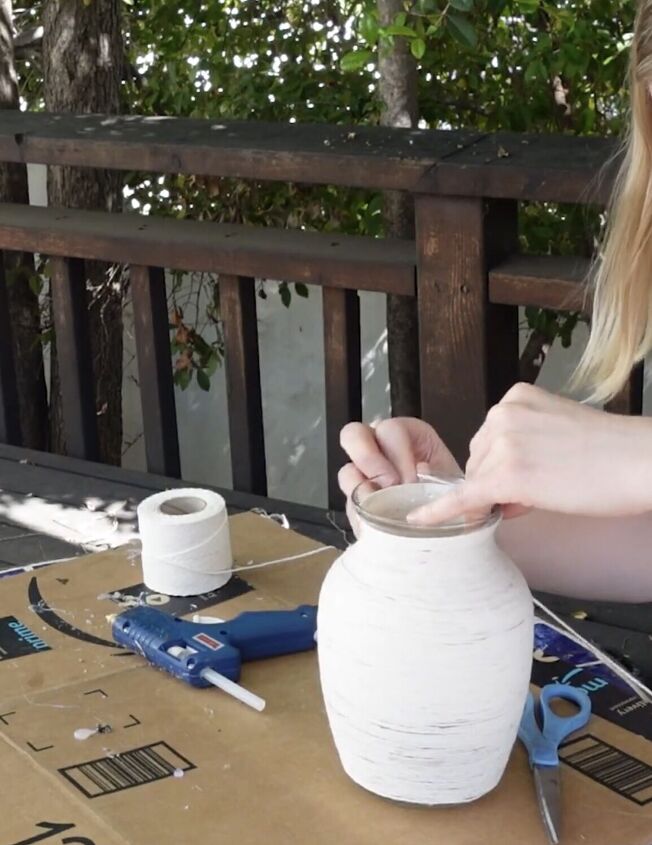
I will start hot gluing this down, and we will start wrapping.
This is super cute, especially if you're a boho gal. Now we're going to make our little polka dots, which is very simple.

We're just going to roll these in little spirals and glue them as we go.
Now it's time to paint the vessel. We have our wrapped base, and I made the little polka dots. These take a long time because they're very delicate, but I have enough that they're very cute.
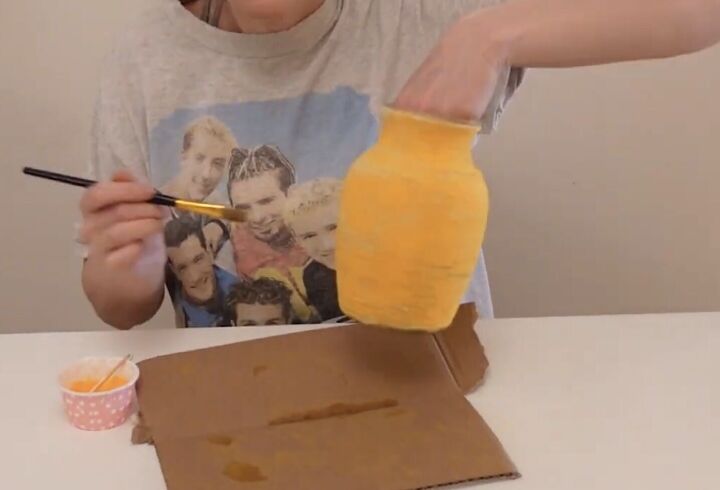
Because this is a woven fabric, I'm going to make a watered-down dye bath and then just blot that on and let it dry. For the actual vase, I'm going to take this tangerine color, add a little water, and mix that all up.
I can already tell that the color is drying a little lighter than I wanted it to, but I'm just going to let this dry for now.

We're going to paint the polka dots a bolder orange.
There were some spots where hot glue had seeped out, or I used it to fuse pieces that did not accept the dye. We are going to have to hand paint these.
All right, the vase is dry. Let's try going in with just straight-up paint.
I realized on my first coat I was not as thorough as I thought I was, and now it kind of looks like I was eating Hot Cheetos and rubbed my hands all over them. A sponge works better because you can work it into the fibers.
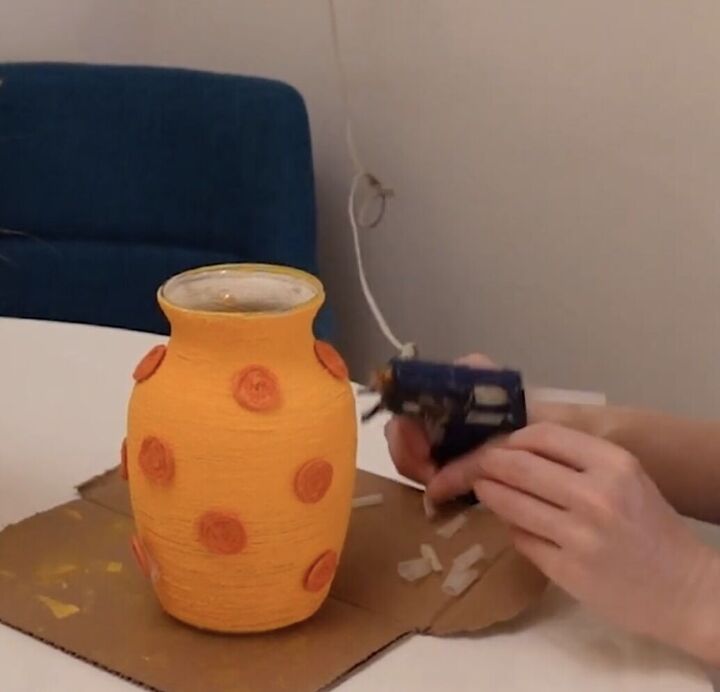
Let this dry, and then we'll return to hot glue on the polka dots.
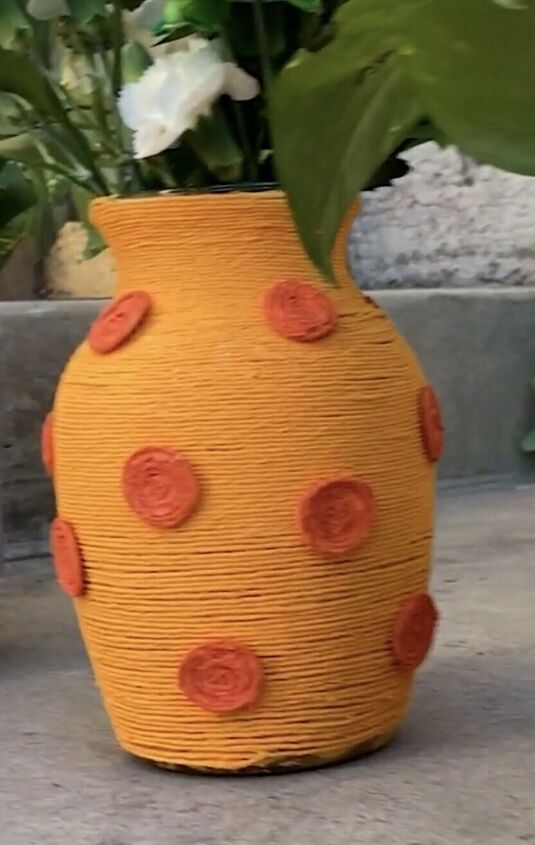
I think it's time to see your big reveal.
DIY Dollar Tree planters
Making Dollar Tree DIY planters was such a super easy, simple craft. This is a fun way to bring more joy and cheer to your life. Have you created crafts from Dollar Tree items? Share what you've made in the comments.


Comments
Join the conversation
Why baking soda in paint?