11 Easy DIY Kitchen Makeover Hacks for Rental Properties

I used some DIY hacks to do a DIY kitchen remodel on my son’s rental kitchen.
The landlord didn’t want me to repaint the cabinets, but even with that slight restriction, I managed to make a variety of updates to take the space from boring to fabulous.
Best of all, I only spent $300. I’ll share some of my changes to give you some of your own DIY kitchen ideas.

1. Faucet update
We switched out the old faucet for a new one. The new black faucet brings a modern and updated edge.

2. Peel-and-stick tiles
We decided to create a backsplash with some peel-and-stick tiles.
First, we removed the outlet covers and wiped down the wall.
Then I lined up the first tile under the outermost cabinet and used a plastic wallpaper scraper to firmly press the sticker to the wall.
I used paper to make patterns to go around the window sill and the outlets. Then I caulked along the bottom and top edges of the tiles.

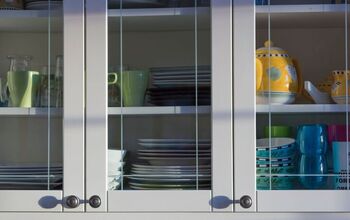
3. Cabinet hardware upgrade
Although we couldn’t paint the cabinets, switching out the hardware made a huge difference.
The old knobs were silver and the color got washed out against the similar shade of the cabinet. That’s why I decided to use black knobs to replace the old ones.
For the handles, I simply removed them, spray-painted them black, and added a top clear coat. I love how the black hardware contrasts the wood and makes it appear richer in color.


4. Create a statement wall with wallpaper
I used peel-and-stick wallpaper to create a statement wall. I’ve learned that when using peel-and-stick wallpaper you must spray the wall or the back of the paper with E-Z Hang spray.
It gives you time to adjust and readjust the paper. It also makes removing air bubbles easier with a plastic wallpaper scraper.
I also lined the inside of the opening cabinets with peel-and-stick wallpaper to add some depth.

5. Update lighting
My son and his girlfriend did not like the light fixtures so we swapped them out for more attractive fixtures.
We bought a new fixture for the kitchen and bought a used chandelier at the thrift shop. We spray-painted the chandelier in black and hung it with some extra chain so we could swag it to hang directly over the dining room table.
We put a hook in the ceiling over the table and hung the excess chain on it to center the fixture over the table.

6. Curtains
I added curtains to the large window in the dining area. I used curtain brackets and hung a curtain rod. I spray-painted some old finials in black and attached them to the ends of the curtain rod.
The curtains were an inexpensive set I bought online.

7. Add a rug
The light flooring was basically the same color as the cabinets. I put down a rug to add color and texture to the floor.

8. Update seating
The dining chairs and barstools were in good condition. They just needed a little freshening up. I removed the seats and cleaned the wood with Restore-A-Finish and super-fine steel wool.

I cut 2 pieces of upholstery fabric to recover the seats of the barstools. When reupholstering seats, make sure you have 1-2 inches to fold over and staple the fabric to the bottom side.
Staple the fabric at the center of each side, pulling the fabric taught.
Make sure it’s centered and then add staples along the sides. For the corners, pull the fabric into small pleats and staple each pleat as you go. Trim off the extra fabric and reattach the seats.

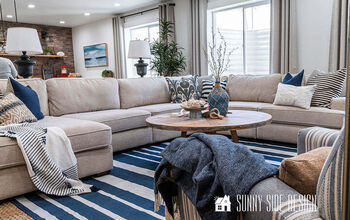
I also recovered the dining chairs with some velvet fabric my son liked. I had enough fabric left over from the bar stools and chairs to make some matching pillows for the couch.

9. Add wall décor
You can inject color and pattern with some wall décor. I hung a large mirror on the statement wall to create a strong focal point in the room.
Then I hung two large floral prints on another wall. I hung a vintage coat rack I had purchased from the thrift store on the wall by the door.
Then I hung a vintage metal plate with an embossed fruit design behind the stove.

10. Display decorative items
I bought two large boxes of home décor from the thrift store for just $30. I got things like a large metal vase, a wooden lantern, and metal leaf décor.

11. DIY projects
I completed a couple more DIY projects to add some final touches.
I hot glued some tassel trim to the bottom of a kitchen towel to hang on the oven door. I also glued gold tassel trim along the bottom of a lampshade that came on a small lamp I had bought at the thrift store.
I also printed out some vintage bird images for 2 wood frames I got at the thrift store. I hung those on the backsplash.

I also bought a wooden serving tray with an inset ceramic tile from the thrift store. I covered it with a printed picture of the wallpaper from the accent wall. I printed it on regular copy paper and decoupaged it to the existing tile.
Once the glue was dry I applied several topcoats of Mod Podge to create a durable surface.


DIY kitchen makeover
What do you think of my DIY kitchen makeover? I can’t believe how beautifully renovated it looks, especially considering how little we spent. Leave me a comment and let me know if you’ve got any DIY kitchen ideas to share.
Next, check out these Easy and Budget-Friendly Bedroom Makeover Ideas.


Comments
Join the conversation