3 Dopamine Dollar-Store DIYs For Groovy & Colorful Decor

I decided that this week what we need on the channel is a hit of dopamine decor using dollar-store DIYs. If you don't know about dopamine decor or dopamine dressing, it’s dressing or decorating in bold colors, fun patterns, and is everything you need to brighten your soul.
I’ll be showing you how to make three super easy, super simple, super fun, and groovy pieces of decor.
I went to the dollar store looking for inspiration. I'm always looking for things that can be the base to add other things onto.
DIY Flower-power mirror
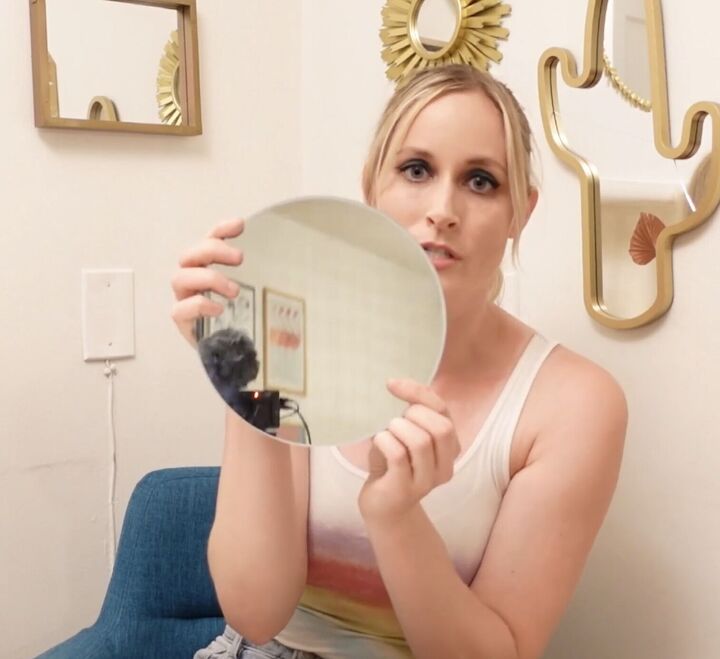
Hence, when I saw this round mirror, I thought instantly, I want to do a flower-powered daisy mirror.
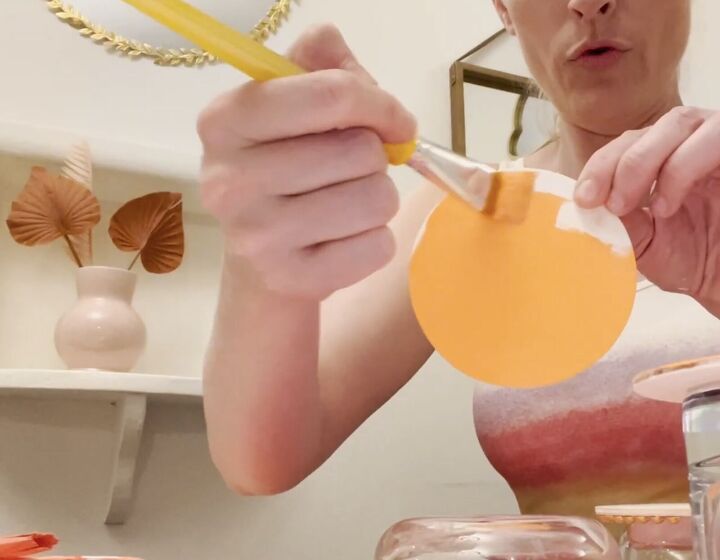
1. Make petals and change the color of the finish
Then I went to the craft section, saw these dollar store little balls around, and I was like, instant petal. We are going to change the color or the finish. We are going to paint these petals pink and orange.
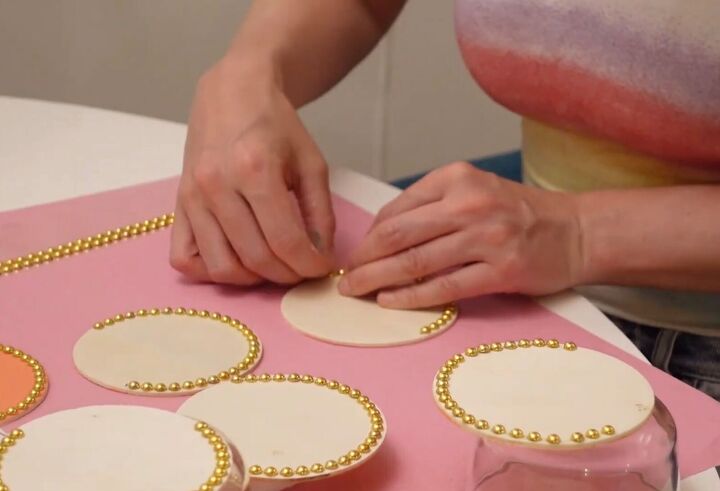
2. Add texture
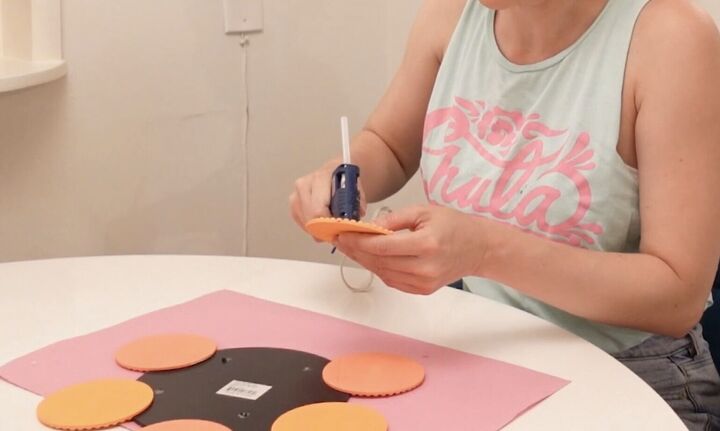
So one of the secrets to good decor is adding texture to a space or a piece. We're going to add a fun detail to these petals by trimming them with these gold dots so that they add a little more pop and pizzazz.
3. Paint
Now it's time to paint. We're going to let these dry. We're going to do a second coat, and let it dry.
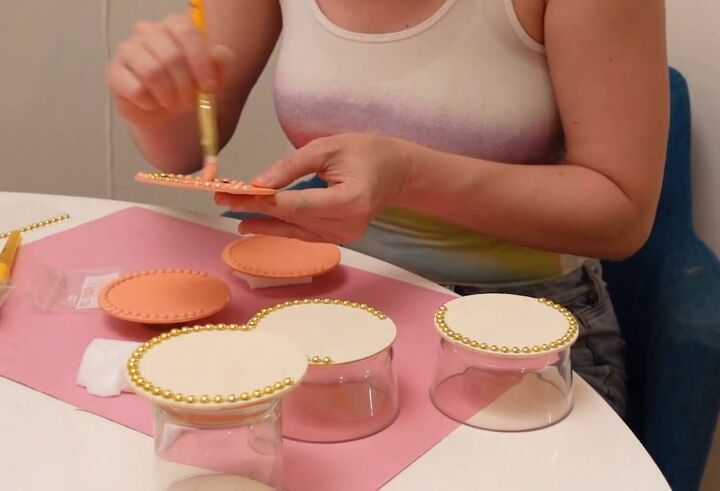
4. Glue the petals
We are just simply going to do some hot glue to get these petals on.
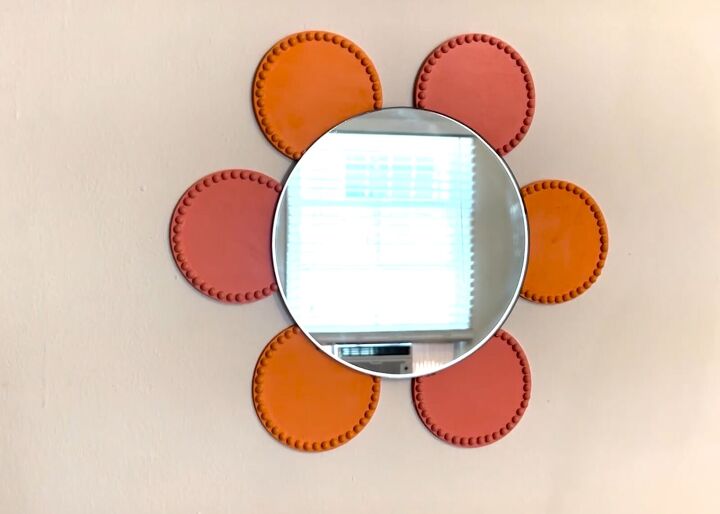
When it comes time to put it up on the wall, you can just use a simple command strip.
DIY storage box
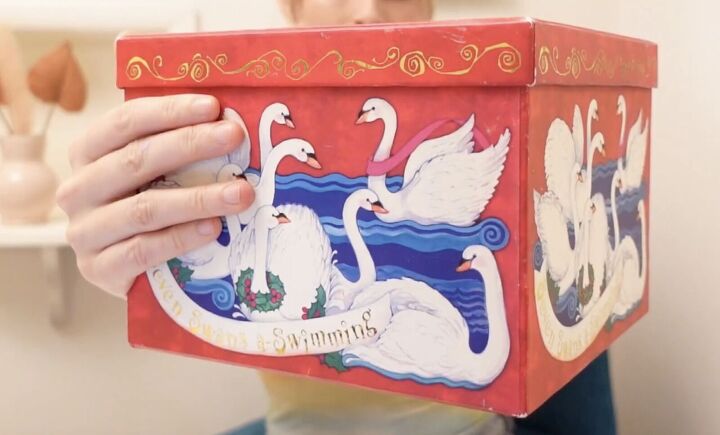
Next up, we're going to make some very cute storage. If you go to your local dollar store, go to the party supply wrapping paper section, and you're going to find a bunch of cool different gift boxes.
1. Add a pattern
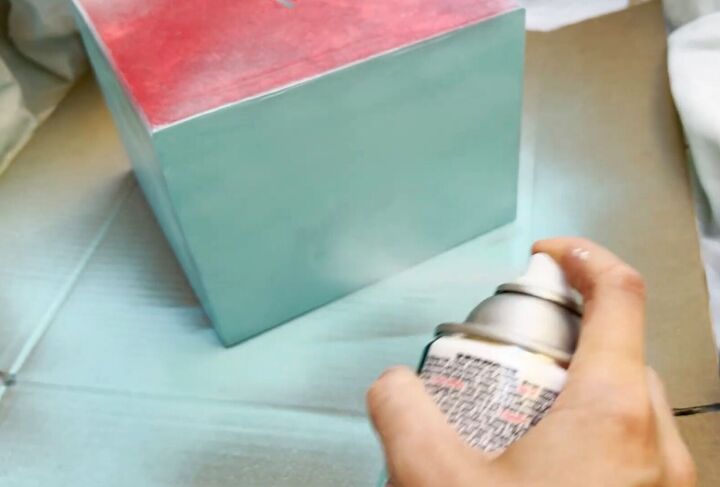
This is a very simple box that we are going to give a very hippie-licious makeover to. To start, we are going to give it a base color paint in this beautiful sky blue.
2. Add tie-dye effect
It's tie-dye time and we're going to go in with this gorgeous rainbow of paints I've mixed up. I’m taking a magic eraser, snapping it in half, and ripping it, that's giving me a cool edge and texture. I’m going to do that so I have a few pieces. Use a different piece for each color.
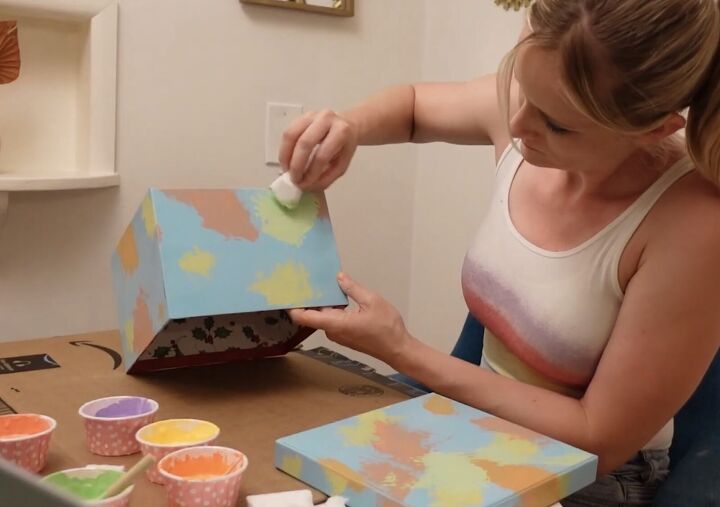
I'm just going to go in and around and just start dabbing paint on just random little spots. That gives you more of that layered effect.
3. Add a fun detail
So this box is super cute, super simple, but it can also kind of still just look like a random painted box. So how can we elevate it? Make it look a little bit more intentional, make it look a little bit more bespoke.
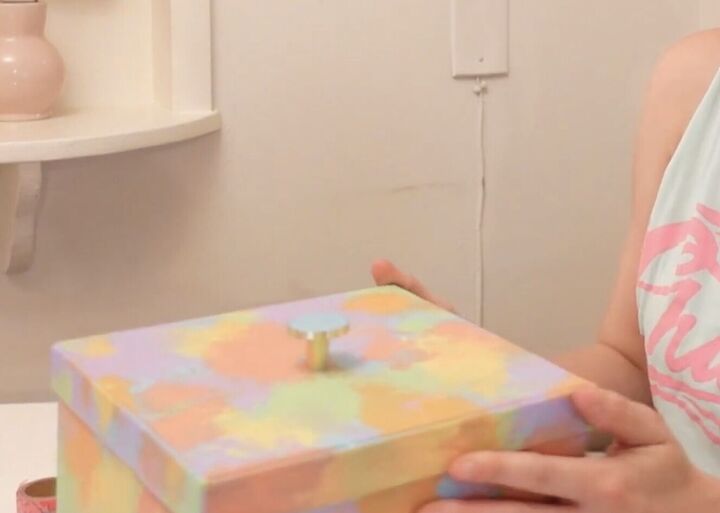
What better way than to add an actual little handle top?
Add legs, add a handle, add the bones of an enemy, I don't know. But something that just gives it a little extra, that makes it feel a little bit more elevated. We're going to go spray paint the handle.
I do think that the blue alone stands out. So I'm just going to do tiny, tiny little tie-dye marks on the top. To find the center mark, I'm just going to X that out. I’m going to screw the handle through the box top until the screw is fully tightened.
If there's a gap you can use a bunch of little mini-washers to fill in that gap so it'll sit tight. If you don't know, washers are just these little round metal rings.
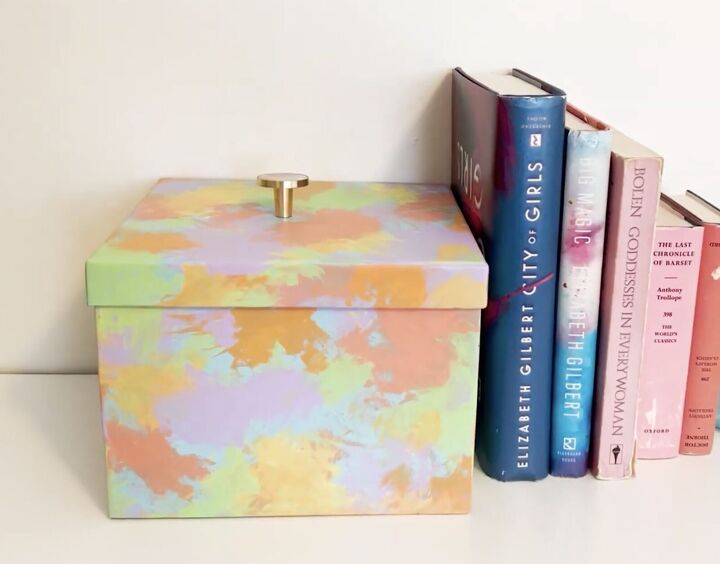
This came out really cool.
DIY jar into candle
Next, we are going to repurpose an object by turning this jar into a candle. I was very inspired by the checkerboard pattern we're seeing everywhere.
1. Watch your painting lines
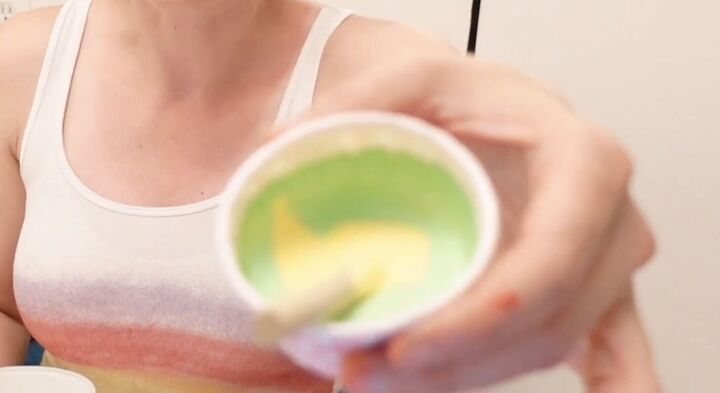
I have just mixed up this beautiful lemon, lime, yellow, and green.
The easiest tell for something that's dollar store material is because it's usually a little wonky. You need to watch your lines and you just need to be consistent and symmetrical.
To accomplish that, you can do what we're going to do, which is stamp a pattern.
Whatever you do, just make sure your lines are very consistent. I grabbed a magic eraser and I cut a perfect, cute little stamp.
Magic erasers are perfect to use as a stamp because they're porous enough to absorb the paint, but they're flat and smooth so when you put the paint on, you're not going to get the same kind of inconsistent stipply pattern that you will on a kitchen sponge.
2. Stamp paint the jar
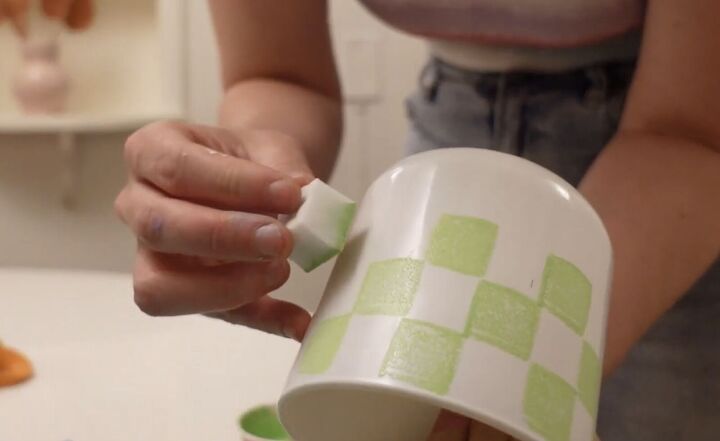
Put your paint on a flat surface instead of dipping it in all the way, you can kind of blot on and off and kind of get a sense of how much is actually on it.
I applied multiple coats of paint and I also went back over with a toothpick, and I kind of just cleaned up any lines, so I feel pretty good about it. Now it is time to make this an actual candle.
3. Melt the candle
So let's melt the candle down.
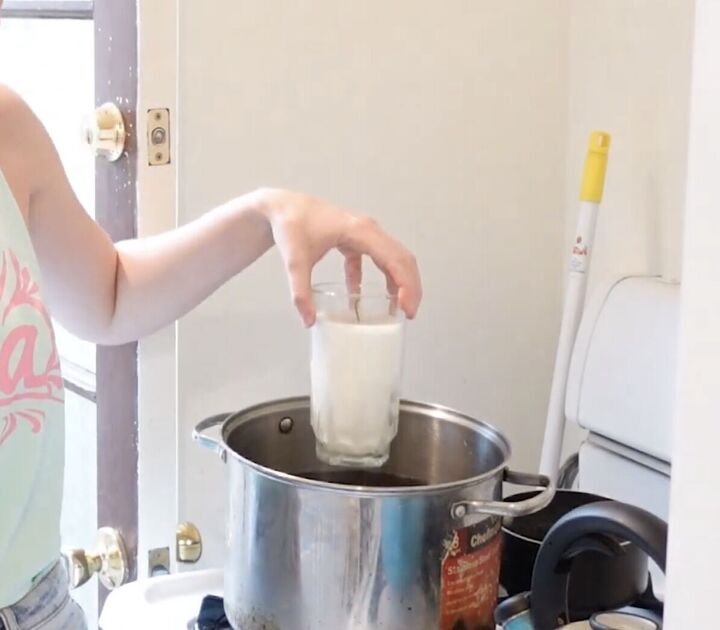
We're just doing water, and we're just going to put this in. Let's give that however long it needs to boil and melt down.
4. Pour a drop of wax and position the wick
The wax is melted, and it has left the wick and the little base for the wick. So I'm going to do two things.
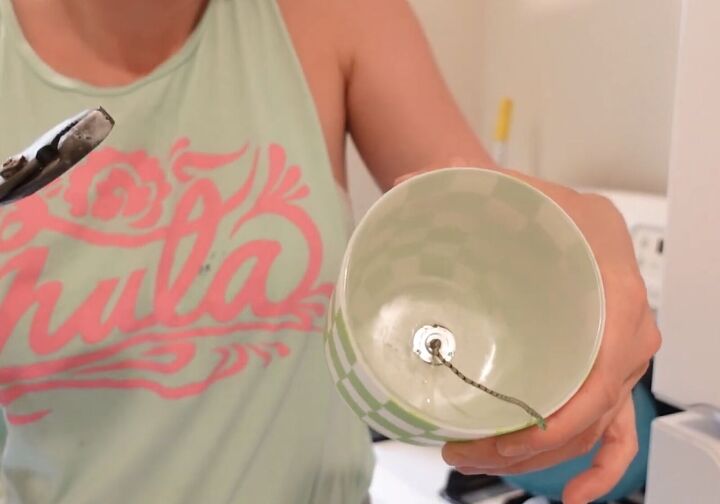
I'm going to drop a little bit of wax in the bottom of the jar, and then I'm going to pull out the wick stem and the little base from the candle (using pliers) and I'm going to put it right over that melted wax I just did.
Now you can reuse it. I'm wrapping the wick around a little paintbrush so that it can stand up straight.
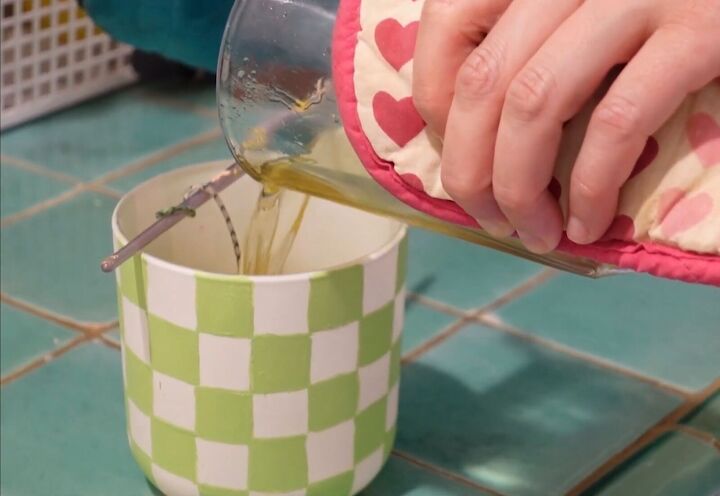
5. Pour the melted wax into the painted jar.
Let the candles set until they’re fully dry and hardened in the jar.
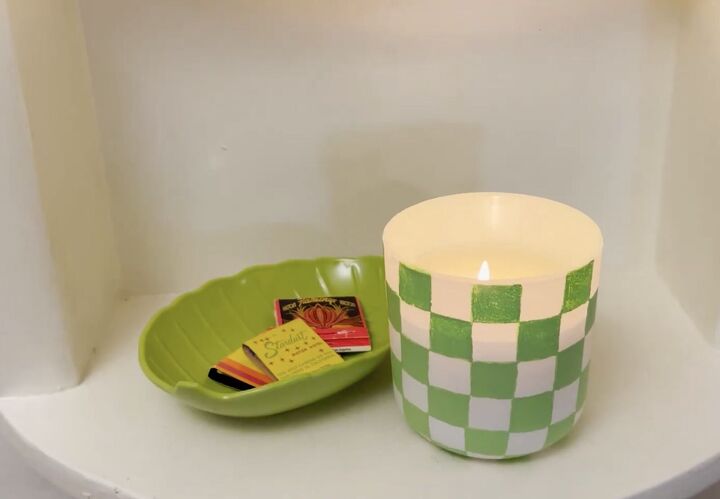
This is a super cute little candle that pops with color.
Dopamine dollar-store DIYs
I did not know that $10 worth of dollar-store supplies could bring so much joy to my inner tween. I hope I gave you a little bit of inspiration for dollar store DIYs to add some groovy color to your home.
Share in the comments below your most recent dollar store craft that you made!


Comments
Join the conversation
Hello. If the original candle is not scented, one could add esencial oil, right?
there are scents & colors made to be added to candles - regular essential oils might burn too hot & cause a fire! Stick with scents made for candles or go scent free! Safety first