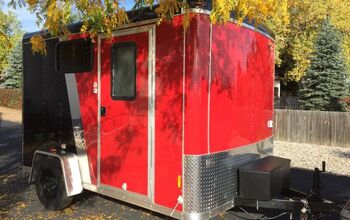
How to Recover Pop Up Camper Cushions Affordably (Without Sewing!)
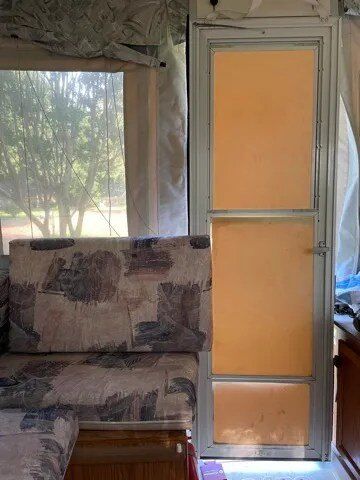
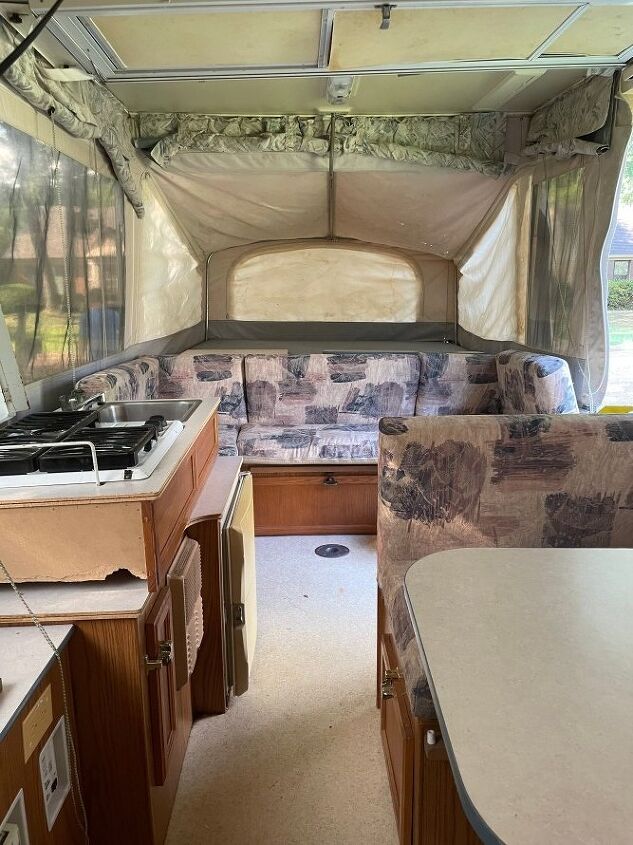
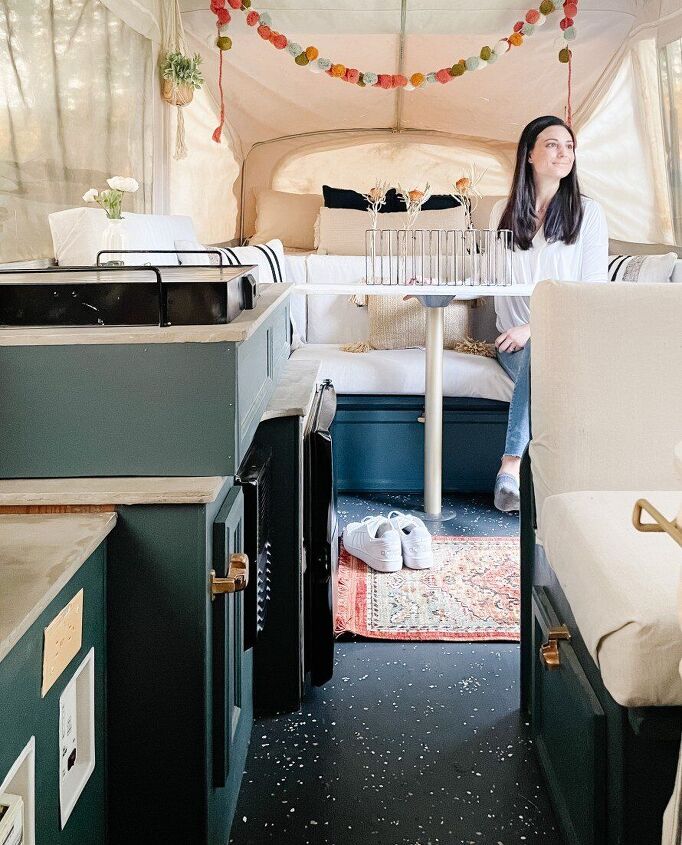
Nothing dates your pop up more than the 90’s colorful geometric patterns all over the cushions. The teals, purples, dirt…. gotta go. You may be thinking it’s an impossible task to recover your cushions if you are like me and can’t sew, but fear not! I executed a successful strategy to recover mine so they are now neutral and durable. Keep reading to learn how to recover pop up camper cushions easily and efficiently.

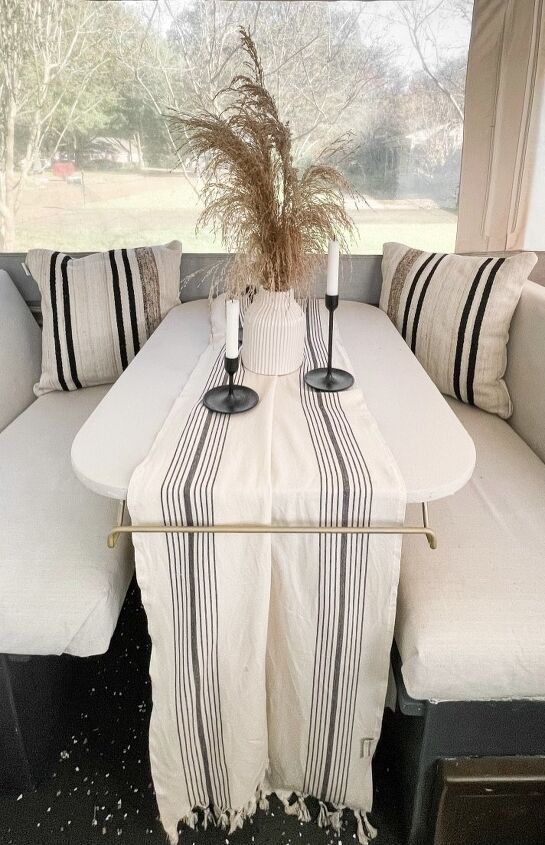
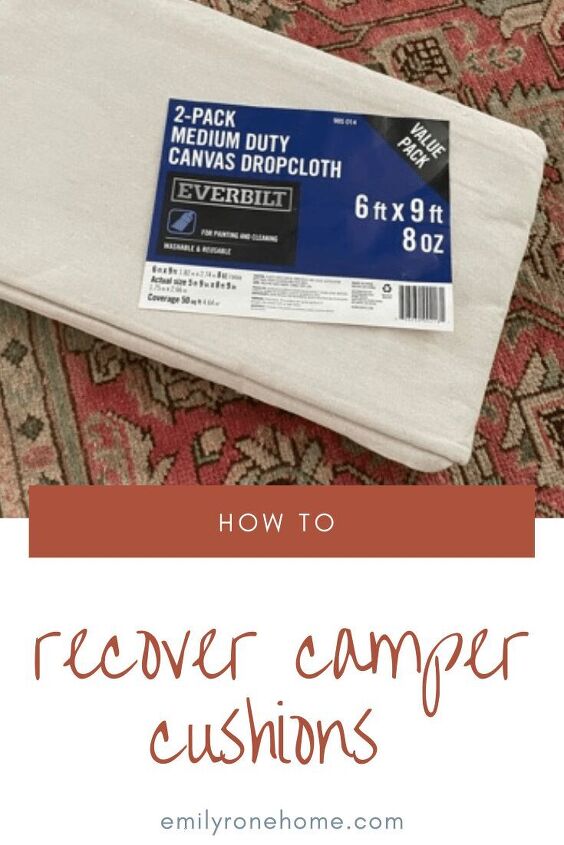
Were you here for the Spring 2021 One Room Challenge? I used a drop cloth as a table cloth for a cheap and easy solution to cover a dated table. So why not use drop cloths to recover dated pop up camper cushions?
For more the full post, including direct links to supplies used, see Emily Rone Home!
STEP 1: Remove old covers and clean
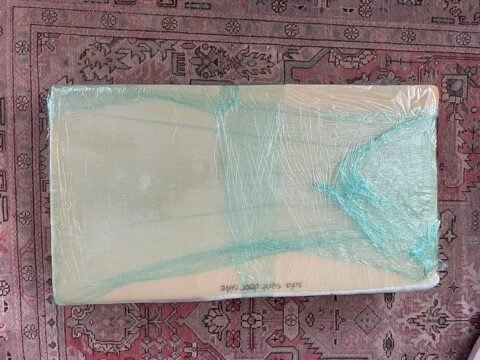
Based on the state of everything else in the camper, my guess was the cushions had never been washed. The cushion covers were dirty, and showed signs of stains and potential water damage. As I unzipped and removed them, they were partially wrapped with thin, dated, yellowed plastic wrap, I’m assuming in an effort to “waterproof”.
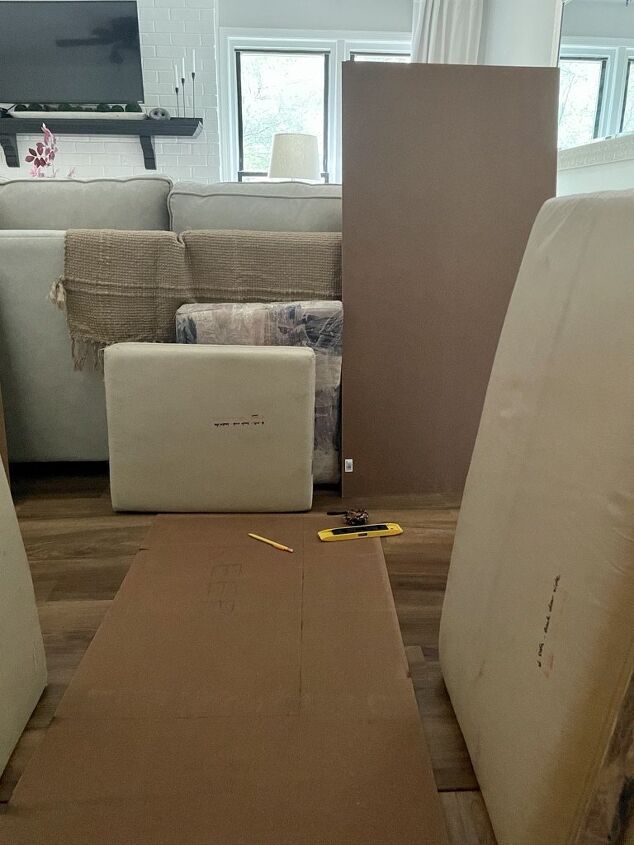
I threw out the old plastic wrap and cushion covers, then waited for a sunny day (not difficult in Memphis in August). I laid out old blankets in the driveway as a barrier from the ground, and put all the bare cushions on top. Next, I generously sprinkled baking soda and let them set for 2-3 hours before flipping and repeating on the other side. After both sides had been treated with baking soda, I sprayed them with half and half water and white vinegar, and let dry in the sun. This treatment took care of the scent my husband so lovingly referred to as “boy scout camp”.
Enjoying the tutorial? Pin it to keep it safe and save it for later reference!
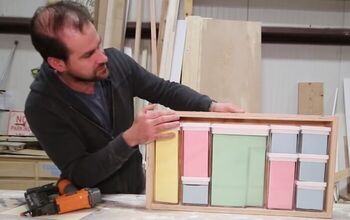
STEP 2: Label cushions and cut plywood
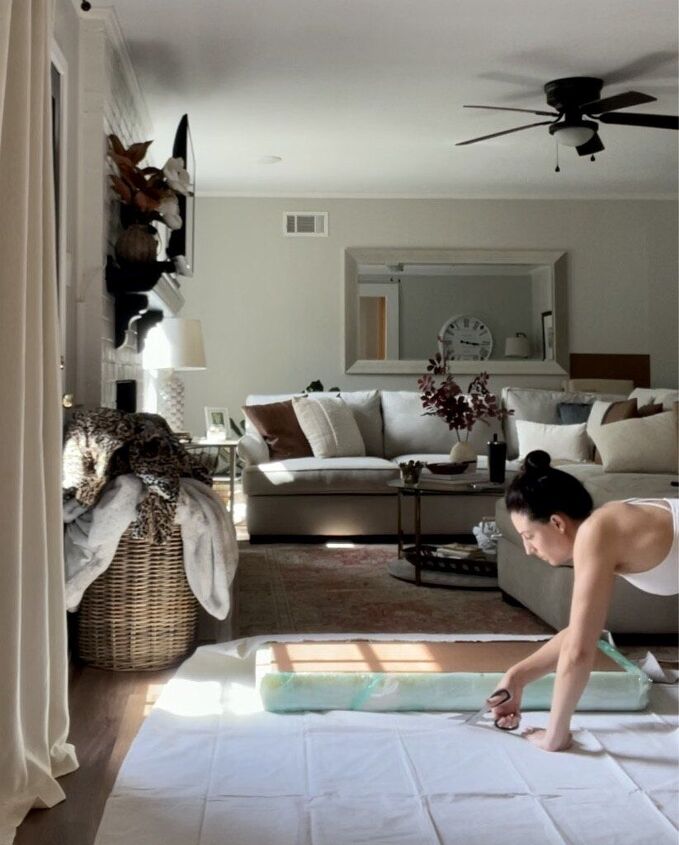
I purchased the cheapest plywood I could find to cut costs and keep the cushions lightweight. With the cushions laid out on the ground, I measured and marked the wood. I made sure to keep a 1 inch border of cushion around the board to ensure soft edges.
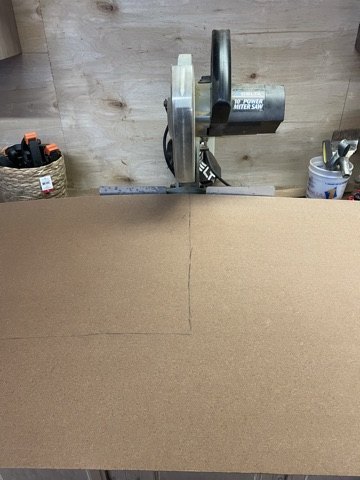
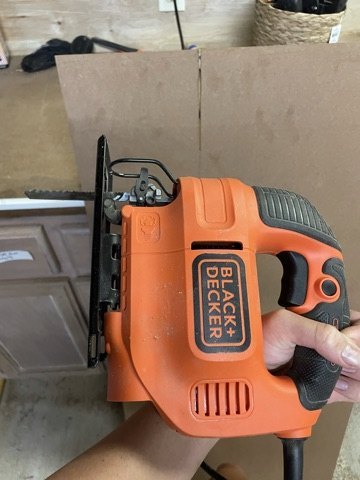
The previous owners had the cushions labeled by location for easy set up. I thought this was brilliant, and would be useful during the recovering process as well. I labeled each cushion with a number and location that matched the piece of plywood I measured and cut. Using my miter saw, I made cuts down the length of the horizontal and vertical lines. My miter saw is not large enough to cut down the whole length of the board, so I used a jigsaw to connect the 2 cuts.
STEP 3:
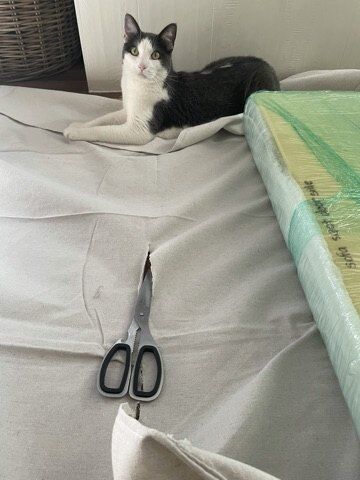
I wrapped the cushions with plastic wrap to create a waterproof barrier underneath the drop cloth to protect the cushion. This task is awkward and bulky, but I just made sure to wrap it both horizontally and vertically
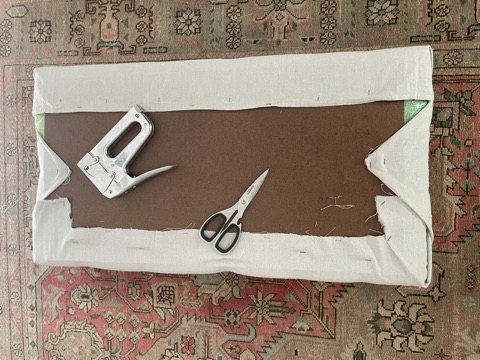
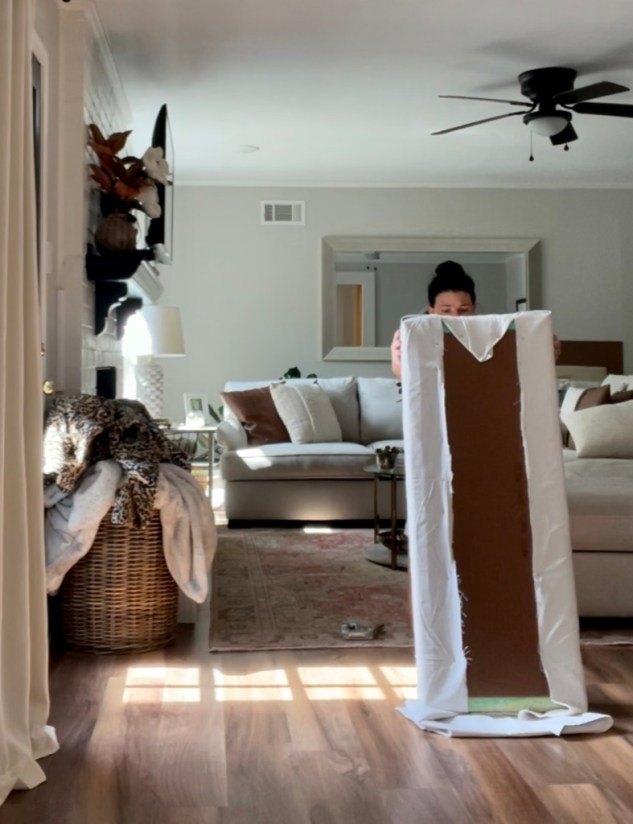
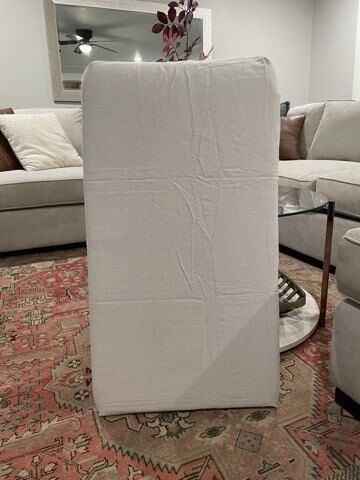
STEP 4: Wrap in drop cloth
I purchased these drop cloths from Home Depot that come in a pack of 2. For all 12 cushions, 2 packs (4 drop cloths) was enough to complete the project. I laid the cushion out on the drop cloth, making sure I had enough excess to pull up around the sides before cutting. This process is very similar to wrapping a present- I pulled the long edges up first, stapling one side, then the other. Next, I pulled on folded the fabric on the short edges. Make sure to pull snug.

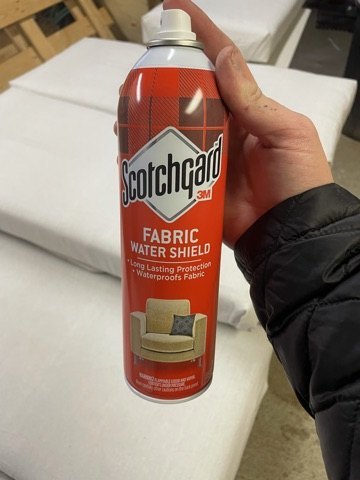
STEP 5: Steam and protect
Once the drop cloth has been cut and stapled to each cushion, I used my steamer to take out the wrinkles. The cushions were smooth and looking great. I finished by liberally spraying ScotchGard in an effort to make the cushions water and stain resistant.
Although this project is affordable and beginner friendly, I will advise it is tedious and time consuming. Especially with 12 cushions to cover! The good thing about this process is I know all the cushions are clean and will hopefully remain durable. Just in case something happens though, these can easily be recovered as needed using the same backing for years to come.

Tags: camper, cushions, DIY, drop cloth, no sew, pop up


Comments
Join the conversation
Love this! The change is incredible.
You stated that you used a drop cloth for the table as well. What did you use to create the cute design?
I saw where someone used black out curtains to cover old cushions I am not one to sew anything but it did happen to look very nice. And if you have time try to find them on sale...Cheaper than buying fabric.