How to Build a Tiny Home on a Budget: 6 Ways to Save Money

What's up, guys? Today I want to chat about how to build a tiny home on a budget. One of the biggest challenges is making sure you have enough time and resources to ensure that you meet deadlines.
How do you keep it to where it's not intimidating, and you can manage it? How do you know what things you should do yourself and what things are beneficial to hire out, so it saves you time and money?
To illustrate my advice, I want to give you a tour of this tiny home project we are working on for a client, which is the main check-in hub for a brand-new hotel.
I hope it gives you an idea of how to save money when building a tiny house or managing any kind of project that involves construction. I want to take you through some simple steps of how that happens and how we keep things moving forward in a linear fashion with minimal hiccups.
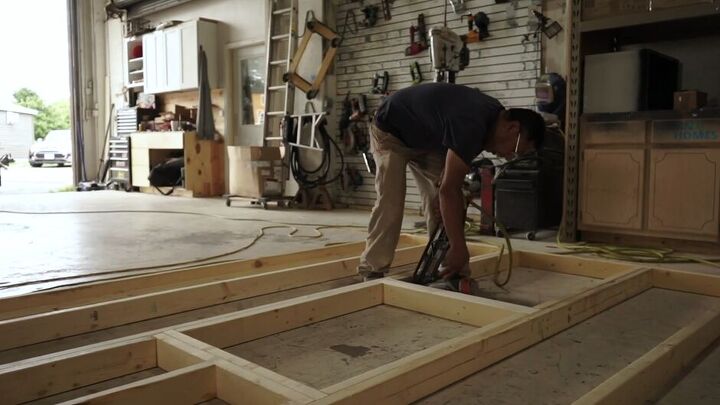
1. Framing
Firstly, we start with framing. If you want to know how to save money building a tiny house, then my first piece of advice is to make sure to finalize the framing plans 100%.
It is important to ensure that every single detail of that plan is ready to go so that when it goes to production, so it can just keep moving forward. This way there is no stopping the project, cutting things out, or reframing, which ends up costing more money.
These houses go together a lot faster and within budget once the framing is done correctly.
2. Ductwork
Now we get into the mechanicals of the unit and the first thing you should start with is ductwork. There is such tight space in these tiny homes, so you want to make sure there is ample room for ductwork.
If we start with plumbing, for example, we might have to move vents and drains because the ductwork doesn't fit. So, we want to make sure we get all the ductwork in before we really start going to town on the plumbing or other mechanics.
This particular house had a lot of different vents. We didn’t want to spend time and effort on figuring out how to coordinate the air returns so that it all circulates properly and possibly make a mistake that would cost money. So, we decided to hire a heating and air company to coordinate that and install everything correctly.
Decide what projects make sense to outsource and include this in your budget for a tiny house.
3. Plumbing
The next step is plumbing. I decided to do it at night because there were so many people working on the project during the day. We made it pretty simple… I drilled all my holes first and laid out all my pieces.
Then I ran all the water lines and everything else, including our main water lines that run through the soffit area with our ductwork. It was important for me to do it this way so that the heat would come off the ductwork in the wintertime and warm the pipes so they wouldn't freeze.
4. Electrical
After we got the plumbing in, it was time to do the electrical. We decided to use this blue electric nonmetallic tubing, also known as Smurf tube.
It's like a conduit but it's super flexible, easy to cut, and we just run it through the whole house the same way you would do normal steel electrical conduit. The only difference is you must include a ground wire with all your pipes. But it allowed us to basically pull all the wire like a normal house.
5. Drywalling
When it came to the wallboard, one of the things that visually helped us stay on track without having to remember a bunch of things is if a wall is complete in its mechanical sense or everything that needs to go on that wall is done, then we put our insulation up.
Insulation is kind of a sideline project or step throughout the whole project. There's always a roll of insulation sitting by the job because as soon as we finish something, no matter what your craft is at the company, you'll put the insulation in.
This means the next person to walk in can visually see what’s done. Then if somebody is looking for something to do and they see all of the insulation is in they know they can start drywalling.
In the bathrooms, we use this paneling called noodle poly. It's got a washable surface on it. The nice thing about this is, that once this board goes up, then it's done. So, we're able to put all the lights in the ceiling, all the fans, grills, everything like that, and just have it all finished. We don't have to wait for paint or anything else. It’s definitely saved us a ton of time in this whole project and time is money.
6. Finalizing the project
Now it’s time to complete the project. We will put all our flooring in, put the main mezzanine glass front door in, and this thing is finished.
How to build a tiny home on a budget
I really hope you've enjoyed these tips on how to build a tiny home on a budget. If you have any questions or comments that you'd like to leave me, drop those below. See you next time.






Comments
Join the conversation
It makes so much sense.