9 Easy and Affordable DIY Spring Decor Projects

I came up with nine beautiful DIY spring decor dupes because of a recent visit to a pricey home decor store in my area. I was shocked at the prices of some of their merchandise!
When I got home, I decided to try to replicate many of the things I had seen while spending much less.
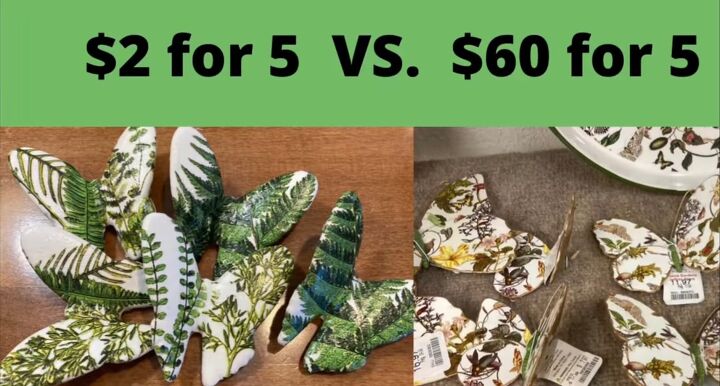
1. Ceramic butterflies
I purchased these ceramic butterflies at a thrift store for a couple of dollars. I cleaned them well and spray-painted them to cover up the flower design. I thought I could get a similar look to the pricey butterflies by decoupaging on a botanical print napkin.
I applied a thin coat of Mod Podge to the butterfly, then carefully applied small pieces of napkin to create a pattern I liked. I applied a napkin to all of the butterflies first, let that dry, and then flipped it over and applied the napkin to the back side of the butterflies.
I used a spray top coat to seal and protect the napkin and E6000 to glue small hooks to the back.
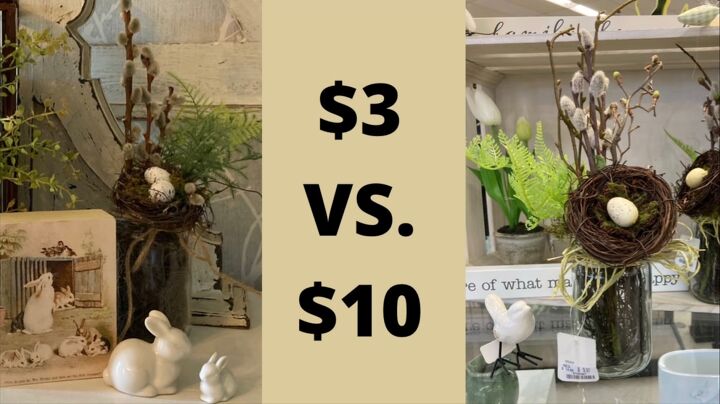
2. Jar florals
For the next project, I used jars that a friend gave me. I have a large stash of angel hair vine that I got for a couple of dollars at a thrift store, but you can find it at craft stores and on Amazon.
I filled the jars full of the angel hair vine and cut apart a floral bush I had purchased at Dollar Tree. I also added some extra greenery from a bush I purchased at Walmart. Lastly, I added a bow with some jute twine I purchased at Walmart.
I made a second floral jar using the angel hair vine to create a small bird's nest to attach to the front of the jar. I shaped it into a circle and then used floral wire to hold it. I hot-glued some moss to the circle to create a bottom for the nest. Then I hot glued a couple of bird eggs into the nest.
To make sure that the nest didn't fall off of the jar, I wired a pussy willow stem to the back of it and then was able to stick that down into the jar.
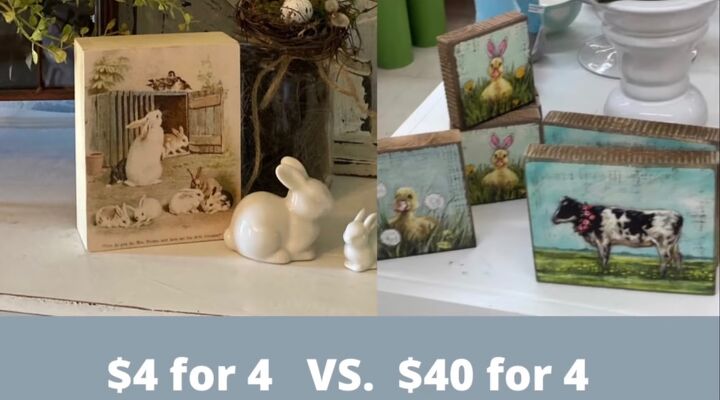
3. Vintage print wood blocks
I used four wood blocks purchased at Dollar Tree for the next project. These blocks are made of pressed wood, so I painted them in various shades of chalk paint. I printed out four images from vintage Easter cards.
Because paper doesn't adhere to wood as easily as smooth surfaces, I applied Mod Podge to the back of the image, and the wood blocks themselves. I used a clean towel to smooth any wrinkles and then let it dry.
I always print out my images slightly bigger than I need to ensure they fit correctly. Using a utility knife, I turned the blocks over and cut off the excess paper. Then, I used light grit sandpaper to smooth down the edges of the paper and distress the block itself.
I used clear wax to seal the chalk-painted wood but did not apply wax over the image. I applied three light coats of clear sealer on the image.
4. Butterfly bouquet
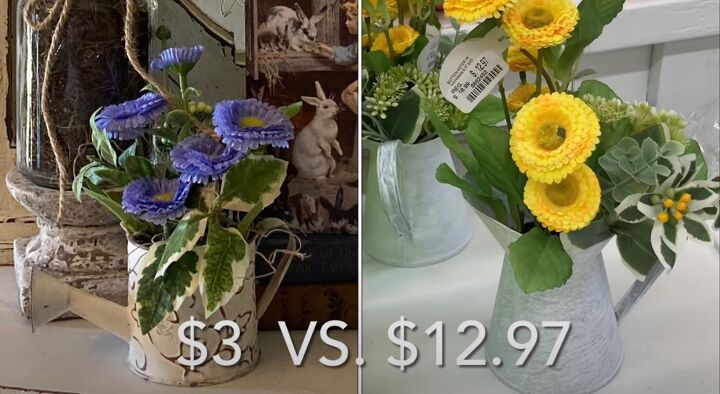
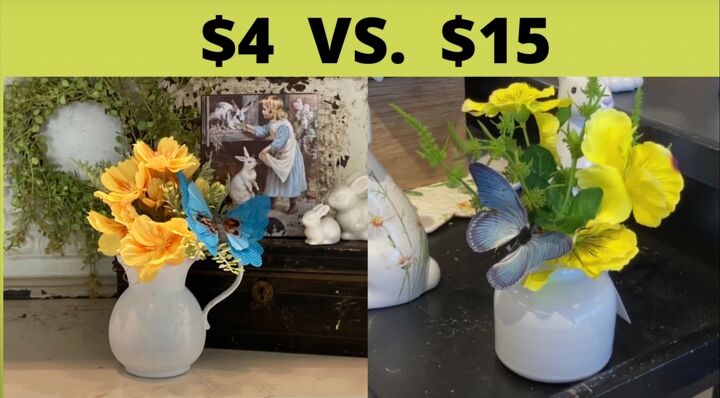
5. Small floral pitcher
For these two projects, I found two small pitchers and a silver creamer in my thrifting stash. I painted all three with two coats of white chalk paint. I lightly distressed them with 220-grit sandpaper and then applied a thin coat of clear wax.
I cut apart some rigid floral foam and put it in the pitcher, ensuring I had a tight fit. I then cut apart a thrift store bouquet using only a few yellow flowers. I added some greenery from a Dollar Tree bush and clipped on a Dollar Tree butterfly. I stuffed in a little Spanish moss, just enough to cover up the Styrofoam.
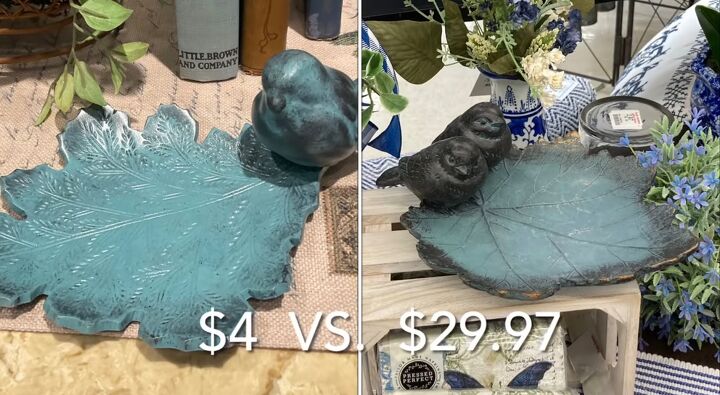
6. Bird on a leaf tray
I took a glass leaf and three ceramic birds for the next project. I spray-painted them with a good bonder and three coats of blue spray paint.
Once the paint had thoroughly dried, I used E6000 to attach two birds to the leaf. I then let this dry overnight to add some dimension.
The next day, I applied some white wax, first tapping it on and then rubbing off the excess. To add further dimension, I returned with sandpaper and distressed the edges. Then, I sprayed on a clear sealer.
I decided to make a second tray using a metal leaf. After spray-painting the leaf and the bird in metallic spray paint, I used E6000 to attach the bird to the leaf. I took agave chalk paint, applied it, and rubbed it off. I kept doing this process until I got a look that I liked.
After the first coat of blue paint had dried, I returned and added more to the center of the leaf.
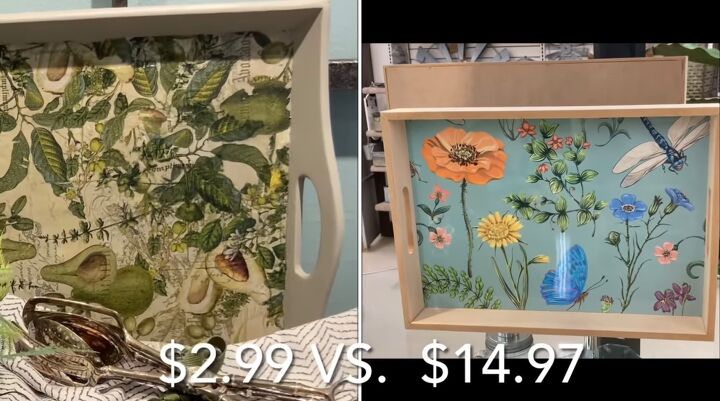
7. Botanical tray
For the next project, I sanded down the image of Uncle Sam on this patriotic tray to get a smooth finish. I then spray-repainted it with bullseye primer.
Once the primer was dry, I applied two coats of Waverly mineral chalk paint. I tore away the two back layers of this three-ply napkin.
I covered the entire base of the tray with a thin coat of Mod Podge. I then carefully applied the napkin, smoothing out wrinkles as I went.
When the Mod Podge was thoroughly dry, I returned with a utility knife and cut off the excess napkin. Then, I returned with some sandpaper to get it all off. I had to go back in and touch up some of the paint. I used a clear top coat to seal and protect the napkin.
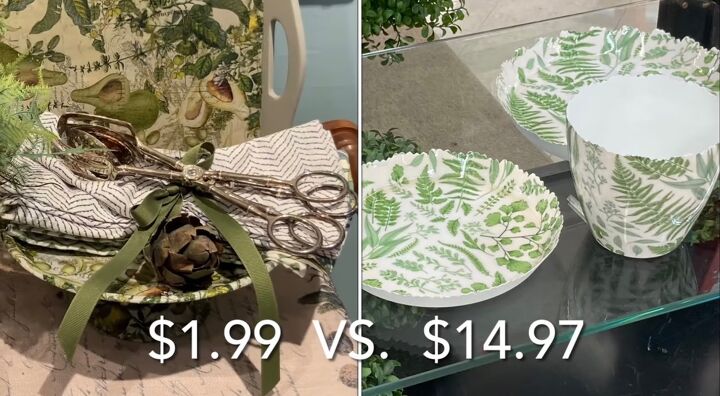
8. Pedestal tray
I took it up a notch and used a pedestal tray for my next project. I had previously painted this with a light gray spray paint, so it was ready to be decoupaged. Like with the tray, I applied a thin coat of Mod Podge to the surface, and then I carefully applied the napkin, smoothing out wrinkles as I went.
I did the top first and cut off the excess. Once that was dry, I returned and applied Mod Podge to the bottom, using napkin strips to cover the base and the underside. When the first coat of Mod Podge was dry, I came back with a second coat to seal and protect the napkin.
When this coat of Mod Podge was dry, I used 220 grit sandpaper to lightly sand off any bumps in the Mod Podge. I then spray-painted it with a clear topcoat.
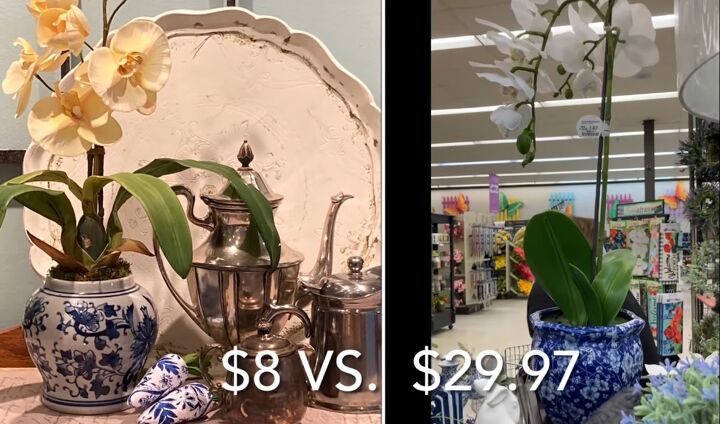
9. Orchid vase
I used a vase and flowers purchased at a thrift store for the final project. I sometimes use packing Styrofoam instead of floral foam to save on cost. I had two identical orchid stems, so I cut a couple of the flowers off of one of the stems to make it look different.
I used a small dowel rod from Dollar Tree to create a stake to tie the orchids. I then hot-glued pieces of sheet moss to the packing foam.
DIY spring decor ideas
I hope my DIY spring decor inspired you to create some home decor. You can have gorgeous spring decor without spending a lot of money.
I'd love it if you would comment below and let me know which of today's projects was your favorite.
Next, check out my Thrift Store Haul & Creative Upcycling Ideas for Home Decor.


Comments
Join the conversation