Using Dollar Tree Products to Organize Under the Sink

For the last few months, I have been housesitting for a loved one, so before I made any changes to their space, I checked with them to make sure it was okay to do so. Just as I thought, they were fine with it - I mean who wouldn't want an organized space?
I purchased x items and my total came to about x dollars which is a great deal! There are many organizing products that cost that just by itself. Another reason I decided to use affordable organizing products for this space is because there tends to be spillage and leakage with cleaning products. So, I didn't want there to be a spill and it damage a product that cost $20 as opposed to a product priced at $1. Honestly, I just wouldn't feel right about have a $20 product damaged - call me cheap but I prefer the term frugal friendly - lol.
This project took two days to - one day to purge, clean, and sort and the second day was used to organize the space. When you view the video, it probably won't seem like it took that long but it did. Typically, a project of this small size wouldn't take two days to complete probably more like 2 hours - 3 hours max.
It's really important to determine your overall goal of any space that you organize. For example, if you live in a space with multiple people, then the use of labels is a really great resource because they provide guidance on where items should be placed. Sometimes without the use of labels, it leaves room for items to just be thrown into a space with out any order which can create clutter.
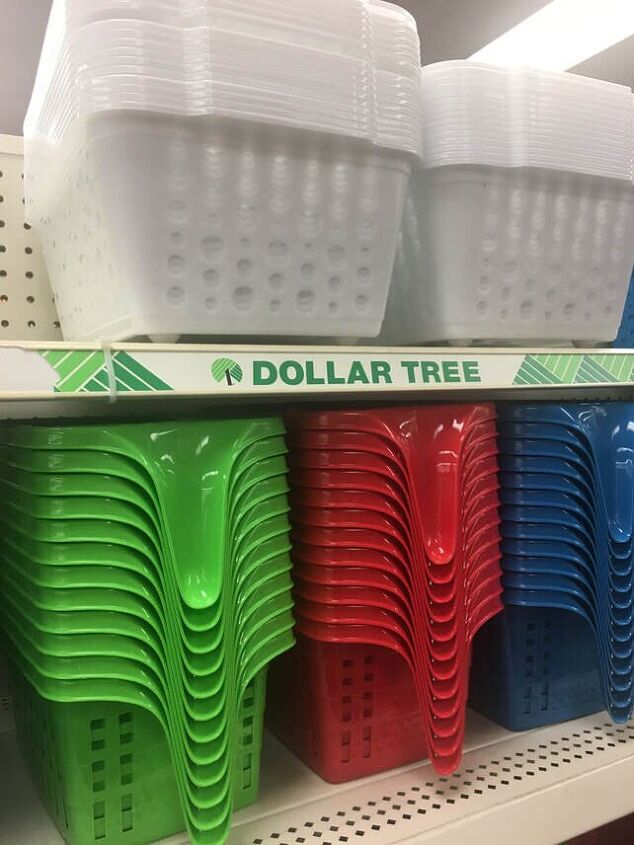
I decided to tackle the space under the sink because of it's small size and I really wanted to experiment with organizing a space with items from the Dollar Tree. And that's because I believe many people think that getting organized can be expensive but it doesn't have to be and I wanted to demonstrate that with this project. So, I went to a Dollar Tree and purchased a few baskets, clear containers, and scented sachets. The scented sachets bring a wonderful smell to the space which is why I stored them underneath the sink.
I purchased items and my total came to about dollars which is a great deal! There are many organizing products that cost that just by itself. Another reason I decided to use affordable organizing products for this space is because there tends to be spillage and leakage with cleaning products. So, I didn't want there to be a spill and it damage a product that cost $20 as opposed to a product priced at $1. Honestly, I just wouldn't feel right about have a $20 product damaged - call me cheap but I prefer the term frugal friendly - lol.
This project took two days to - one day to purge, clean, and sort and the second day was used to organize the space. When you view the video, it probably won't seem like it took that long but it did. Typically, a project of this small size wouldn't take two days to complete probably more like 2 hours - 3 hours max.
It's really important to determine your overall goal of any space that you organize. For example, if you live in a space with multiple people, then the use of labels is a really great resource because they provide guidance on where items should be placed. Sometimes without the use of labels, it leaves room for items to just be thrown into a space with out any order which can create clutter.Overall, I wanted to create a simple yet functional space and I did just that which only cost me about $10 since i purchased around 10 items. I've said this before but I'm lazy, lazy in the sense that I don't want to have to search all over the place for my belongings. So, having items in a designated storage space saves time from having to do that. Using products from the Dollar Tree are just as functional as any other organizing product from any retail store and I'm more content with replacing these products for $1 if they were to become damaged.
Project Recap:
- Before organizing any space be sure to remove every item
- Assess the space to determine what products you will need so that money is not wasted
- Purge and sort through the items to determine what stays and what goes
- Group similar items together like all cleaning supplies, dish soap, and more
- Contain, contain, contain which prevents another clutter pile-up and makes it easy to locate items
- Use labels to prevent second guessing where an item should be stored
- Add a scented sachet or deodorizer to maintain the freshness of the space
- Maximize vertical space by using command hooks to store items on the inside of the doors
Watch the video to see how I transformed the space!






![101 Items to Get Rid of With No Regret [Free Declutter List]](https://cdn-fastly.thesimplifydaily.com/media/2022/08/30/8349390/101-items-to-get-rid-of-with-no-regret-free-declutter-list.jpg?size=350x220)

Comments
Join the conversation
The photo was at an angle I couldn’t view the organized result clearly and there wasn’t a video.
annoyed.. microwave clean up.. WHERE?