6 DIY Dollar Tree Fall Decor Ideas For 2023

Autumn is my favorite time of the year and I’ll want to show you the DIY Dollar Tree fall decor for this year. These ideas use simple Dollar Tree supplies to create unique home decor that doesn't look like something from a dollar store. Let’s get started on these six projects.
DIY Dollar Tree fall decor ideas
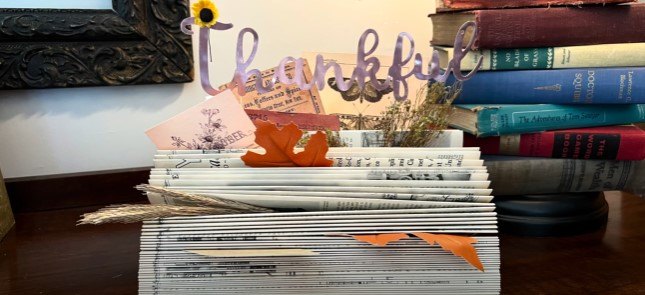
1. Book display
For this first project you'll need to find an old book that you don't plan on reading again.
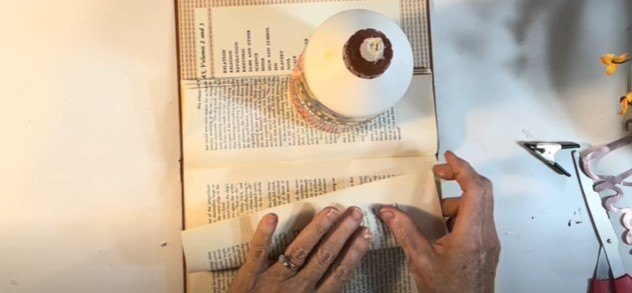
Fold and crease the pages in half.
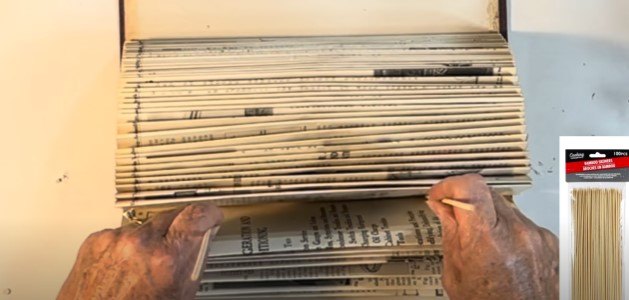
Once all of the pages were folded, I stuck two skewer sticks from Dollar Tree into the center of the book. I cut them down so they were just a couple inches taller than the folded pages.
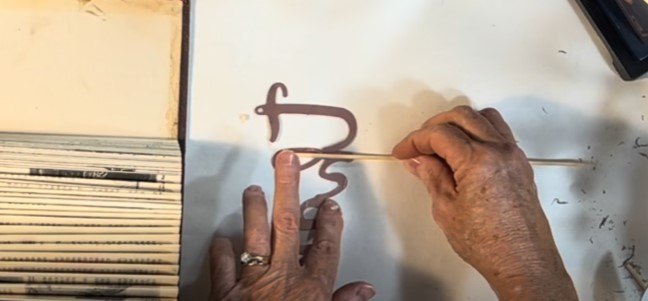
I hot glued the metal word “thankful” to the skewer sticks.
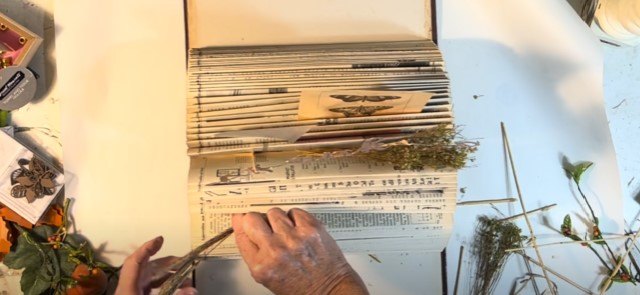
I added items in between the pages, such as dried flowers and leather leaves from Dollar Tree. I also printed out some vintage images.
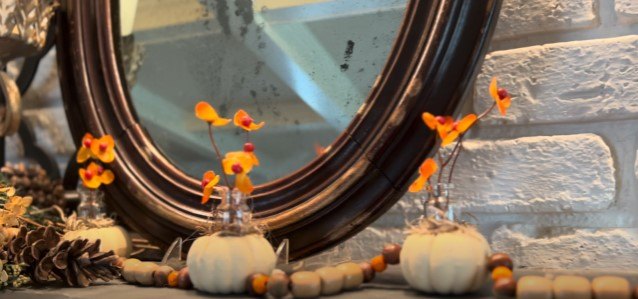
2. Beaded pumpkin garland
I purchased a package of small styrofoam pumpkins and mini glass containers at Dollar Tree.
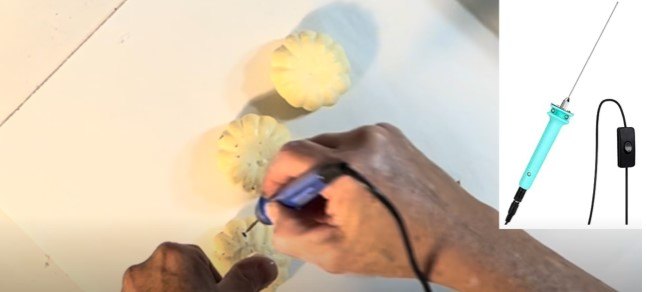
I used a heat gun and X-acto knife to carve a hole in the top of each of the foam pumpkins big enough to hold one of the glass containers.
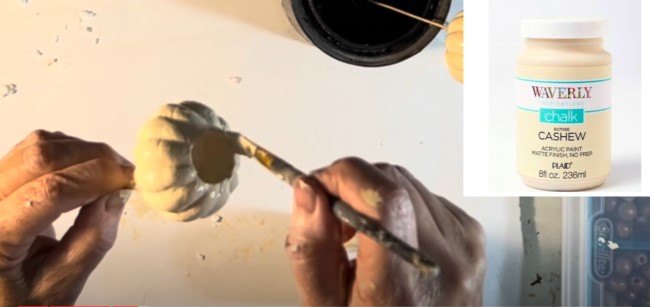
I painted the pumpkins with Waverly's Cashew chalk paint and let them dry.
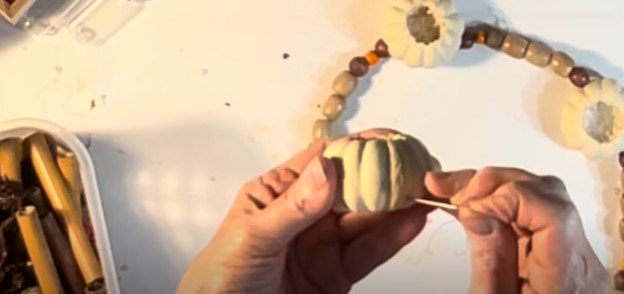
I strung a long piece of thin wire on a large darning needle and thread beads. Then I ran the darning needle through the bottom of the foam pumpkins, using pliers to push and pull the needle through the foam.
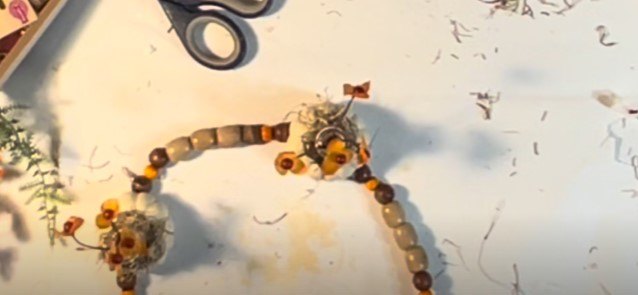
After beading, I put a little hot glue on the bottom of a mini glass container and inserted it into the center of the foam pumpkin. Then, I hot-glued some Spanish moss around the top edge of the pumpkin and added flowers to each vase.
I drilled a small hole in a laser-cut wood leaf from Dollar Tree to add to one end of the bead garland, and I made a tassel out of some twine to add to the other end.
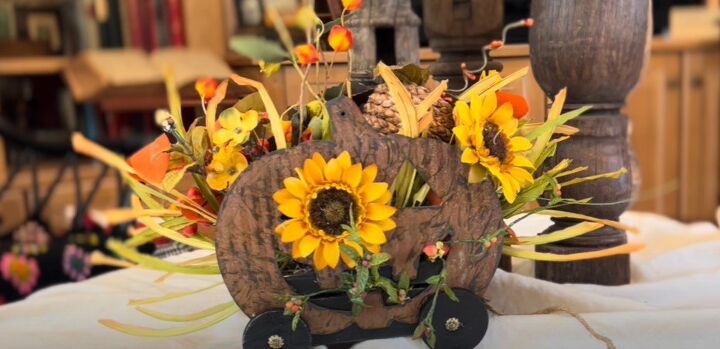
3. Rusty pumpkin wagon
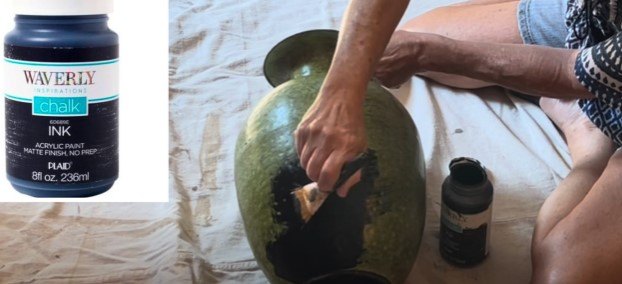
For this next project, I picked up two metal pumpkins.
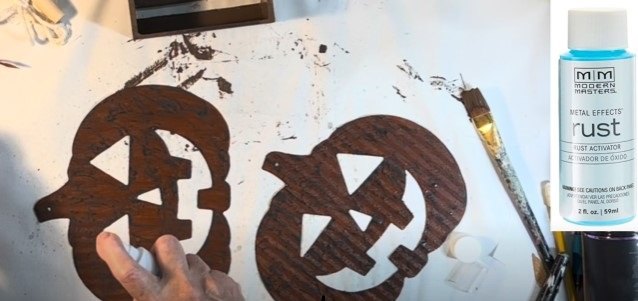
I added two coats of the Metal Effects primer to the pumpkins and then two coats of paint that makes the items rust-colored. When the rust paint was dry, I sprayed on the rust activator, let it dry for five minutes, and then applied a second coat of the rust activator.
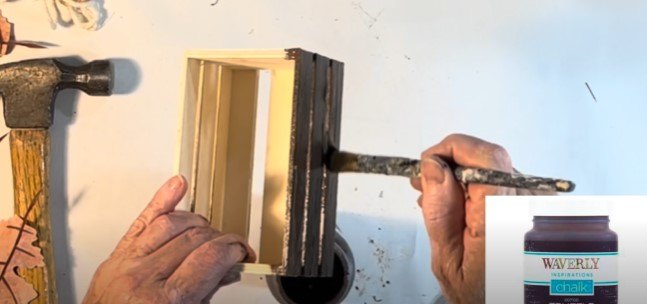
While the pumpkins were rusting, I painted a small Dollar Tree wood crate, first with brown paint and then with black. I slightly distressed the box with sandpaper, and then I glued one of the metal pumpkins to either side of the crate with superglue.
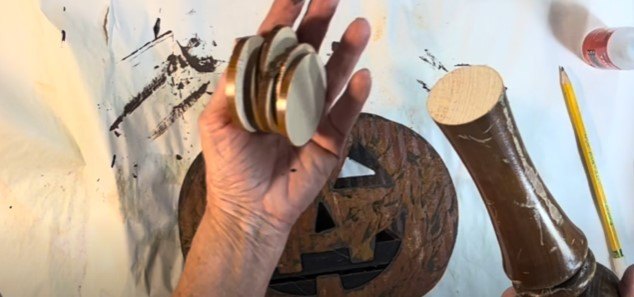
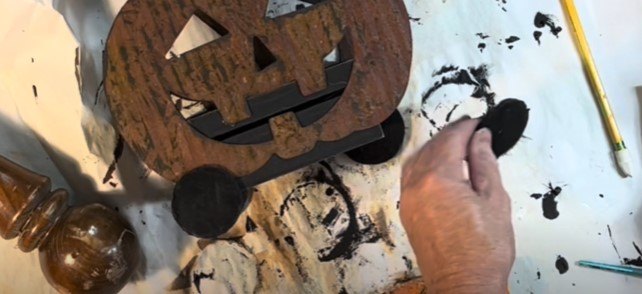
I used my miter saw to slice off four small rounds from an old spindle that I had on hand and painted them with black chalk paint. When they were dry, I lightly distressed them with some sandpaper. Then I attached the wood rounds to the metal pumpkin using super glue and hot glue.
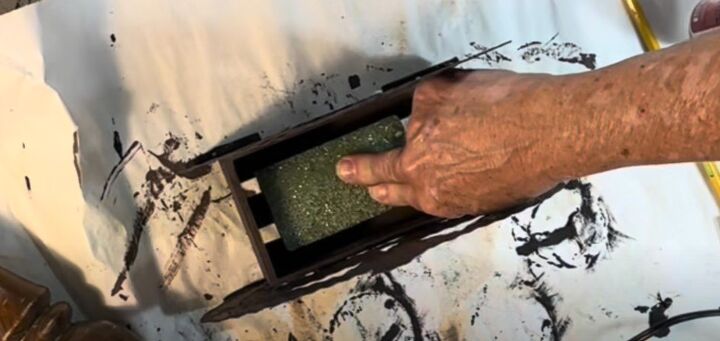
Then I glued a piece of Styrofoam inside of the crate and added faux flowers. I made sure that some of the flowers and vines stuck through the Jack-o'-lantern face for added interest.
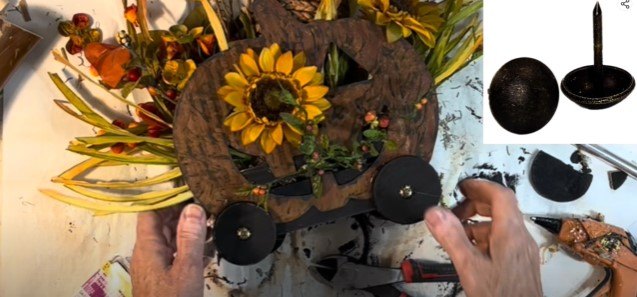
To make my wood rounds look more like wheels, I hammered an upholstery tack into the center of each one. I also drilled a small hole on one end of the crate so I could screw in a small eye hook and attach a piece of jute rope for a little pull.
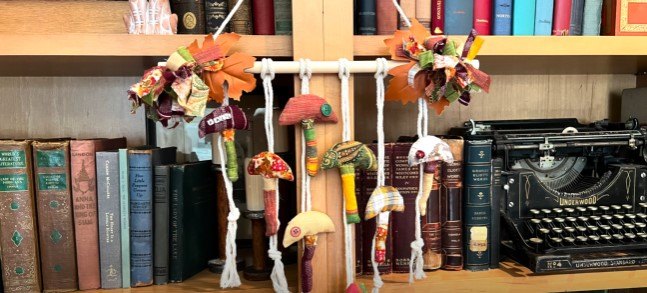
4. Boho mushroom wall decor
The Dollar Tree has cute fabric so I picked up several pieces in coordinating colors and patterns to make a mushroom wall display.
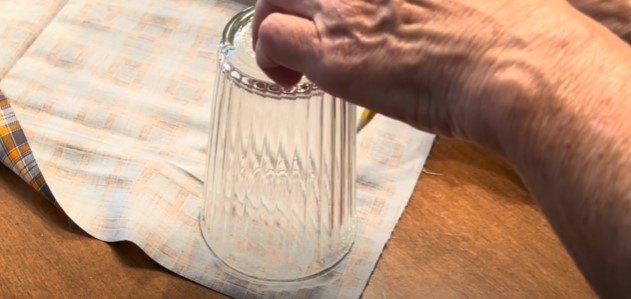
To create little fabric mushrooms, I cut three shapes from each of my different fabrics. First, I cut out a circle. I just used a drinking glass to trace around. Then, I cut out a rectangle about an inch wide and two inches long for the stem. Then, I cut out a very skinny rectangle about two inches long and I frayed the edges.
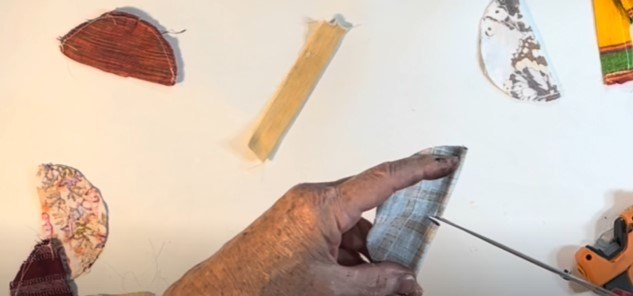
To create the top of the mushroom, fold the circle in half and then cut a small slit in the center. Then, fold the circle in the opposite direction. You can then either machine sew, hand sew, or glue the curved edge together with the right sides of the fabric facing each other.
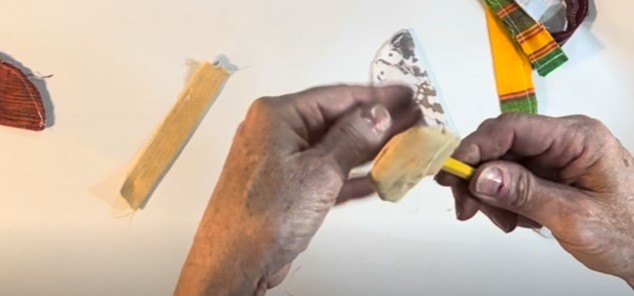
Using the slit at the bottom and with the help of a pencil eraser, turn the fabric right side out. Use the eraser to make sure you get those end pieces completely pushed out. Repeat the process for the rectangular stem piece.
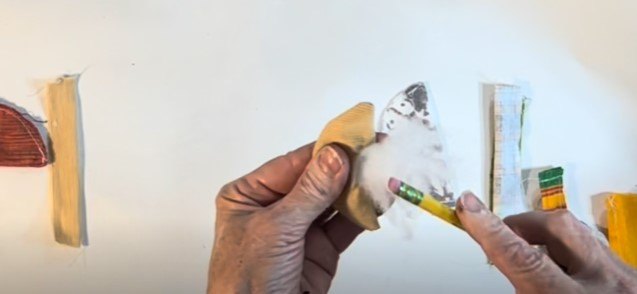
Now, add a little pillow stuffing to the top of the mushroom and the mushroom stem. If you use that pencil eraser, it will go much faster.
To assemble the mushroom, fold in the fabric slightly along one edge of the slit and then apply some hot glue and press in the stem. Flip the mushroom over and repeat the process on the other side. Then, take your small strip of fabric with frayed edges, wrap it around the top of the stem, and hot glue it in place.
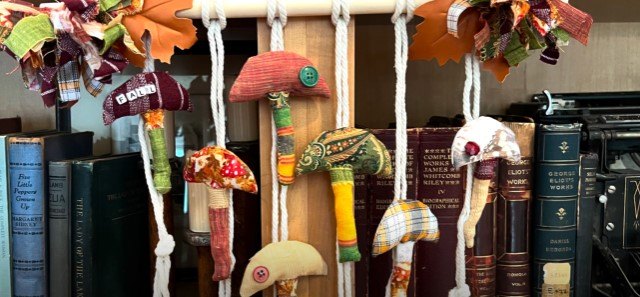
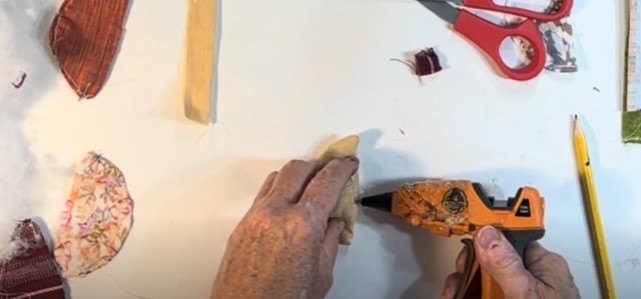
To display the mushrooms, I hung them from a macrame photo hanger I found at Dollar Tree. I pinned the mushrooms to the rope and then added embellishments like bead letters and buttons. I hot-glued some of the Dollar Tree faux leather leaves to the stick.
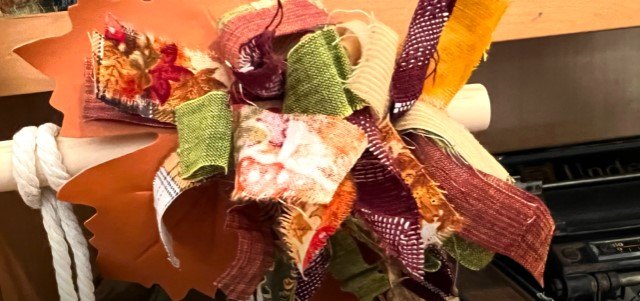
I had a bunch of leftover strips from my mushrooms. I probably cut about 40 strips, which I divided into two groups of 20. I tied and knotted one strip around the center of all the other strips to create a rag bow. I trimmed up the edges to give it a fuller look and then tied the bows to each end of the stick next to the leaves.
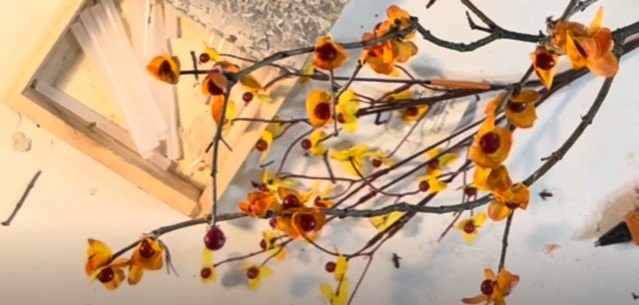
5. Bittersweet branches
I love the look of real bittersweet so I decided to try to make my own. I bought five bunches of Dollar Tree bittersweet and cut off all of the blossoms.
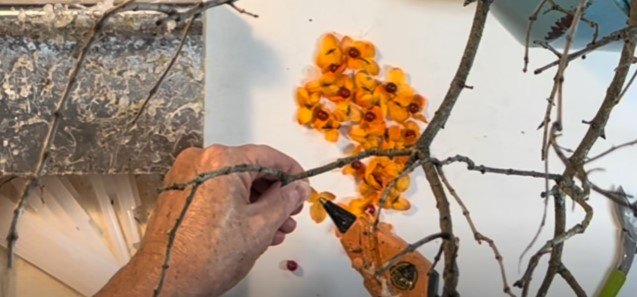
Then I found a large stick in my yard. I just hot-glued the berry inside the blossom and then hot-glued the blossom to my branch.
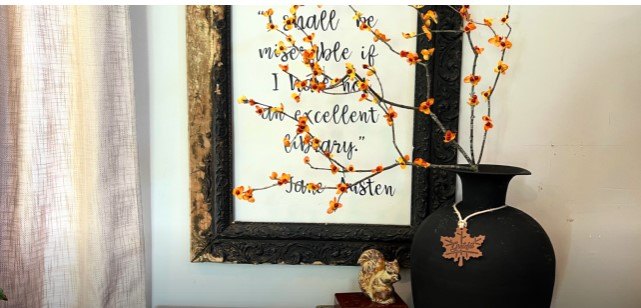
I love these matte black vases so I purchased a large metal vase for under $5 at Goodwill and gave it a couple coats of black chalk paint. When the paint was dry, I applied some clear wax over the entire vase.
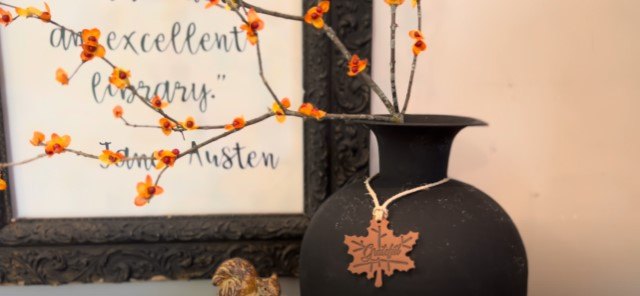
I added branches and a faux leather leaf tag from Dollar Tree. If the branches are too short, add plastic bags on the bottom to fill the vase and hold the branches in place.
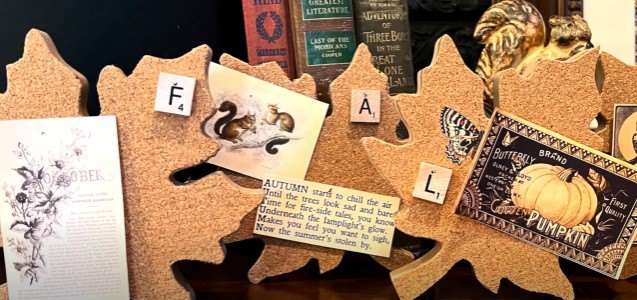
6. Cork leaves
I purchased four large MDF monogrammed leaves and a couple sheets of cork.
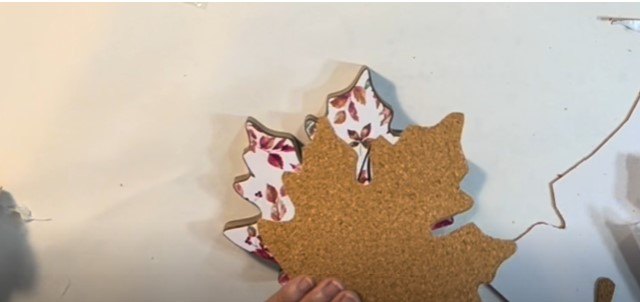
I placed the leaves on the back side of the cork and traced around them. I did two of them face up and two face down so that some of the leaves would be facing different directions.
Once I had the leaf shape cut out of the cork, I lined it up with the wood leaf and adhered it either to the front or to the back of the leaf. You can use a little sandpaper to even out the edges.
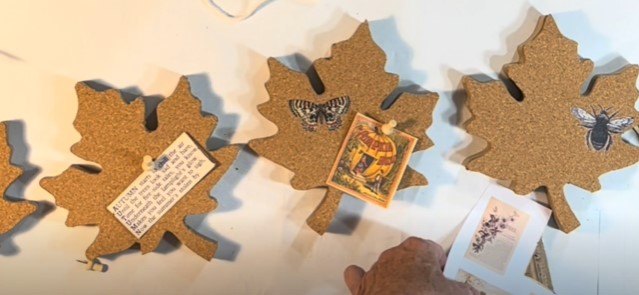
I added rub-on bug and butterfly transfers to the leaves. These come from the IOD Entomology Collection. Use these leaves as miniature bulletin boards and pin on some pictures.
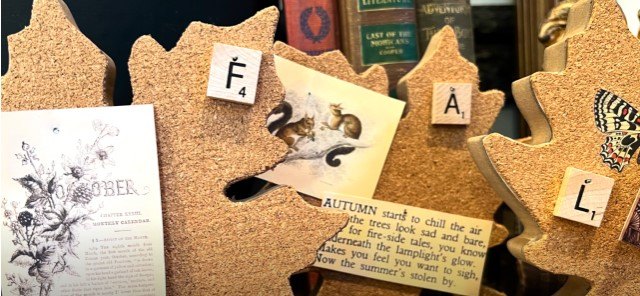
I love typography, so I drilled a small hole in some wood letters so that I could spell out the word ‘fall” by placing one letter on each of the four leaves. That MDF wood is pretty hard, so it was easier to attach the letters using a small nail rather than a straight pen or a thumbtack.
DIY Dollar Tree fall decor ideas
I hope these DIY Dollar Tree fall decor ideas inspire you to create your own projects. Let me know if you make fall decor from Dollar Tree finds. Please share with us in the comments what you make!


Comments
Join the conversation